




Landscape Photography Essentials
Landscape photography captures nature’s beauty in a unique way.
It matters greatly to photographers and viewers alike.
Moreover, stunning landscape images transport viewers to distant places and evoke strong emotions.
They also celebrate the diversity and majesty of the natural world.
Composition, lighting, and depth shape each final image.
The arrangement of elements influences how viewers engage with a photograph.
Likewise, changing light can dramatically alter a scene’s mood.
Depth provides scale and draws viewers into the image.
This guide presents essential tips for improving landscape photography.
You will learn to choose shooting times and apply effective composition techniques.
Additionally, you will explore lighting, equipment, and post-processing methods.
Each tip can help you capture breathtaking landscapes that tell a story.
Many photographers struggle to select the best time or master composition.
However, this guide simplifies those challenges through a few key principles.
Regular practice will strengthen your skills and improve your results.
Therefore, carry your camera and remain open to unexpected moments.
Nature offers constant surprises, and every scene holds photographic potential.
By applying these tips, you will develop a sharper creative eye.
With experience, you can capture breathtaking vistas with greater confidence.
Why Golden Hour Matters
Golden hour occurs shortly after sunrise and before sunset.
During this period, warm, soft light beautifully illuminates the surrounding landscape.
Therefore, photographers should plan sessions around these hours for strong results.
- Warm Colors: Golden-hour light enhances reds, oranges, and yellows throughout the landscape.
- Soft Shadows: Gentle lighting reduces harsh shadows and creates an appealing appearance.
- Dynamic Skies: Sunrise and sunset often feature dramatic clouds that strengthen landscape photographs.
- Creative Compositions: Changing light encourages experimentation with different compositions.
Arrive early to prepare equipment and scout the location.
This preparation helps photographers respond to changing light more effectively.
Meanwhile, the landscape can reveal new compositional opportunities before the strongest colors appear.
Weather Conditions and Their Effects on Light
Weather directly affects the quality of light in landscape photographs.
Different conditions create distinctive effects that can strengthen or diminish an image.
Consequently, photographers should embrace nature’s unpredictability and adjust their approach accordingly.
- Clear Skies: Bright sunlight produces stark contrasts and vibrant colors.
- Overcast Days: Clouds diffuse sunlight and provide soft, even lighting for foliage details.
- Rainy Weather: Rain creates a moody atmosphere, while puddles provide reflective surfaces.
- Fog: Fog adds depth and mystery, making subjects appear softer and more ethereal.
A polarizer can reduce glare during bright, clear conditions.
Additionally, overcast light can reveal details that harsh sunlight may hide.
Rain and fog also offer atmospheric possibilities for careful observers.
Shooting in Various Lighting Conditions
Photographers can improve landscape images by adapting techniques to changing light.
Each condition requires thoughtful adjustments to exposure, composition, and camera stability.
Furthermore, experimentation helps photographers respond confidently to difficult scenes.
Shooting in Overcast Weather
Overcast conditions provide soft light that can reveal textures clearly.
A wider aperture can compensate for reduced natural light.
Post-processing can then improve contrast and color saturation.
- Use a Wider Aperture: Brighter settings compensate for diminished natural light.
- Emphasize Textures: Soft light reveals details in tree bark and rocks.
- Post-Processing: Adjust contrast and color saturation to brighten images.
Shooting in Bright Sunlight
Bright sunlight can create strong contrast and harsh shadows.
Shady areas provide more balanced light for landscape subjects.
Meanwhile, different angles can reduce contrast problems within the composition.
Transform Your Career Today
Unlock a personalized career strategy that drives real results. Get tailored advice and a roadmap designed just for you.
Start Now- Scout Shady Spots: Shaded areas help create balanced light without harsh shadows.
- Use a Polarizer: A polarizer reduces glare and enhances colors in skies and water.
- Shoot at Different Angles: Vary perspectives to minimize contrast issues.
Shooting During Sunset and Sunrise
Sunrise and sunset often require longer exposures to capture rich colors.
A tripod keeps the camera stable during those extended exposures.
Foreground elements can guide viewers through the resulting composition.
- Use a Tripod: Longer exposures capture color depth and movement effectively.
- Include Foreground Interest: Rocks or flowers draw viewers into the image.
- Composition Balance: Apply the rule of thirds to balance compositions effectively.
Shooting in Challenging Conditions
Challenging weather requires careful exposure and stability adjustments.
Snowy scenes may need exposure compensation to prevent underexposure.
At night, longer exposures and wide lenses support creative exploration.
- Snowy Days: Adjust exposure compensation to avoid underexposing images.
- High Winds: Stabilize the camera against wind for sharper photographs.
- Night Photography: Use longer exposures and a wide lens for creative results.
Light painting can add another creative element during night photography.
Stable equipment remains important whenever wind or long exposures affect the camera.
These adjustments help photographers work more deliberately in difficult conditions.
Creating Stunning Landscapes Through Light Mastery
Mastering natural light can transform landscape photography.
Understanding light helps photographers capture the essence of nature.
Moreover, light shapes landscapes and influences viewers’ emotions.
Pay close attention to how light interacts with the surrounding scene.
Constant practice helps photographers improve their adaptability.
Experiment with different times of day and changing weather conditions.
Also, record which lighting choices worked and which choices did not.
Documentation supports growth and helps refine photographic skills.
Most importantly, nurture your passion for landscape photography.
Let your appreciation for nature guide every image.
With time and effort, photographers can improve the quality of their work.
Light remains an essential ingredient in every successful landscape photograph.
Choosing Locations for Landscape Photography
Strong location choices can transform ordinary landscape photographs into compelling visual works.
Careful planning helps photographers find views that support effective compositions.
Additionally, thoughtful preparation improves opportunities for distinctive and memorable images.
Researching and Scouting Potential Locations
Research potential locations before traveling to the shooting area.
Online research can reveal useful viewpoints, local conditions, and photographic inspiration.
Afterward, scout promising locations in person to evaluate angles and compositions.
- Use online resources: Search Instagram and Flickr for location-related inspiration.
- Read photography blogs: Photographer experiences can reveal useful viewpoints and practical advice.
- Check weather conditions: Weather influences lighting, atmosphere, and the overall mood.
- Join local photography groups: Forums can reveal hidden gems and popular locations.
Visit selected areas at different times to observe changing light across the landscape.
Exploring Diverse Landscape Environments
Different environments provide distinct textures, colors, patterns, and compositional possibilities.
Exploring varied terrain also broadens a photographer’s skills and portfolio.
Furthermore, diverse subjects help maintain audience interest across a body of work.
- Mountains: Peaks, ridges, and valleys can create dramatic depth.
- Oceans: Beaches and coastlines introduce movement through changing water patterns.
- Forests: Treetops and shadows can form intriguing patterns and mysterious scenes.
- Deserts: Sand dunes and unusual formations create strong visual contrasts.
Using Maps and Online Communities
Maps and online platforms support efficient planning before a landscape photography session.
Topographic information helps photographers understand elevation changes and surrounding landforms.
Virtual scouting can also identify possible viewpoints before an in-person visit.
- Topographic maps: These maps show elevation changes and important landforms.
- Google Earth: This tool supports virtual scouting and location marking.
- Social media forums: Photography groups share locations, observations, and practical tips.
- Local tourism websites: These sites often identify recommended photography areas.
Before visiting, evaluate access requirements for every potential location.
Obtain necessary permission before entering private land or restricted areas.
Finally, respect nature and other people’s rights while photographing outdoors.
Building a Stronger Landscape Photography Portfolio
Successful location selection combines research, scouting, environmental variety, and responsible preparation.
Each landscape offers different opportunities for texture, scale, movement, and visual structure.
Therefore, investing time before each shoot can produce more impactful landscape photographs.
Transform Your Career Today
Unlock a personalized career strategy that drives real results. Get tailored advice and a roadmap designed just for you.
Start NowFind Out More: Developing Long-Term TV Show Strategies
Composition plays a crucial role when photographers capture landscapes.
Adjusting element placement can transform a simple photograph into a compelling visual story.
Rule of Thirds
The rule of thirds divides the frame into nine equal parts.
Two horizontal lines and two vertical lines create this structure.
Placing important elements along these lines creates a balanced composition.
- Enhancing Interest: Place the horizon in the top or bottom third to increase visual interest.
- Power Points: Position subjects at intersections to create clear focal points.
- Dynamic Balance: Balance elements across the frame to create energy and rhythm.
This technique can change the overall impact of a landscape photograph.
As your skills develop, challenge yourself by breaking the rule occasionally.
Creative exploration often produces appealing results beyond typical boundaries.
Leading Lines
Leading lines create pathways for the viewer’s eye to follow.
They can direct attention toward a subject or deeper into the landscape.
Including these lines adds depth and encourages viewers to examine the scene.
- Natural Paths: Use roads, rivers, or trails to guide attention toward the horizon or a subject.
- Man-made Elements: Use fences, buildings, or bridges as intentional visual pathways.
- Diagonal Lines: Use diagonals to create movement, excitement, and dynamism.
Identify possible leading lines before you take the photograph.
Experiment with angles and perspectives to understand their influence on composition.
A slight position change can reveal new lines that strengthen the image.
Foreground Interest
Foreground interest adds depth and dimension to landscape photographs.
Foreground subjects can create a three-dimensional effect within the image.
This approach draws viewers into the scene and helps them feel involved.
- Incorporate Details: Use rocks, flowers, or water to anchor the scene and provide scale.
- Layering Elements: Include foreground, middle ground, and background elements for greater depth.
- Contrast: Use contrasting colors or textures to separate foreground subjects from the landscape.
Consider how foreground elements relate to the background when composing your photograph.
Not every landscape needs a strong foreground, but one can increase visual impact.
Shift your position or adjust your angle to find effective foreground interest.
Combining Composition Techniques
Combining the rule of thirds, leading lines, and foreground interest can strengthen landscape images.
These techniques complement one another and create more engaging visual structures.
Thoughtful combinations can help each landscape feature receive appropriate attention.
- Place Elements Intelligently: Apply the rule of thirds while selecting lines and foreground subjects.
- Vary Depths: Layer foreground, middle ground, and background elements to create depth.
- Showcase Highlights: Use composition techniques to emphasize the landscape’s strongest features.
Before each photoshoot, consider how the techniques can work together.
Careful observation helps you understand how landscape elements interact within the frame.
Continued experimentation can help your personal style emerge.
Practical Landscape Photography Tips
Practical habits can support stronger composition during landscape photography sessions.
Preparation also helps you respond effectively to changing conditions.
Reviewing your work can reveal useful patterns and opportunities for improvement.
- Use a Tripod: A tripod stabilizes the camera, especially during low-light photography.
- Experiment with Angles: Crouch, climb, or step back to find a stronger perspective.
- Check the Weather: Plan around conditions that enhance lighting and landscape textures.
- Practice Patience: Wait for a suitable moment or changing light when necessary.
- Review and Reflect: Analyze your images to identify successful compositions and areas for improvement.
Dedication can help your landscape photography evoke emotion and communicate compelling stories.
Understanding composition allows you to create more impressive visual work.
Explore diverse environments patiently as you develop your skills and style.
See Related Content: Handling Media Relations in Crisis Situations
Lens Selection
The lens you choose strongly influences the perspective and detail in landscape photographs.
Different lenses offer distinct advantages for capturing broad views, distant subjects, and isolated details.
Choose your lens according to the composition and landscape type you want to photograph.
Wide-Angle Lenses
Wide-angle lenses capture expansive scenery and help photographers include more foreground interest.
They also provide substantial depth of field for sharp foreground and background details.
However, photographers should watch for distortion near the frame edges.
Transform Your Career Today
Unlock a personalized career strategy that drives real results. Get tailored advice and a roadmap designed just for you.
Start Now- Field of View: Wide-angle lenses usually range from 16mm to 35mm and capture broader scenery.
- Depth of Field: These lenses support sharpness from the foreground through the background.
- Distortion: Barrel distortion can appear at the edges, so adjust your composition carefully.
- Popular Options: Canon EF 16-35mm, Nikon AF-S 14-24mm, and Sony FE 16-35mm offer useful choices.
Telephoto Lenses
Telephoto lenses compress scenes and make distant elements appear closer together.
They work well for isolated trees, mountains, and other landscape details.
Additionally, their longer working distance can help photographers avoid disturbing wildlife.
- Compression: Telephoto lenses commonly range from 70mm to 200mm and compress distant elements.
- Details: Use these lenses to isolate trees, mountains, and other landscape features.
- Candid Shots: Their distance supports wildlife photography without unnecessary disturbance.
- Recommended Lenses: Canon EF 70-200mm, Nikon 70-200mm, and Sony 70-200mm are suitable options.
A versatile zoom lens can combine wide-angle and telephoto capabilities.
This flexibility helps photographers adapt when the scene or composition changes.
Consider the desired perspective before selecting a lens for each landscape.
Essential Camera Settings
Camera settings strongly influence sharpness, noise, exposure, and motion effects.
Adjust the aperture, ISO, and shutter speed according to the scene and available light.
These controls work together to shape the final appearance of each landscape photograph.
Aperture
A smaller aperture, represented by a higher f-stop number, increases depth of field.
Landscape photographers often use settings between f/8 and f/16.
However, extremely narrow apertures can introduce diffraction and reduce fine detail.
- Depth of Field Control: Use a smaller aperture for greater depth of field.
- Sharpness: Smaller apertures can improve sharpness, but avoid extreme settings beyond f/22.
- Foreground Interest: Greater depth of field keeps foreground elements sharp.
ISO
A low ISO setting helps reduce noise and preserve image clarity.
Increase the ISO only when darker conditions require greater sensitivity.
Whenever possible, choose the lowest ISO that supports a suitable shutter speed.
- Low ISO: Keep the ISO between 100 and 200 to reduce noise.
- Lighting Conditions: Increase the ISO when low light makes exposure difficult.
- Balance Sensitivity: Select the lowest practical ISO for stable shooting.
Shutter Speed
Fast shutter speeds can freeze movement in landscapes.
Slow shutter speeds can create dreamy effects in moving water and clouds.
Use a tripod during long exposures to prevent unwanted camera movement.
- Motion Freeze: Shutter speeds of 1/250 second or faster can freeze movement.
- Long Exposure: Several-second exposures can soften water and clouds.
- Tripod Usage: A tripod helps maintain sharpness during long exposures.
Tripod Stability and Sharpness
A tripod stabilizes the camera and helps prevent shake.
It also gives photographers more time to refine composition and framing.
For long exposures, a tripod becomes especially valuable.
- Stability: A tripod supports sharper images by reducing camera shake.
- Composition: Use the tripod to adjust framing more deliberately.
- Long Exposure: A tripod supports stable exposures lasting several seconds.
- Weight and Stability: Heavier tripods provide greater stability during windy conditions.
- Leveling: Built-in spirit levels help keep horizons straight.
Additional Tripod Practices
Small handling choices can further improve tripod stability.
Place the tripod securely and adjust each leg for uneven terrain.
Choose a portable model when hiking requires lighter equipment.
- Remote Trigger: Use a remote release or timer to prevent shutter movement.
- Footprint: Place the tripod on stable ground rather than soft surfaces.
- Adjustable Legs: Set tripod legs independently on uneven terrain.
- Collapsible Options: Select a light, portable tripod for easier hiking.
Coordinating Landscape Photography Techniques
Lens selection determines how the landscape fills the frame.
Camera settings control sharpness, noise, exposure, and motion effects.
A stable tripod helps photographers apply these choices with greater precision.
Delve into the Subject: How to Stay Updated in Media Planning Industry
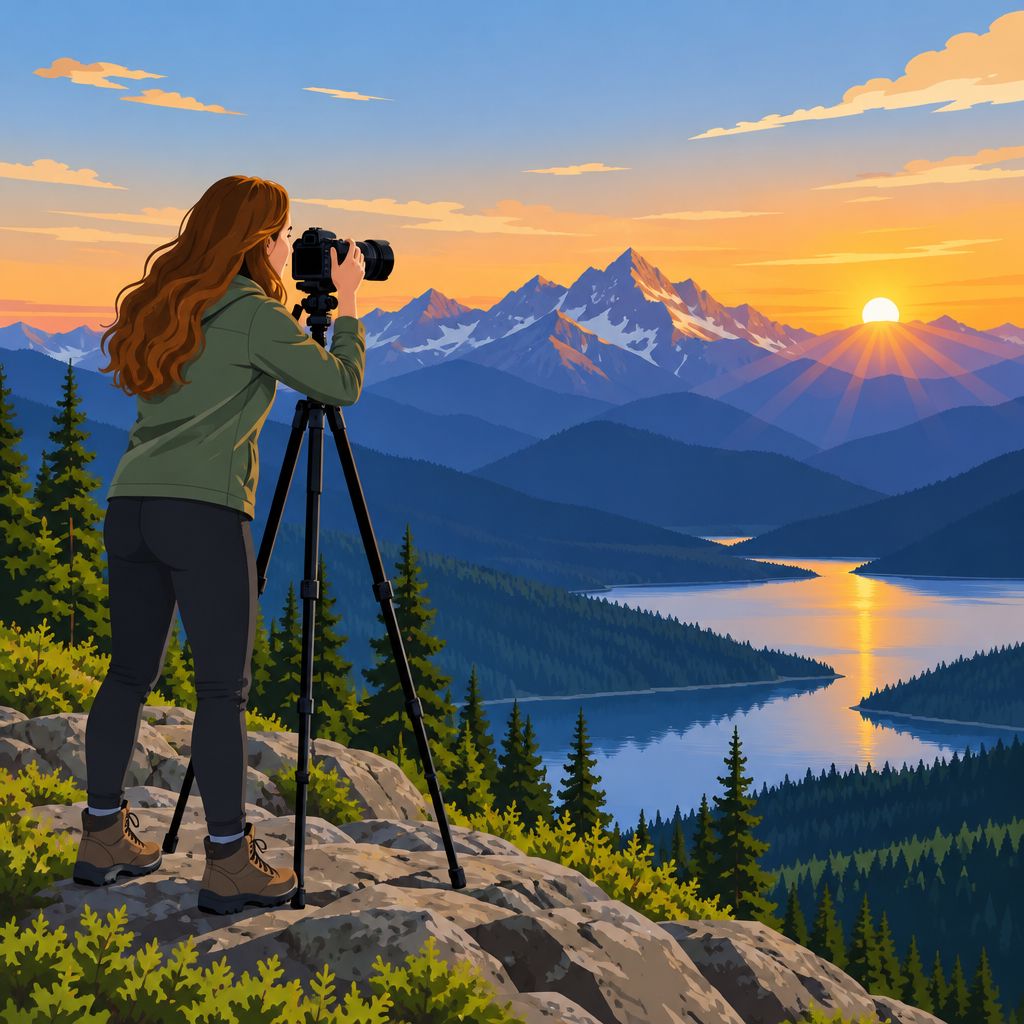
Natural Elements That Strengthen Landscape Compositions
Capturing stunning landscapes requires careful attention to detail.
Photographers can create engaging compositions by incorporating various natural elements.
Thoughtful placement makes landscape images feel more immersive and inviting.
- Foreground Interest: Place interesting rocks or flowers in the foreground to add depth.
- Leading Lines: Use paths, rivers, or tree lines to guide the viewer’s eye inward.
- Natural Frames: Position foliage or branches around the edges to create a natural frame.
- Contrast Elements: Pair contrasting subjects, such as rugged rocks and smooth lakes, for visual interest.
- Layering: Combine foreground, midground, and background elements to create a harmonious composition.
Natural elements can guide attention through the frame.
They also help viewers connect with the scene.
As a result, carefully arranged details strengthen the photograph’s visual story.
Weather and Seasons That Create Dramatic Scenes
Weather can transform an ordinary landscape into something extraordinary.
Therefore, photographers should observe conditions before planning their shoots.
Unpredictable weather can produce especially dramatic results.
- Golden Hour: Shoot shortly after sunrise or before sunset for soft, warm light.
- Stormy Skies: Photograph landscapes before or after storms to capture dark, dramatic clouds.
- Rainy Conditions: Use puddles and wet surfaces to create reflective details.
- Fog and Mist: Use fog to soften distractions and emphasize shapes.
- Different Seasons: Photograph spring blooms, summer greenery, autumn colors, and winter snowscapes.
Each season offers distinct opportunities for landscape photography.
Meanwhile, changing weather can reveal different moods within the same scene.
Understanding weather patterns helps photographers prepare more effectively.
Transform Your Career Today
Unlock a personalized career strategy that drives real results. Get tailored advice and a roadmap designed just for you.
Start NowTechniques for Highlighting Unique Landscape Features
Every landscape contains features that can make photographs more captivating.
Photographers can emphasize these details through perspective, light, color, and timing.
These choices invite viewers to explore the image more closely.
- Use a Wide-Angle Lens: Capture broad landscapes while emphasizing the foreground and background.
- Macro Photography: Isolate textures or small plants to create an intriguing perspective.
- Shadow Play: Use light and shadow to emphasize textures and add depth.
- Contrasting Colors: Combine colors such as green grass and blue sky to attract attention.
- Timing: Photograph at different times to reveal features under changing light.
Careful observation helps photographers identify distinctive landscape details.
Additionally, varied techniques can reveal features that remain hidden under other conditions.
Practice and patience will strengthen the impact of these photographic choices.
See Related Content: Essential Skills for Multimedia Journalists
Choosing Editing Software
Post-processing forms an essential part of the landscape photography process.
Editing can enhance captured images and help photographers achieve stronger visual results.
Lightroom and Photoshop support different editing needs and creative approaches.
- Adobe Lightroom: Lightroom offers an approachable interface for beginners.
- Lightroom organizes and processes large batches of photographs efficiently.
- Its non-destructive editing preserves the original image during adjustments.
- Adobe Photoshop: Photoshop supports detailed retouching and image manipulation.
- Photoshop provides layers, intricate adjustments, and complex effects.
- Advanced users can apply precise changes throughout the image.
Applying Core Image Adjustments
Begin the editing process with basic adjustments that improve brightness, depth, and color.
Use the histogram to monitor tonal changes and preserve important image details.
Make gradual changes to maintain balanced highlights, shadows, and colors.
- Exposure: Adjust exposure to correct the overall brightness of the image.
- In Lightroom, use the Exposure slider to increase or decrease brightness.
- In Photoshop, choose Image, Adjustments, and Exposure.
- Avoid excessive exposure changes that remove highlight or shadow details.
- Contrast: Contrast strengthens the difference between light and dark areas.
- In Lightroom, adjust the Contrast slider to add depth.
- In Photoshop, use the Brightness/Contrast adjustment.
- Check the histogram while adjusting contrast to protect image details.
- Color: Saturation increases the vividness of colors throughout the photograph.
- In Lightroom, adjust the Saturation or Vibrance sliders.
- In Photoshop, use a Hue/Saturation adjustment layer.
- Apply color adjustments carefully because excessive saturation can appear unnatural.
Combining Exposures and Panoramic Frames
Advanced editing techniques can expand the tonal range and perspective of landscape photographs.
HDR processing combines multiple exposures into one image with a wider range of light.
Panorama stitching joins overlapping photographs to present expansive landscape views.
- HDR: Capture underexposed, correctly exposed, and overexposed photographs.
- Select the exposure series in Lightroom before choosing Merge to HDR.
- Adjust the resulting HDR image to achieve a balanced distribution of light.
- Panorama: Capture several overlapping frames with sufficient scene coverage.
- Select the photographs in Lightroom and choose Photo Merge, then Panorama.
- Refine the merged image by adjusting its zoom level and composition.
Shaping Mood and Completing the Image
Creative adjustments help establish a mood and strengthen the image’s visual impact.
Color temperature can introduce warmer or cooler tones into the photograph.
Afterward, careful finishing work prepares the image for sharing or printing.
- Adjust the color temperature to create warmer or cooler tones.
- Add a vignette to guide attention toward the center of the image.
- Apply split toning to introduce color variations in highlights and shadows.
- Sharpen the image to enhance details without creating excessive artifacts.
- Remove distracting elements with Photoshop’s healing brush or clone tool.
- Resize the image for printing or online sharing while maintaining quality.
Practice helps photographers develop a personal editing style over time.
Lightroom and Photoshop can support vibrant, carefully edited landscape photographs.
Use the creative process to help each landscape image communicate its visual character.
Capturing stunning landscapes requires more than a good eye.
An adventurous spirit encourages photographers to explore fresh visual possibilities.
Different viewpoints and angles can give familiar landscapes a distinctive presence.
Why Viewpoint Changes Matter
Changing your viewpoint can significantly influence the appearance and meaning of a photograph.
Moving above or below eye level introduces new relationships between foreground and background elements.
As a result, photographers can create images that feel deeper, more dramatic, and more personal.
- Enhanced Depth: Low angles enlarge foreground elements, while high angles reveal more of the landscape.
- Unique Composition: Raising or lowering the camera creates compositions that differ from ordinary eye-level views.
- Dramatic Lighting: Changing position alters how backlighting and side lighting shape shadows and highlights.
- Storytelling Elements: Low viewpoints can inspire awe, while high viewpoints can emphasize a landscape’s scale.
How Angles Shape Perception
The angle of capture can transform an ordinary landscape into a more engaging visual experience.
Each angle directs attention toward different details, relationships, and emotional qualities within the scene.
Therefore, photographers should compare several angles before selecting the strongest interpretation.
- Low Angle: Shooting upward emphasizes foreground details and makes tall trees appear larger.
- Eye Level: This familiar perspective suits scenes that include people interacting with the environment.
- High Angle: Shooting downward reveals expansive terrain and helps viewers understand the landscape’s structure.
- Oblique Angle: Tilting the composition introduces visual tension and dynamic energy.
- Close-Up Shot: A close view of flora creates intimacy and highlights details within the landscape.
Creative Benefits of Breaking Composition Rules
Compositional rules provide useful foundations, yet photographers can create stronger work by testing those conventions.
Unconventional choices can reveal personal viewpoints and encourage viewers to reconsider familiar scenes.
Furthermore, creative risks can produce images with greater originality, emotion, and visual tension.
- Increased Originality: Unusual viewpoints can produce memorable images that conventional techniques might not achieve.
- Personal Voice: Rule-breaking can express your individual storytelling style and artistic vision.
- Engagement with the Scene: Emotional connections with a place can inspire inventive photographic approaches.
- Inviting Emotion: A tilted view of a calm lake can introduce tension into the image.
- Challenging Norms: Experimentation can expand ideas about what landscape photography can communicate.
Practical Ways to Explore New Perspectives
Careful experimentation helps photographers discover viewpoints that remain hidden from familiar standing positions.
Walk around the subject first, and observe how distance, height, and direction change the composition.
Then, compare several frames to identify the perspective that communicates your strongest response.
- Explore Your Environment: Walk around the subject to find unexpected vantage points.
- Get Low: Ground-level shooting reveals textures and perspectives that standing positions often hide.
- Find High Points: Hills and ledges can reveal broad landscapes and important visual relationships.
- Use a Tripod: A tripod supports stability during low-angle and high-angle exposures.
- Play with Tilt: Tilting the camera can add visual intrigue and dynamic movement.
- Include Foreground Elements: Rocks and plants can frame the subject while adding depth and context.
Building a Distinctive Perspective
Perspective experimentation adds depth, creativity, and personal expression to landscape photography.
Each camera position shapes how viewers experience the environment through your image.
By exploring unconventional angles, you can create photographs that reflect the world’s visual diversity.
Transform Your Career Today
Unlock a personalized career strategy that drives real results. Get tailored advice and a roadmap designed just for you.
Start NowCommunity Connections in Landscape Photography
Photography grows through community engagement and shared experiences.
Landscape photographers can strengthen their skills by connecting with other enthusiasts.
Active participation also provides inspiration, encouragement, and opportunities for creative growth.
Benefits of Photography Groups and Forums
Photography communities connect members who share knowledge, experiences, and creative goals.
They also create opportunities for friendships, collaborations, and mentorship.
Furthermore, experienced photographers can help members develop their technical and artistic understanding.
- Networking opportunities: Meeting photographers can lead to friendships, collaborations, and professional opportunities.
- Shared knowledge: Workshops and discussions can deepen your understanding of landscape photography.
- Motivation: Community participation helps maintain your passion, accountability, and commitment.
- Diverse perspectives: Different styles and techniques can expand your artistic vision.
- Useful resources: Forums may provide tutorials, equipment reviews, and practical photography advice.
Online communities such as Reddit’s r/photography and DPReview welcome photography discussions.
Members can share images, ask questions, and receive advice from other photographers.
Regular participation helps photographers learn while building meaningful community relationships.
Sharing Landscape Photography Online
Digital platforms make it easier for photographers to present their work worldwide.
Instagram and Flickr allow photographers to display images and connect with interested viewers.
Consistent sharing can support portfolio development, audience engagement, and personal branding.
- Online portfolio: Shared images can show potential clients and collaborators your distinctive style.
- Greater exposure: Photography platforms can introduce your work to a wider audience.
- Audience engagement: Conversations with followers reveal which images resonate with viewers.
- Creative challenges: Contests and challenges encourage experimentation and skill development.
- Personal branding: Consistent publishing helps establish your identity as a photographer.
Use relevant hashtags to help interested viewers discover your work.
Responding to comments can strengthen relationships and encourage further discussion.
However, photographers should let audience responses inform their choices without losing personal direction.
Using Feedback to Improve Photography
Constructive feedback helps photographers recognize strengths and address weaknesses.
Asking other photographers for critique can reveal opportunities for meaningful improvement.
A thoughtful approach makes feedback more useful and supports continued learning.
- Stay open-minded: Accept criticism as a tool for identifying areas that need improvement.
- Ask specific questions: Request comments about composition, lighting, or technical choices.
- Consider different opinions: Varied perspectives can broaden your understanding of photography.
- Join critique sessions: Group discussions can accelerate learning within a supportive environment.
- Reciprocate feedback: Reviewing others’ work builds relationships and encourages mutual learning.
Regular critique can maintain motivation while encouraging steady progress.
Photographers should evaluate suggestions carefully and apply changes that support their creative goals.
Over time, repeated feedback can strengthen both confidence and technical ability.
Building a Supportive Learning Culture
Photography communities become stronger when members share knowledge generously.
Active participation encourages collaboration, respectful discussion, and continuous learning.
Each photographer can contribute by supporting others and welcoming new perspectives.
- Share expertise: Experienced photographers can offer tutorials, workshops, and practical guidance.
- Encourage newcomers: Helpful guidance can support beginners as they develop their skills.
- Collaborate on projects: Joint efforts can produce fresh ideas and unique photography opportunities.
- Organize meetups: Local gatherings can strengthen relationships and inspire creativity.
- Practice respect: Positive discussions create a welcoming and productive community environment.
Sharing your journey can motivate other photographers to pursue their interests.
Collaboration also helps members exchange ideas and discover new creative approaches.
Through consistent engagement, communities can elevate the skills of everyone involved.
Strengthening the Landscape Photography Journey
Community involvement adds depth and encouragement to the landscape photography experience.
Groups, forums, social platforms, and critique sessions provide valuable opportunities for growth.
By sharing work and learning from others, photographers can develop their skills and inspire their peers.
Practical Steps for Stronger Landscape Images
Check the lighting before each landscape photography session.
A sturdy tripod keeps your camera stable and produces sharper images.
It also reduces camera shake during low-light photography.
Foreground elements add depth and context to landscape images.
Leading lines can guide viewers through the photograph.
Weather conditions can enhance landscape photographs with dramatic skies and atmospheric effects.
For example, misty mornings can give landscapes a mystical quality.
Experimenting with different perspectives can reveal unexpected beauty in ordinary scenes.
Editing software can improve colors, contrast, and image sharpness.
However, subtle adjustments preserve the scene’s natural character.
Transform Your Career Today
Unlock a personalized career strategy that drives real results. Get tailored advice and a roadmap designed just for you.
Start NowAvoid excessive processing so the final image retains its original essence.
Apply these techniques during your next photography outing.
Regular practice will help you strengthen your landscape photography skills over time.


