Introduction:
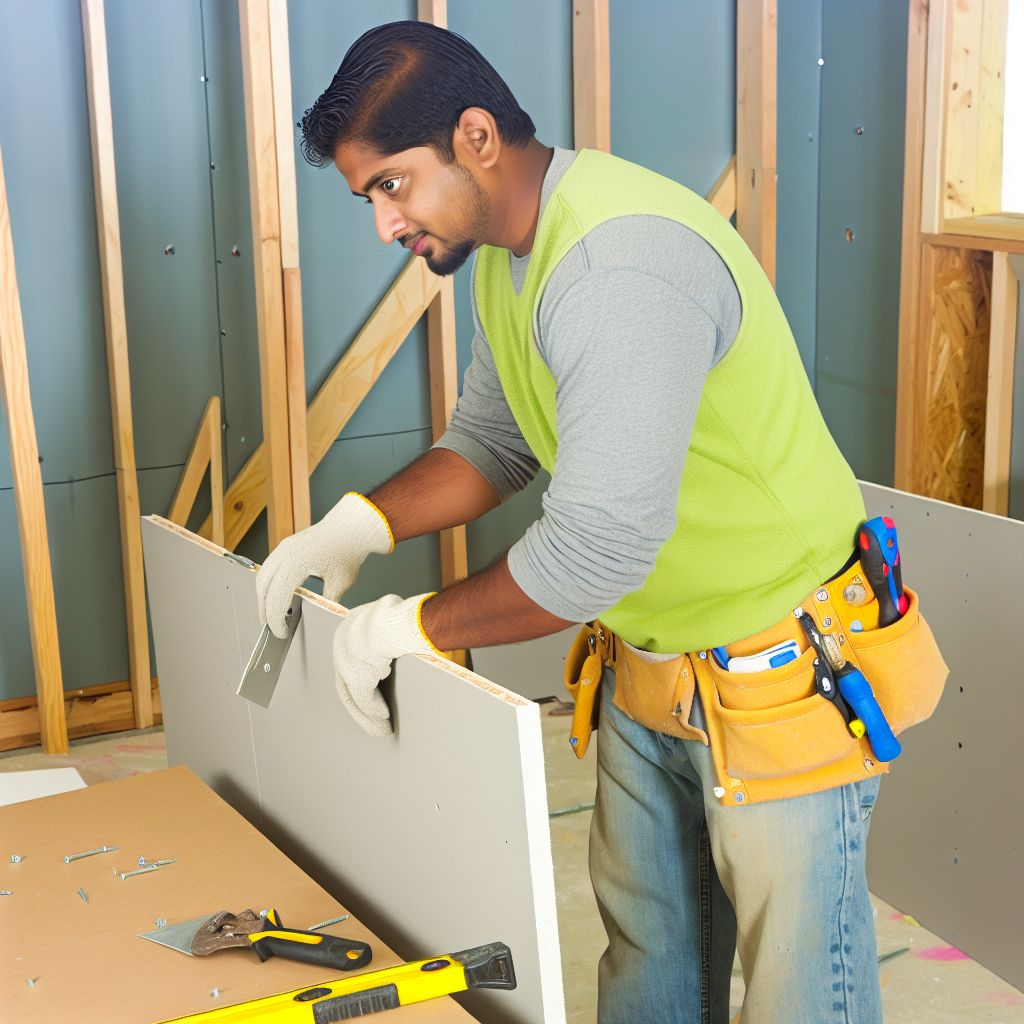
Proper drywall installation is crucial for a smooth and durable finish in any construction project.
Without it, walls can be weak and easily damaged.
This step-by-step guide will walk you through the process of installing drywall correctly, ensuring a professional result.
Measure and Cut:
Start by measuring the area where the drywall will be installed and cutting the sheets to fit using a utility knife.
Make sure to double-check your measurements before cutting to avoid any mistakes.
Positioning:
Once you have your drywall sheets cut to size, position them on the wall starting from the top and working your way down.
Leave a small gap between the sheets to allow for expansion and contraction.
Install:
Secure the drywall sheets to the wall studs using drywall screws, making sure to drive them in just below the surface.
Continue this process until all sheets are properly attached and secured.
Taping and Mudding:
Apply drywall tape to the seams between the sheets, then cover with joint compound using a drywall knife.
Smooth out the compound and let it dry before sanding it down for a seamless finish.
Finish:
After the joint compound has dried and been sanded, you can now paint or wallpaper over the drywall for a polished look.
Make sure to follow proper painting or wallpapering techniques for best results.
When it comes to installing drywall correctly, there are several important factors to consider.
Understanding the materials needed is crucial in order to achieve a successful outcome.
Let’s break down the essentials step by step:
List of tools required for the job:
- drywall screws or nails
- drywall saw or utility knife
- tape measure
- joint compound
- t-square
- drywall lift or a helping hand
- sanding block or sandpaper
Explanation of different types of drywall available:
There are several types of drywall to choose from, each with specific characteristics:
- Standard drywall: used for most residential applications
- Green board: water-resistant, ideal for bathrooms and kitchens
- Blue board: mold-resistant, perfect for humid environments
- Fire-resistant drywall: offers added protection against fires
- Soundproof drywall: reduces noise transmission between rooms
Tips for choosing the right drywall for your project:
When selecting drywall for your project, consider the following tips:
- Assess the moisture level of the area where drywall will be installed
- Determine if fire or soundproofing properties are necessary
- Consider the size and scope of the project to choose the right thickness of drywall
- Consult with a professional if you’re unsure about which type of drywall to use
- Invest in high-quality drywall to ensure durability and longevity
By carefully considering the materials needed for your drywall installation, you can ensure that the job is done correctly the first time.
Using the right tools and selecting the appropriate type of drywall will result in a finished product that is both functional and visually appealing.
Preparing the area for installation:
Before you start installing drywall, it’s important to prepare the area properly.
Here are some steps to take before beginning the installation process:
Steps to take before installing drywall:
- Clean the walls and remove any debris or dust.
- Inspect the framing for any signs of damage or issues.
- Check for proper insulation and make any necessary adjustments.
- Ensure all electrical and plumbing work is complete and up to code.
How to properly measure and cut drywall sheets:
- Measure the height and width of the area where you will be installing the drywall.
- Transfer these measurements to the drywall sheets using a pencil and straight edge.
- Use a utility knife to score the drywall along the marked lines.
- Apply pressure to the scored line to break the drywall along the cut.
Techniques for securing the drywall sheets in place:
- Start by securing the drywall at the ceiling, using drywall screws or nails.
- Work your way down the wall, ensuring each sheet is securely fastened.
- Place screws or nails every 6-8 inches along the studs to properly secure the drywall.
- Use a drywall tape to cover the seams between each sheet for a smooth finish.
By following these steps and techniques, you can ensure that your drywall installation is done correctly and will provide a strong and durable surface for your walls.
Find Out More: A Day in the Life of a Professional Machinist
Taping and Mudding:
When it comes to installing drywall, taping and mudding are essential steps in achieving a professional finish.
Properly taping and mudding seams not only ensures a smooth surface but also strengthens the joints for long-lasting results.
Importance of Taping and Mudding Seams:
Taping and mudding seams are crucial in creating a seamless and finished look for your drywall installation.
Without proper taping and mudding, the joints between drywall sheets will be visible, and the overall appearance will be compromised.
Additionally, taping and mudding help to reinforce the seams, preventing cracks and damage over time.
Detailed Instructions on How to Tape and Mud Properly:
- Clean the joints: Before taping, make sure the seams are clean and free of any dust or debris.
- Apply joint compound: Using a taping knife, spread a thin layer of joint compound over the seam.
- Place the tape: Gently press drywall tape into the wet joint compound, ensuring it is centered over the seam.
- Smooth out bubbles: Use the taping knife to smooth out any bubbles or wrinkles in the tape.
- Apply a second coat: Once the first coat is dry, apply a second coat of joint compound over the tape, feathering out the edges.
- Sand and repeat: Sand the dried compound lightly and apply additional coats as needed until the seam is smooth and blended with the rest of the wall.
Tips for Achieving a Smooth Finish on the Drywall Surface:
- Use a drywall knife with a tapered edge for a smoother finish.
- Apply thin coats of joint compound to avoid excess buildup.
- Sand between coats to remove any imperfections and smooth out the surface.
- Prime the walls before painting to seal the drywall and ensure a consistent finish.
- Consider using a high-quality joint compound for better adhesion and durability.
By following these detailed instructions and tips for taping and mudding your drywall, you can achieve a flawless finish that will enhance the overall look of your space.
With patience and attention to detail, your drywall installation will look professional and polished.
Learn More: Daily Life of an Ironworker on Construction Sites
Sanding and priming:
Why sanding and priming are crucial steps in the process
It smoothes out imperfections in the surface.
Helps the paint adhere better to the drywall.
Creates a clean and professional-looking finish.
Tools needed for sanding and priming
- Sanding block or sandpaper for smoothing out imperfections.
- Primer to seal the surface and ensure proper paint adhesion.
- Paint roller or brush for applying primer and paint.
Techniques for achieving a professional-looking finish
- Start by sanding the entire surface with a sanding block.
- Fill any holes or dents with joint compound and sand smooth.
- Apply a coat of primer to seal the surface and allow it to dry.
- Sand the primed surface lightly to smooth out any imperfections.
- Apply a second coat of primer for a flawless finish.
- Once the primer is dry, paint the drywall with your desired color.
- Use a paint roller or brush to apply the paint evenly.
- Allow the paint to dry completely before applying a second coat.
- Inspect the surface for any touch-ups or additional coats if needed.
- Enjoy your newly installed and beautifully finished drywall!
Delve into the Subject: Safety Tips for Waste Management Professionals
Painting and Finishing Touches:
- Choosing the right paint for your drywall
- Tips for painting over drywall
- Final touches to complete the installation process
Once your drywall installation is complete, it’s time to move on to the final step – painting and finishing touches. This step is crucial to achieve a polished and professional-looking result. Here are some tips and guidelines to help you navigate through this process smoothly.
Choosing the Right Paint for Your Drywall:
When it comes to choosing the right paint for your drywall, there are a few factors to consider. First and foremost, you’ll need to decide whether you want to use water-based or oil-based paint. Water-based paints are easier to work with, dry faster, and have less odor. On the other hand, oil-based paints are more durable and provide a smoother finish.
Another important factor to consider is the sheen of the paint. The most common sheen options are flat, eggshell, satin, semi-gloss, and high-gloss. Flat paint has no shine and is best for hiding imperfections in the drywall, while high-gloss paint is the most reflective and durable.
Lastly, you’ll need to choose the right color for your drywall. Light colors can make a room feel more spacious and airy, while dark colors can create a cozy and intimate atmosphere. Consider the overall design and aesthetics of the room when choosing a paint color.
Transform Your Career Today
Unlock a personalized career strategy that drives real results. Get tailored advice and a roadmap designed just for you.
Start NowTips for Painting Over Drywall:
Before you start painting, make sure to properly prepare the drywall surface. Sand any rough spots or imperfections, and fill in any holes or cracks with spackling compound. Once the surface is smooth and clean, it’s time to apply a coat of primer. Primer helps the paint adhere better to the drywall and provides a uniform finish.
When painting over drywall, it’s essential to use high-quality paintbrushes and rollers to ensure a smooth and even application. Start by cutting in the edges with a brush, then use a roller to fill in the rest of the surface. Work in small sections and overlap each stroke to avoid streaks and uneven coverage.
Allow the first coat of paint to dry completely before applying a second coat. This will help achieve better coverage and a more professional-looking finish. Once the final coat is dry, inspect the surface for any touch-ups or imperfections that need to be addressed.
Final Touches to Complete the Installation Process:
After the paint has dried and you’re satisfied with the results, it’s time to add the final touches to complete the installation process. This includes installing trim and molding around the edges of the drywall to create a finished look.
You can choose from a variety of trim options, such as baseboards, crown molding, and chair rails, to enhance the visual appeal of the room. Make sure to measure and cut the trim pieces accurately to achieve a clean and professional finish.
Once the trim is in place, fill in any nail holes or gaps with caulk or wood filler. Sand the surface smooth and paint over the trim to match the color of the drywall. This will create a seamless transition between the drywall and the trim, giving your walls a polished and cohesive look.
By following these guidelines and tips, you can successfully complete the installation of drywall and achieve a flawless finish. With the right tools, materials, and techniques, you’ll be able to transform your space and create a beautiful and functional environment.
Uncover the Details: Agricultural Worker Safety Tips for Every Season
How to Fix Common Drywall Installation Mistakes
Gaps Between Sheets: Use a joint compound to fill in any gaps and sand it down for a smooth finish.
Uneven Surfaces: Apply additional layers of joint compound to even out any imperfections in the drywall.
Visible Screws or Nails: Use a nail set to drive in any exposed nails or screws below the surface, then cover with joint compound.
Popped Nails: Secure the popped nail back in place and cover with joint compound to prevent future issues.
Tips for Avoiding Mistakes in the First Place
Measure Twice, Cut Once: Double-check your measurements before cutting drywall to ensure a precise fit.
Use the Right Tools: Invest in quality tools, such as a drywall saw and T-square, to make the installation process easier.
Work with a Partner: Having a second set of hands can help you lift and position drywall sheets more effectively.
Take Your Time: Rushing through the installation process can lead to mistakes, so work methodically and carefully.
Resources for Further Assistance and Guidance
Online Tutorials: Watch videos or read articles from reputable sources to learn more about drywall installation techniques.
Local Hardware Stores: Visit a hardware store for advice on tools and materials needed for your specific project.
Professional Installation Services: If you’re unsure about tackling a drywall project on your own, consider hiring a professional for assistance.
By following these troubleshooting tips and avoiding common mistakes, you can ensure a successful drywall installation project.
Don’t hesitate to seek out additional resources for guidance and assistance along the way.
Proper Drywall Installation Techniques
Proper drywall installation is crucial for a successful project.
Follow the step-by-step guide to achieve professional results.