




Introduction
A fence erector plays a crucial role in installing accurate, durable fences.
Privacy screens provide security and seclusion within fencing.
This guide explains how to install privacy screens for fences step by step.
Understanding Privacy Screens
Privacy screens create a barrier between your property and the outside world.
They provide seclusion and security around your property.
Therefore, select an option that suits your outdoor space and privacy needs.
Types of Privacy Screens
Several materials offer distinct appearances and practical benefits.
Each option supports a different balance of style, maintenance, and durability.
Consider the surrounding fence when comparing these choices.
- Wooden privacy screens provide a rustic and natural appearance for your fence.
- Vinyl privacy screens offer a durable and low-maintenance privacy solution.
- Bamboo privacy screens provide an eco-friendly and stylish option.
- Metal privacy screens create a modern and industrial appearance.
Factors for Choosing Privacy Screens
Material affects the screen’s durability and maintenance requirements.
Design should complement your fence and the surrounding aesthetic.
Additionally, size and privacy level should match your specific needs.
- Consider the material’s durability and maintenance requirements.
- Choose a design that complements your fence and overall aesthetic.
- Determine the height and width based on your privacy needs.
- Select a privacy level that provides the desired seclusion for your space.
- Set an installation budget that aligns with your financial resources.
Understanding these options helps you choose a screen that enhances privacy and security.
By considering each factor, you can create a more secluded outdoor space.
Planning the Fence Area
Before installation, assess the fence area where you plan to install privacy screens.
First, inspect the fence for existing damage or weak spots.
Repair any damaged or weak areas before installing the privacy screens.
Next, take accurate measurements of the fence.
Measure the fence length and height to determine the required screen quantity and sizes.
Determining Privacy Screen Placement
Then, determine where to place the screens for maximum coverage and privacy.
Choose whether to cover the entire fence or only selected areas.
Consider the fence design and your privacy needs when selecting the placement.
Privacy Screen Placement Options
Several placement options can help you balance privacy, appearance, and coverage.
Full coverage creates a consistent barrier across the entire fence.
Partial coverage highlights selected sections while adding a decorative appearance.
- Cover the entire fence when you want complete privacy.
- Cover selected sections when you prefer a more decorative look.
- Arrange screens in custom patterns to add visual interest.
Important Placement Considerations
Sunlight direction can affect shadows and visibility around the fence.
Therefore, position the screens to limit shadows that obstruct the view.
Also, maintain sufficient height for privacy without restricting airflow.
- Consider sunlight direction before finalizing the screen placement.
- Install screens high enough to provide coverage without obstructing airflow.
- Align the screens with existing fence posts for a cohesive appearance.
You Might Also Like: Daily Tasks and Responsibilities of a Maintenance Worker
Materials and Tools for Privacy Screen Installation
Successful installation depends on suitable materials and reliable tools.
Gather every required item before beginning the privacy screen installation.
Organizing supplies first helps maintain steady progress during the work.
Materials Needed for the Installation
Privacy screen panels form the primary barrier within the fence.
Fence posts, gravel, and concrete mix provide structural support.
Screws, nails, and protective sealant complete the material requirements.
- Privacy screen panels
- Fence posts
- Concrete mix
- Gravel
- Screws
- Protective sealant
- Nails
- Hammer
Tools Required for the Job
Use digging tools to prepare openings for the fence posts.
Measuring and leveling tools help maintain accurate placement.
Protective equipment supports safer handling throughout the installation.
- Post hole digger
- Level
- Tape measure
- Drill
- Saw
- Work gloves
- Safety goggles
- Ladder
Selecting High-Quality Materials
Choose durable privacy screen panels made from vinyl or composite materials.
Select pressure-treated fence posts to resist rot and decay.
Transform Your Career Today
Unlock a personalized career strategy that drives real results. Get tailored advice and a roadmap designed just for you.
Start NowUse fence post concrete mix, screws, and protective sealant for dependable results.
- Choose privacy screen panels made of durable vinyl or composite materials.
- Select pressure-treated fence posts to resist rot and decay.
- Use concrete mix formulated specifically for setting fence posts.
- Choose screws instead of nails for a more secure installation.
- Apply protective sealant to improve the panels’ weather resistance.
You Might Also Like: The Importance of Teamwork in Boilermaking
Installing Privacy Screens
Privacy screens add seclusion and style to outdoor spaces.
They can create a comfortable retreat or block unattractive views.
This project uses careful measurements, secure attachments, and regular alignment checks.
Measuring and Planning the Screen Layout
First, measure the area where you want to install the privacy screens.
Consider each screen’s height, width, and distance between supporting posts.
These measurements help the screens fit properly and create a cohesive appearance.
Digging the Post Holes
Next, use a post hole digger to create openings for the supporting posts.
Make each hole deep enough to support the planned screen height.
Keep the holes evenly spaced and level with one another.
Positioning and Securing the Posts
Place each post inside its prepared hole.
Check that every post stands plumb and remains level.
Then, secure the posts with concrete or gravel before continuing.
Allowing the Post Supports to Set
Give concrete enough time to dry completely around the posts.
Wait until the supports remain stable before attaching any screens.
This preparation creates a firm base for the remaining installation work.
Attaching the Privacy Screens
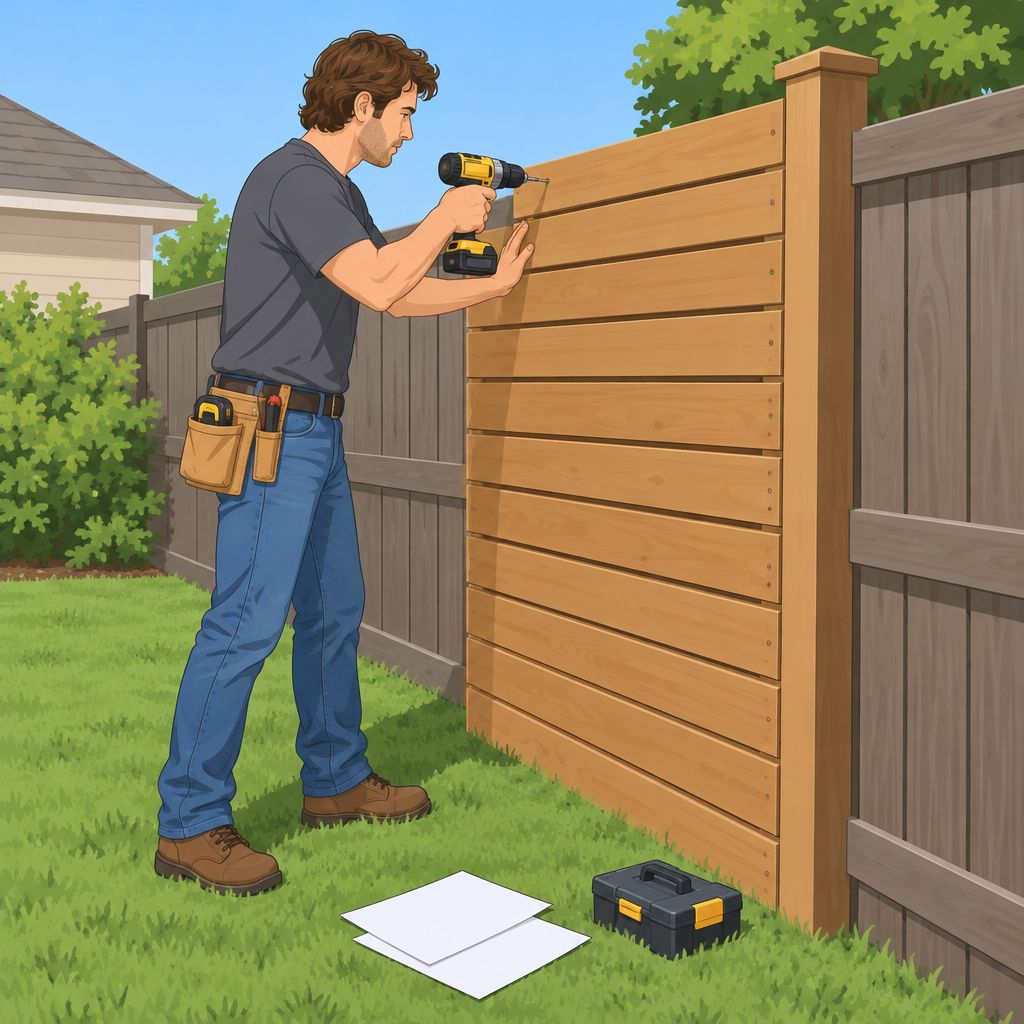
Attach each screen after the posts become secure.
Depending on the screen design, screw it directly onto the posts.
Alternatively, use suitable brackets to hold the screen in place.
Securing and Aligning the Screens
Use screws or nails to secure every screen firmly to its posts.
Check the spacing and alignment as you attach each section.
Reinforce areas that could move during windy conditions.
Adding Decorative Finishing Details
After installation, stain or paint the screens to complement your outdoor decor.
You can also add climbing plants or vines for a natural appearance.
Lattice or slats can create additional patterns and decorative designs.
Maintaining the Installed Screens
Inspect the screens regularly for damage, looseness, or visible wear.
Clean them with mild detergent and water whenever dirt accumulates.
Seal or repaint the screens as needed to protect them from weather.
Delve into the Subject: Top Skills Every Professional Roofer Should Master
Finishing Touches
After installing privacy screens, add finishing touches to improve their appearance and function.
Decorative elements can soften the screens and personalize the outdoor space.
Additionally, protective treatments and careful inspections help maintain the finished structure.
Adding Decorative Elements
- Add climbing vines or hanging baskets to soften the screens’ appearance.
- Use outdoor-friendly artwork or decorative panels to personalize the privacy screens.
- Install outdoor lighting along the screens’ tops or sides to improve nighttime visibility and security.
Sealing or Staining the Screens
- Apply an outdoor sealant or stain to protect the privacy screens from weather damage.
- Choose a product with UV protection to help prevent fading and discoloration.
- Follow the manufacturer’s instructions for application and drying times.
Final Inspection
- Inspect the screens for loose ends, gaps, or imperfections that could reduce their effectiveness.
- Repair or reinforce weak spots to keep the screens secure during changing weather conditions.
- Check that the screens remain evenly spaced and aligned for a professional finish.
These finishing steps enhance the privacy screens’ appearance, protection, and functionality.
Discover More: Sheet Metal Worker vs. Welder: Key Differences
Maintenance Tips
Proper maintenance keeps privacy screens in good condition.
As a result, the screens continue providing the desired level of privacy.
Regular care also helps preserve their appearance and functionality.
- Cleaning and maintenance: Clean privacy screens with a mild detergent and water solution.
- Furthermore, avoid harsh chemicals because they could damage the screen material.
- Regularly inspect the screens for damage and repair problems as needed.
- Troubleshooting common problems: Patch tears or holes promptly to prevent further damage.
- Next, check the frame for rust or corrosion and treat it accordingly.
- Also, secure the screens to the fence to prevent sagging or loosening.
- Regular maintenance schedule: Establish a routine that includes cleaning, inspection, and repairs.
- Additionally, schedule a yearly professional inspection to address overlooked issues.
- Stay proactive to prolong the screens’ lifespan and maintain their functionality.
Privacy Screens and Professional Fencing Services
Privacy screens enhance fence functionality and appearance.
They provide privacy, security, and style in outdoor spaces.
Transform Your Career Today
Unlock a personalized career strategy that drives real results. Get tailored advice and a roadmap designed just for you.
Start NowBy installing them carefully, you can give clients the peace and privacy they want.
This service can increase property value and improve clients’ quality of life.
The Value of Privacy Screens in Fencing
Privacy screens create secluded, comfortable outdoor environments.
They protect spaces from prying eyes while adding thoughtful design.
For fence erectors, installation expands service offerings and attracts more clients.
It also demonstrates a commitment to comprehensive solutions for individual customer needs.
Building Confidence Through Fencing Experience
As experience grows, you install screens more efficiently and skillfully.
Each project can strengthen your confidence when handling different fencing requirements.
Consequently, reliable workmanship can support your reputation as a dependable fence erector.
Therefore, approach challenging projects with determination rather than hesitation.
Creating More Valuable Outdoor Spaces
Installing privacy screens creates outdoor sanctuaries, not merely added privacy.
The improvement can add property value and support clients’ quality of life.
You can transform ordinary fences into functional, stylish outdoor spaces.
By embracing this service, you can elevate future fencing projects.


