



Introduction
Music video editing strongly influences the production quality.
It shapes how audiences perceive the artist and the message.
Well-edited videos strengthen storytelling and create emotional responses.
Quality editing can transform a simple performance into an engaging visual experience.
As an editor, you control pacing, transitions, and visual details.
Each cut and effect supports the song’s narrative and atmosphere.
Poor editing can distract viewers and weaken the musical experience.
Thoughtful edits, however, can captivate audiences and strengthen their connection with the music.
These techniques can help beginners and experienced editors create polished music videos.
Understanding the Video’s Vision
First, develop a clear vision before you begin editing.
Listen to the song several times and mark its important moments.
Then, identify the emotions and messages that the music communicates.
Choosing Suitable Editing Software
Select software that matches your skill level and budget.
Options range from beginner-friendly tools to advanced professional programs.
Popular choices include Adobe Premiere Pro, Final Cut Pro, and DaVinci Resolve.
Before editing, explore the features available in your chosen software.
Establishing Rhythm and Pacing
Sync your cuts and transitions with the song’s rhythm.
Align visual changes with beats and lyrical shifts to increase engagement.
Meanwhile, maintain consistent pacing to keep viewers attentive.
Using Effects With Purpose
Use visual effects to support the story without overwhelming viewers.
Simple transitions, color grading, and motion graphics can add visual energy.
However, excessive effects may distract audiences from the performance.
Bringing the Edit Together
Music video editing combines creative judgment with technical skill.
By applying these techniques, you can create visuals that complement the music.
Finally, take your time and enjoy bringing your creative vision to life.
Understanding the Music
Begin by listening to the song several times before editing any footage.
Take notes about the mood, tempo, vibe, and changes in musical dynamics.
These observations help you connect visual choices with the song’s emotional direction.
- Mood: Determine whether the song feels happy, sad, aggressive, or peaceful.
- Tempo: Identify the beat speed and rhythm before selecting visual pacing.
- Vibe: Recognize the overall atmosphere and reflect it through visual choices.
Next, identify the song’s verses, choruses, bridges, and other important sections.
Mark timestamps where the music changes direction or reaches an emotional peak.
Use those moments to guide cuts, transitions, and visual emphasis.
- Chorus: Highlight catchy sections with memorable or energetic visuals.
- Verse: Use these sections to develop the story or provide context.
- Bridge: Introduce a visual change when the music creates a twist.
Finally, match the editing style and pace to the music.
Sync cuts with the beat when you want a precise and polished rhythm.
Also, adjust transitions, colors, and camera angles to support the song’s mood.
- Cutting Rhythm: Align important cuts with the song’s beat.
- Transitions: Choose fades, wipes, or digital effects that suit the mood.
- Color Grading: Apply color tones that reinforce the music’s feelings.
- Camera Angles: Change angles during dramatic points in the song.
Planning the Visual Structure
After studying the music, plan the visual structure before assembling the final edit.
This preparation keeps the footage organized and supports a smoother editing process.
It also helps you connect each visual choice with the song’s structure.
Create a storyboard that divides the song into clear visual sections.
Sketch important scenes and actions for each section of the music.
Then, record notes about camera angles, transitions, and planned effects.
Transform Your Career Today
Unlock a personalized career strategy that drives real results. Get tailored advice and a roadmap designed just for you.
Start Now- Divisions: Break the song into sections that match the storyboard.
- Visual Representation: Sketch the main scenes or actions for each section.
- Details: Note camera angles, transitions, and effects beside each scene.
A storyboard keeps production focused and ensures that you capture necessary visuals.
Meanwhile, varied shots add visual interest and support changing melodies.
Capture multiple distances and angles so the edit can maintain dynamic pacing.
- Close-ups: Emphasize emotions and important details.
- Wide Shots: Show the environment and provide context.
- Medium Shots: Balance personal details with the surrounding setting.
Applying Editing Techniques
Once you organize the footage, begin shaping the video around the music.
Use cuts to establish rhythm and direct attention toward important moments.
Also, combine precise timing with smooth audio and visual movement.
Cut on the beat when the music calls for clear rhythmic movement.
Use emotional cuts to emphasize peaks within the song.
Furthermore, apply J-cuts and L-cuts to create smoother overlaps.
- Beat Cuts: Align visual changes with the song’s beat.
- Emotional Cuts: Emphasize emotional peaks through carefully timed edits.
- J-Cuts and L-Cuts: Overlap audio or video to connect clips smoothly.
Effects can strengthen the video’s style when they support the music.
However, excessive effects can distract viewers from the main content.
Therefore, choose effects that enhance the message without overwhelming it.
- Slow Motion: Highlight poignant moments within the song.
- Speed Ramping: Increase intensity during climactic sections.
- Visual Effects: Select effects that fit the song’s overall vibe.
Polishing Color and Sound
After editing, refine the video’s appearance through color grading.
First, adjust brightness and exposure so the visuals match the song’s tone.
Next, correct inconsistent colors throughout the footage.
Finally, apply creative grading to strengthen the intended emotional connection.
- Adjusting Brightness: Control exposure to match the song’s tone.
- Color Correction: Standardize colors for greater consistency.
- Creative Grading: Apply color schemes that support emotional impact.
Then, balance the audio so no element overpowers another.
Careful audio mixing strengthens the relationship between the soundtrack and visuals.
Ultimately, thoughtful planning and precise finishing create a cohesive music video.
Organizing Your Footage
Organized footage gives your music video editing process a clear and efficient foundation.
A structured system helps you locate clips without searching through countless folders.
It also creates more time for creative decisions during the editing process.
Folder Structure
Start by creating one dedicated master folder for the entire project.
Then, divide that folder according to scenes, takes, and behind-the-scenes material.
Use consistent names so you can find specific files quickly.
- Music Video Project
- Raw Footage
- Edited Sequences
- Audio Tracks
- Graphics
- Behind the Scenes
Markers and Tags
Markers and tags help you identify important scenes and shots during editing.
Most editing software lets you label clips with colors, descriptions, and timestamps.
These labels make it easier to locate footage that matches your creative direction.
- Color coding: Assign colors to performance shots, close-ups, and landscapes.
- Descriptive labels: Identify memorable moments with phrases such as “great dance move.”
- Time coding: Record timestamps for major transitions or events in longer clips.
Rough Storyboards
A rough storyboard gives your video a visual plan before editing becomes complex.
It helps you arrange shots and transitions into a cohesive sequence.
You can also revise scenes early, which saves time during later editing.
- Sketch or write: Map scenes on paper or with digital tools.
- Define key moments: Mark the moments that drive the storyline.
- Plan transitions: Decide how each shot will connect naturally.
Benefits of Organized Footage
Organized footage reduces delays and keeps your editing process focused.
It also supports creative work by removing clutter from your workflow.
Furthermore, clear file management helps teams share materials more smoothly.
- Time efficiency: Find clips quickly instead of searching through disorganized files.
- Enhanced creativity: Focus on ideas without unnecessary clutter.
- Better collaboration: Help teammates locate necessary materials easily.
- Professionalism: Show clients and collaborators a dependable working process.
Maintaining the Organization System
Set up your folders before shooting so the project begins with a clean structure.
As you review footage, add comments that identify changes or useful features.
Update folders and tags regularly as the project develops.
- Prepare early: Establish your folder system before filming begins.
- Add comments: Record observations directly on relevant clips.
- Update regularly: Maintain consistent folders and labels throughout production.
- Back up files: Protect footage with external drives or cloud storage.
A More Efficient Editing Workflow
Effective organization gives your editing process structure and direction.
Folder systems, labels, and storyboards work together to reduce confusion.
By preparing early and maintaining order, you can spend more time shaping the video.
Transform Your Career Today
Unlock a personalized career strategy that drives real results. Get tailored advice and a roadmap designed just for you.
Start NowDiscover More: Sound Design for Live Events: Key Strategies
Editing a music video presents an exciting creative challenge.
The right techniques can significantly increase its appeal.
These tools can help you create engaging visuals that connect with your audience.
Dynamic Jump Cuts
Jump cuts provide a powerful way to create dynamic, fast-paced editing.
This technique removes parts of a scene, creating sudden changes in time or action.
As a result, jump cuts add excitement to the video.
- Maintain Energy: Use jump cuts to keep the music video energetic and engaging.
- Highlight Key Moments: Isolate significant moments to emphasize scenes or lyrics.
- Simplify Storytelling: Remove unnecessary content so viewers focus on the music and visuals.
- Use Sparingly: Limit jump cuts because excessive use can confuse viewers or weaken immersion.
Plan each shot carefully when using jump cuts.
Make sure every shot serves a clear purpose.
A well-structured sequence keeps the narrative coherent.
Additionally, match your cuts to the music’s rhythm to strengthen audience engagement.
This synchronization creates a captivating audio-visual experience.
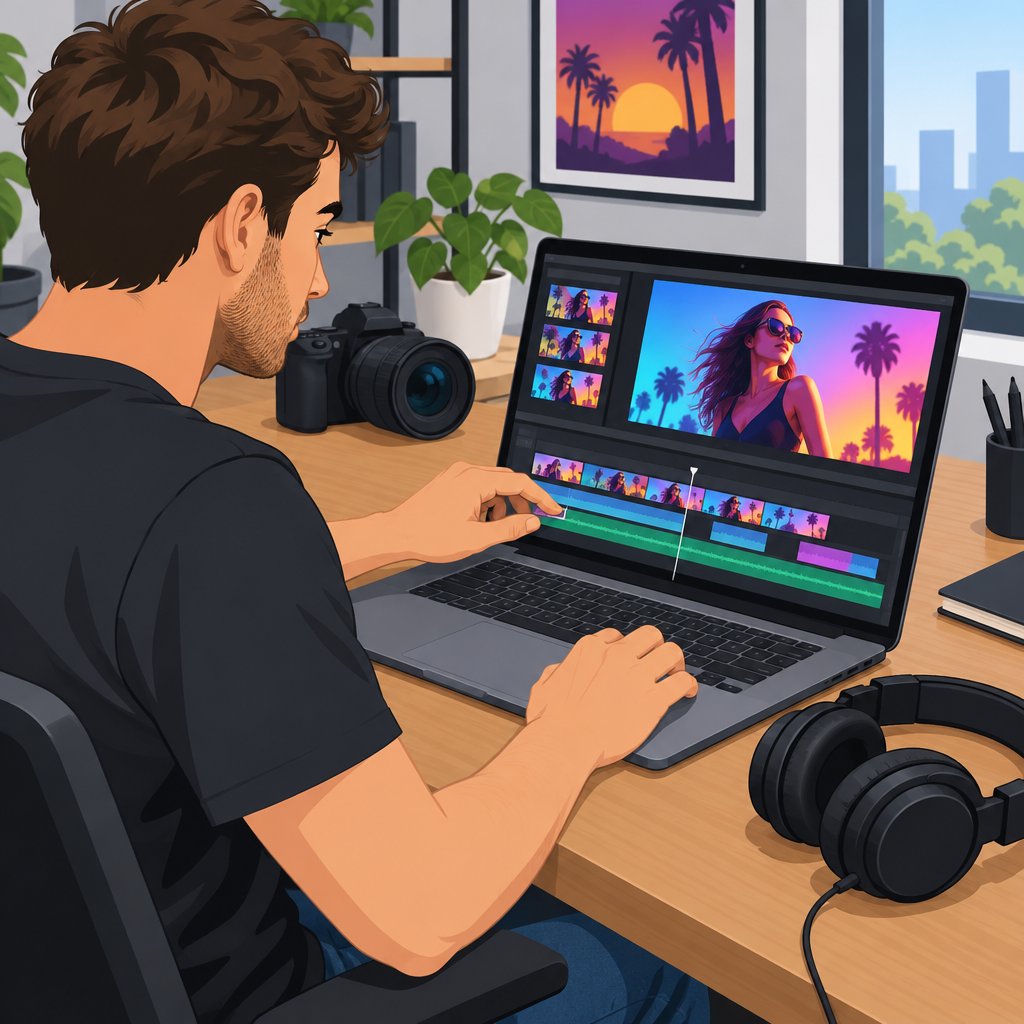
Expressive Transitions
Transitions help create a seamless flow between clips.
Different transitions can evoke distinct feelings and maintain viewer interest.
Therefore, experimenting with transitions can strongly influence your video’s style.
- Fades: Use fades to black or white to create emotional depth or mark a section’s ending.
- Dissolves: Blend clips gradually to create a softer, dream-like transition.
- Wipes: Shift dramatically between scenes to represent significant changes or actions.
- Split Screens: Show multiple perspectives simultaneously to develop parallel stories within one song.
Understand each transition’s emotional effect before choosing it.
Use transitions to strengthen the video’s storytelling.
Also, tailor each transition to the song’s tempo and mood.
The right transition can emphasize the music’s emotional beats.
Choose effects that complement the performance instead of distracting viewers.
Color Grading and Visual Effects
Color grading plays a crucial role in establishing your music video’s mood.
Adjust color, contrast, and brightness to shape the audience’s perception.
A thoughtful grade can add depth and establish a distinct atmosphere.
- Establish a Mood: Use warm tones for comfort and cool tones for sadness.
- Enhance Storytelling: Use colors to represent themes or elements within the song.
- Maintain Consistency: Apply consistent grading choices throughout the video.
- Use LUTs: Apply Look-Up Tables to streamline grading and achieve a specific aesthetic quickly.
Consider the song’s overall theme before adding visual effects.
Effects should enhance the video without overwhelming the viewer.
For example, simple lens flares or light leaks can add a professional touch.
However, dramatic effects can distract viewers from the music.
Use every effect carefully to preserve the video’s focus.
Polishing and Exporting the Music Video
After placing cuts and transitions, synchronize the visuals with the music.
Align visuals closely with beats and lyrics to create seamless movement.
Precise synchronization elevates the video’s overall quality.
- Review Your Work: Watch the video several times and correct jarring cuts or transitions.
- Seek Feedback: Share the video with others to gain fresh perspectives.
- Focus on Branding: Add subtle logos or watermarks when appropriate.
- Optimize Export Settings: Select suitable resolutions and formats for each social media platform.
Music video editing requires creativity, patience, and technical skill.
Use jump cuts, transitions, and color grading to build visually engaging content.
Finally, balance visual effects with storytelling to immerse your audience.
With practice and dedication, your music video projects can shine.
Gain More Insights: Strategies for Repositioning an Established Brand
Syncing Audio and Visuals
Audio and visual synchronization strengthens the viewer’s experience.
Careful alignment connects video clips with musical beats and lyrical moments.
These techniques help editors create engaging and dynamic music videos.
Aligning Clips with Beats and Lyrics
Aligning visual elements with the rhythm creates a powerful interaction.
Transform Your Career Today
Unlock a personalized career strategy that drives real results. Get tailored advice and a roadmap designed just for you.
Start NowFirst, listen closely and identify important beats that can guide transitions.
Then, use meaningful lyrics and emotional moments to strengthen visual connections.
- Identify Key Beats: Listen carefully for the song’s tempo and significant beats.
- Use Software Tools: Audio waveforms can help you locate beats accurately.
- Place Markers: Add timeline markers that correspond with important beats.
- Highlight Lyrics: Match visuals with emotional lyrical moments to deepen audience connection.
- Experiment with Cuts: Test different edit points until you find the strongest results.
Timing and Rhythm in the Edit
Timing establishes a rhythm that resonates with viewers.
Consistent pacing allows the visual energy to support the song.
Adjusting clip duration can emphasize specific beats, lyrics, and musical changes.
- Use the Grid System: Snapping clips to a grid supports consistent alignment.
- Employ J and L Cuts: These edits create smooth transitions between audio and visuals.
- Adjust Clip Duration: Speed clips up or slow them down to emphasize important moments.
- Use Slow Motion and Speed Ramps: These effects can highlight dramatic musical moments.
- Maintain Consistent Energy: Use rapid cuts for energetic songs and longer shots for slower songs.
Using Musical Visual Cues
Musical elements provide useful cues for editing decisions.
Changes in sound can signal transitions, camera adjustments, or shifts in mood.
Visual choices should support the music’s emotional direction and imagery.
- Follow Sound Effects: Use drum hits and other effects to guide visual actions.
- Notice Instrumentation Changes: Instrument shifts can indicate important transitions.
- Use Lyrics as Prompts: Match lyrical themes with related visual material.
- Vary Camera Angles: Use wider views during choruses and closer views during verses.
- Match the Mood: Choose bright visuals for uplifting sections and darker tones for somber moments.
Final Synchronization Adjustments
After the initial edit, review the entire video in real time.
Small timing changes can improve the relationship between visuals and audio.
Feedback and audio layering can also reveal opportunities for refinement.
- Review in Real Time: Watch the video to evaluate synchronization throughout.
- Make Subtle Adjustments: Nudge clips when their timing feels slightly incorrect.
- Seek Feedback: Ask trusted peers to identify synchronization issues you may have missed.
- Experiment with Audio Layers: Add ambient sounds or effects when they support the visuals.
- Test Export Settings: Export different formats to check quality across platforms.
Software Features for Better Synchronization
Editing software includes tools that can streamline the synchronization process.
These features help editors locate musical details and control visual timing.
Learning these tools can make adjustments faster and more precise.
- Audio Waveform Displays: Waveforms provide visual references for locating beats.
- Synchronization Tools: Built-in features can align audio and video tracks automatically.
- Clip Marking Tools: Markers can label important sections and simplify timeline navigation.
- Keyframing: Keyframes control motion and effects that match beats or emotions.
- Preview Tools: Playback options let editors review changes immediately.
Mastering audio and visual synchronization requires practice and patience.
These techniques can elevate music video editing and create more compelling results.
Keep creativity central while refining each musical and visual relationship.
Uncover the Details: Creating a Unified Voice Across All Internal Channels
Overlays, Text, and Graphics
Overlays can add depth and texture to a music video.
They can introduce artists, lyrics, or themes through visual elements.
Choose overlays that support the music’s mood and theme.
- Choose Relevant Overlays: Select an overlay that matches the music’s mood and theme.
- Adjust Opacity: Lower the opacity so the overlay blends smoothly with the video.
- Maintain Legibility: Keep text easy to read against the video background.
- Time Visuals Carefully: Sync overlays with beats or hooks to create continuity.
Thoughtful overlays can enrich the video’s visual narrative.
Text can highlight important lyrics or messages.
Logos and social media handles can also strengthen brand recognition.
Speed Ramping and Slow Motion
Speed ramping changes footage speed during the edit.
This technique creates dynamic movement that can capture attention.
Use slow motion to emphasize emotional or impactful moments.
- Highlight Key Moments: Apply slow motion during emotional sections of the song.
- Build Excitement: Increase the speed during energetic sections.
- Create Smooth Transitions: Blend speed changes seamlessly for better flow.
- Use Sound Effects: Add matching sound effects when footage speed changes.
Slow motion can evoke emotion and emphasize a scene’s intensity.
Speed ramping can create a pulsating rhythm that follows the music.
Experiment with different speeds until the edit feels natural.
Glitch and Distortion Effects
Glitch effects can create striking visuals that capture attention.
They can represent disruption, chaos, or heightened emotions.
Distortion can emphasize selected emotions or transitions.
- Add Glitch Effects: Use glitches to symbolize disruption or emotional intensity.
- Use Distortion Artistically: Apply distortion selectively to support specific scenes.
- Keep Effects Subtle: Limit their use so they do not distract from the content.
- Sync with Audio: Match effects with important audio cues for greater impact.
Glitch effects can create a modern and edgy aesthetic.
They can also distinguish different visual styles within one video.
Distortion can add depth and complexity to selected scenes.
Additional Visual Techniques
Several additional techniques can strengthen the visual presentation.
Color grading can establish the video’s mood and tone.
Adjust hues, saturation, and contrast to support the theme.
- Color Grading: Adjust hues, saturation, and contrast to establish the video’s tone.
- Transitions: Use crossfades, wipes, or cuts to connect clips smoothly.
- Dynamic Shots: Combine close-ups and wide angles to maintain visual interest.
- Layered Footage: Combine clips with alpha channels to create engaging visual effects.
Transitions can create a fluid connection between clips.
Transform Your Career Today
Unlock a personalized career strategy that drives real results. Get tailored advice and a roadmap designed just for you.
Start NowDynamic shots help maintain viewer interest throughout the video.
Layered footage can produce creative and engaging visual experiences.
Storytelling Through Visual Effects
Visual effects should support the story rather than provide decoration alone.
A coherent visual approach helps viewers follow the intended narrative.
Each effect should strengthen the song’s emotional direction.
- Maintain Coherence: Use effects that enhance the story without causing confusion.
- Develop Visual Motifs: Repeat related themes to connect different sections.
- Support Emotional Arcs: Choose effects that match the lyrics and tone.
- Encourage Engagement: Select visuals that help viewers connect with the music.
Recurring motifs can make the story feel more cohesive.
Emotionally appropriate effects can amplify the song’s message.
Purposeful visuals can create a memorable connection with viewers.
Testing and Refining the Edit
Review the first edit carefully after adding visual effects.
Feedback can reveal which choices work and which need adjustment.
Iteration helps create a polished final video.
- Review the Edit: Watch the video repeatedly to check visual and audio synchronization.
- Seek Input: Ask musicians, videographers, or viewers for useful feedback.
- Make Adjustments: Refine effects according to feedback and personal observations.
- Complete a Final Review: Check the finished video for errors and improvements.
Careful testing ensures that visuals remain synchronized with the audio.
Outside opinions can identify distracting or ineffective effects.
Creative experimentation can transform a music video into an engaging visual experience.
See Related Content: Best Certifications for Marketing Managers
Paying Attention to Editing Details
Careful editing details shape the final quality and impact of a music video.
Every visual and audio element contributes to the viewer’s experience.
Therefore, review each creative and technical choice before completing the project.
Maintaining Continuity Across Scenes
Continuity supports clear storytelling and prevents distracting inconsistencies.
Small changes in lighting, clothing, or positioning can interrupt the audience’s attention.
Check each transition carefully to preserve visual consistency throughout connected sequences.
- Match cuts: Keep objects and subjects in consistent positions between cuts.
- Lighting changes: Avoid abrupt shifts that weaken visual continuity.
- Wardrobe consistency: Keep performers in matching outfits throughout each sequence.
- Positioning: Check hands, props, and facial expressions between shots.
- Background elements: Keep surrounding items consistent during scene transitions.
Creating Smooth Transitions Between Shots
Smooth transitions give music videos a polished and professional appearance.
They also maintain viewer attention while supporting the song’s rhythm.
Choose transition techniques that connect movement, timing, and visual direction naturally.
- Use cross-dissolves: Blend clips subtly to create gentle transitions.
- Match action: Cut between shots while the movement continues.
- Cut on beats: Align edits with the song’s tempo.
- Use L-cuts and J-cuts: Overlap audio between adjoining clips.
- Experiment with motion: Connect movement across neighboring frames.
Fine-Tuning the Audio Mix
Audio management strongly influences the quality of a music video.
Balanced levels help music, vocals, instruments, and effects work together harmoniously.
Monitor the mix regularly to preserve clarity without sacrificing musical dynamics.
- Background vocals: Keep supporting vocals below the main vocal level.
- Instrument mix: Balance each instrument for a cohesive sound.
- Sound effects: Add subtle effects without overpowering the music.
- Audio compression: Create consistent volume while preserving dynamics.
- Regular level checks: Test playback through speakers and headphones.
Reviewing the Completed Edit
A thorough review reveals problems that may remain hidden during active editing.
Take deliberate breaks so fresh eyes and ears can identify overlooked issues.
Additionally, compare playback across several devices before delivering the final version.
- Take breaks: Return to the project with renewed attention.
- Watch on different devices: Check playback on phones, tablets, and computers.
- Gather feedback: Invite others to identify unnoticed flaws and suggest ideas.
- Schedule focused sessions: Remove distractions during detailed reviews.
- Use software tools: Find audio peaks, glitches, and other technical problems.
Strengthening Artistic Expression Through Detail
Attention to detail can influence how viewers understand the video’s artistic intent.
When visuals complement the music, the finished work can create a stronger emotional response.
Music video editing requires both artistic judgment and technical knowledge.
Balance these skills to support compelling storytelling and consistent visual direction.
Listen and watch critically because each review can reveal new creative insights.
Adjust every sound and image to reflect the story’s intended emotion.
Use the editing process as an opportunity for artistic expression and practical learning.
A detailed checklist helps prevent important technical or creative elements from falling aside.
Ultimately, consistent attention to detail makes the finished music video more memorable and impactful.
Refining Creative Editing Skills
Experimenting with transitions, color grading, and effects can help you discover a distinctive editing style.
Transform Your Career Today
Unlock a personalized career strategy that drives real results. Get tailored advice and a roadmap designed just for you.
Start NowKeep the process playful, because each project creates opportunities to learn and improve.
Meanwhile, let storytelling guide every creative decision.
Each cut and transition should support the narrative rather than distract from it.
Visual storytelling can connect viewers with the music on a deeper level.
Engaging edits can evoke emotion and create memorable moments.
Continue developing your skills by studying effective edits in other music videos.
Also, learn from experienced professionals and invite peers to share constructive feedback.
Regular practice encourages improvement and supports fresh editing ideas.
Passion and skill shape music video editing as an expressive art form.
With dedication, you can create visually compelling videos that resonate with audiences.
Start with your footage, trust your vision, and keep refining your work.
Additional Resources
Google search results for How to Edit Music Videos: Tips and Techniques Media and Communication
Bing search results for How to Edit Music Videos: Tips and Techniques Media and Communication


