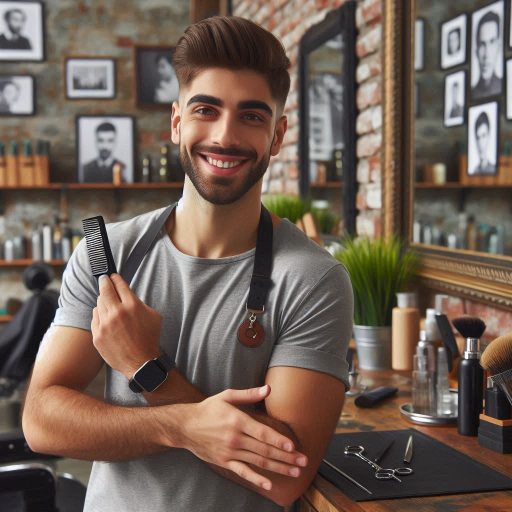
Introduction
Haircut techniques play a crucial role in the styling industry.
They allow stylists to create diverse looks and enhance their clients’ features.
Mastering various techniques can elevate a stylist’s skill level and boost their confidence.
Each haircut technique offers unique benefits and caters to different hair types and styles.
When stylists learn advanced techniques, they expand their creative potential.
This knowledge enables them to transform a basic haircut into a masterpiece.
Moreover, being versatile with haircut techniques allows stylists to meet the unique needs of each client.
Clients often seek stylists who can adapt their skills to suit individual preferences.
Understanding different haircut techniques enhances a stylist’s ability to provide exceptional service.
For instance, layering adds movement and texture, while blunt cuts offer a sleek finish.
By mastering these methods, stylists can cater to a wide range of clients, from those seeking trendy looks to others preferring classic styles.
In summary, mastering haircut techniques is vital for any stylist.
It empowers them to offer personalized services and create stunning hairstyles.
As stylists hone their skills, they become more adept at satisfying clients and standing out in the competitive styling industry.
Embracing a variety of techniques will ensure continued growth and success in their careers.
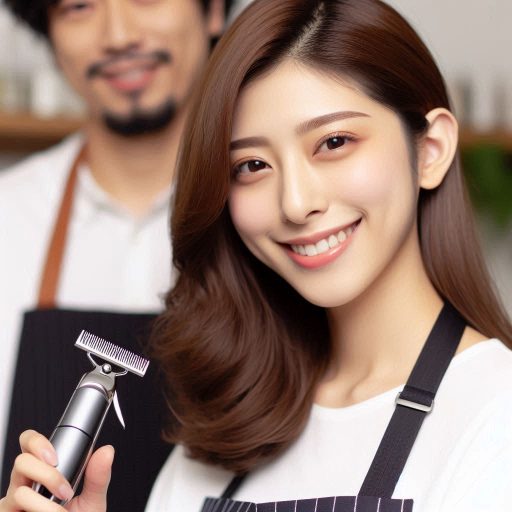
Layering Technique
What layering is and its benefits
Layering is a popular haircutting technique that adds dimension and movement to the hair.
It involves cutting the hair into different lengths, creating layers that blend seamlessly.
This technique enhances volume and reduces bulk, making it suitable for various hair types.
How to achieve a layered haircut using scissors or razors
To achieve a layered haircut, start by assessing the hair’s texture and length.
Section the hair into manageable parts. Use scissors or a razor to create layers.
Transform Your Career Today
Unlock a personalized career strategy that drives real results. Get tailored advice and a roadmap designed just for you.
Start NowFor scissors, hold the section of hair between your fingers, then cut at a slight angle to create soft layers.
For razors, glide the blade along the hair to create textured ends. Always ensure your tools are sharp for clean cuts.
Tips on how to customize layering techniques for different hair types and lengths
Customizing layering techniques can significantly enhance the final look.
For fine hair, opt for subtle layers to maintain volume without overwhelming the hair.
Use shorter layers around the crown to create lift.
For thick hair, consider more pronounced layers to reduce weight and enhance movement.
Incorporate longer layers at the bottom for a smooth finish.
When working with curly or wavy hair, layering can help define curls and add bounce.
Use longer layers to prevent excessive shrinkage.
Additionally, avoid cutting too much from the top, as this can lead to unwanted volume.
Always consult with clients to understand their preferences and lifestyle.
This dialogue helps in customizing layers that suit their needs.
By mastering the layering technique, stylists can create beautiful, versatile hairstyles that clients will love.
Layering not only enhances the overall appearance but also boosts clients’ confidence in their look.
Read: How to Build a Loyal Esthetician Clientele
Graduation Technique
Definition of graduation and its purpose in haircuts
Graduation is a haircutting technique that creates layers of varying lengths.
It adds texture and movement to the hair while maintaining some length.
Stylists use graduation to enhance volume and shape in a haircut.
Understanding this technique is essential for creating versatile styles.
Showcase Your Business Today
Reach thousands of readers actively exploring professional services. Publish your business profile and grow your audience now.
Publish NowThe process of creating a graduated haircut
To create a graduated haircut, start by sectioning the hair.
Use clips to separate the hair into manageable sections.
Begin with the back section and work your way to the front.
Take small, horizontal sections, usually about one inch wide.
Hold each section at a specific angle to achieve the desired length.
For graduation, tilt the section slightly upwards.
This technique allows for a smooth transition from shorter to longer lengths.
As you cut, focus on the angles. For a soft graduation, maintain a gentle angle.
For a more pronounced effect, increase the angle slightly.
The key is to keep the cut even throughout the entire head.
Ensure you blend the sections well to avoid harsh lines.
Using the right tools, such as sharp shears, is crucial for precision.
How graduation can add volume and shape to the hair
Graduation adds both volume and shape to the hair.
It creates fullness at the roots while tapering towards the ends.
This technique is particularly beneficial for fine or thin hair.
It allows stylists to create the illusion of thickness and body.
Additionally, graduation can enhance natural waves and curls, making the hair appear more dynamic.
In summary, mastering the graduation technique is vital for any stylist.
It allows for creativity while enhancing the overall appearance of a haircut.
By understanding sectioning, angles, and blending, stylists can achieve stunning results.
This technique not only shapes the hair but also adds life and movement to every style.
Read: How to Open Your Own Barber Shop: A Guide

Texturizing Technique
Definition of texturizing and its role in haircutting
Texturizing in haircutting refers to the process of adding depth and dimension to the hair by cutting into the strands to create texture.
Various tools and techniques can be used for texturizing hair, including point cutting, razor cutting, and texturizing shears.
Various tools and techniques for adding texture to hair
Point cutting involves cutting the hair at an angle, which creates a softer, textured look by removing weight from the hair.
Razor cutting uses a razor tool to remove thin layers of hair, resulting in a choppy, textured effect that adds movement to the hair.
How texturizing can enhance the overall look and feel of a haircut
Texturizing shears have teeth along one or both blades, which allow the stylist to create texture by cutting the hair in a non-uniform manner.
By adding texture to a haircut, stylists can enhance the overall look and feel of the style, making it more dynamic and visually interesting.
Texturizing can help to create volume in thin hair, reduce bulk in thick hair, and add dimension to layered cuts.
Texturizing is also useful for creating a more natural look, as it mimics the way hair grows and moves in real life.
Additionally, texturizing can help to blend different lengths of hair seamlessly, creating a seamless flow and transition between sections of the hair.
Overall, mastering texturizing techniques is essential for stylists who want to elevate their haircutting skills and offer clients a customized and modern look.
Read: The Best Tools for Professional Barbers
Blunt Cutting Technique
Definition of blunt cutting and its characteristics
Blunt cutting is a fundamental haircutting technique that creates straight, clean lines.
This method involves cutting the hair at a single length without layering.
As a result, it produces a uniform appearance that exudes sophistication and elegance.
The precision and clean lines associated with blunt cuts
The key characteristic of blunt cutting is its precision.
Stylists achieve crisp, defined edges that enhance the overall shape of the haircut.
This technique works well for various hair types, including straight, wavy, and thick hair.
Blunt cuts are particularly popular for bobs and lobs, as they frame the face beautifully.
Showcase Your Business Today
Reach thousands of readers actively exploring professional services. Publish your business profile and grow your audience now.
Publish NowStep-by-step instructions on how to achieve a blunt haircut using scissors or clippers
To achieve a blunt haircut, follow these step-by-step instructions:
- Prepare the Hair: Start with clean, dry hair.
Brush it thoroughly to remove tangles and ensure even cutting. - Section the Hair: Divide the hair into four sections using clips.
This method helps manage the hair and ensures even cutting. - Determine the Length: Decide the desired length for the blunt cut.
Use a comb to measure and visualize where the cut will be. - Begin Cutting: Hold a section of hair firmly between your fingers.
Position your scissors or clippers horizontally to ensure a straight cut. - Cut in Small Increments: Start at the back and work your way forward.
Cut small increments to maintain control and precision. - Check for Evenness: After cutting each section, check for evenness.
Make necessary adjustments by trimming any uneven areas. - Finish the Cut: Once all sections are cut, review the overall shape.
Make final adjustments for a polished finish.
Blunt cutting is an essential technique that every stylist should master.
With practice, you can achieve beautiful, clean lines that enhance your clients’ hair and elevate their look.
Read: Barber vs. Hair Stylist: Key Differences Explained
Thinning Technique
Thinning and its benefits in haircutting
- Thinning refers to removing excess bulk from the hair to create a lighter, more manageable style.
- Thinning tools include thinning shears, also known as texturizing shears, and razors.
- Thinning can help reduce bulk in hairstyles, especially for those with thick or coarse hair.
- Thinning is a great way to create softer edges in hairstyles, giving a more natural look.
- Thinning can also help blend layers seamlessly and add texture to the hair.
Different thinning tools
There are different ways to use thinning shears, depending on the desired outcome.
Here are some techniques:
- Slide Cutting: Holding the shears at a slight angle, gently slide them down the hair shaft to remove bulk.
- Point Cutting: Point cutting involves cutting into the hair vertically to create softer, more textured ends.
- Notching: Notching is a technique where small chunks of hair are removed at different lengths to create a piecey look.
How thinning can help reduce bulk and create softer edges in hairstyles
Razors are another popular tool for thinning hair. Here are some tips for using a razor:
- Feathering: Feathering with a razor involves creating soft, feathered ends by gently razoring downward on sections of hair.
- Texturizing: Texturizing with a razor helps to remove excess bulk while adding movement and texture to the hair.
Thinning is a versatile technique that can be used on various hair types and lengths.
It is important for stylists to master thinning techniques to offer their clients a customized, personalized haircut that suits their individual needs.
Conclusion
Mastering haircut techniques is crucial for stylists to enhance their skills and provide excellent service to clients.
Continuous practice and learning new haircutting techniques are essential for stylists to stay updated and improve their craft.
Having a diverse range of haircut techniques in their arsenal can help stylists stand out in a competitive industry.