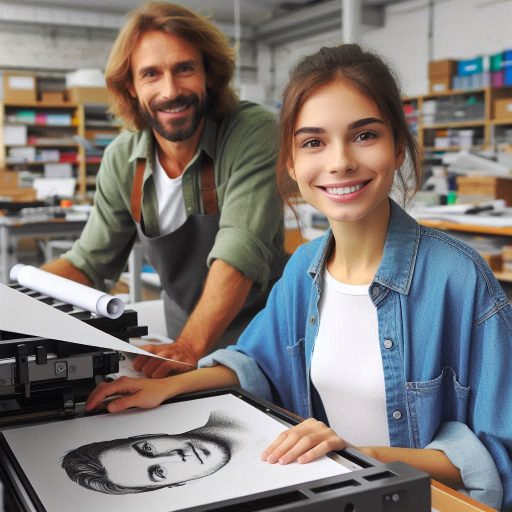
Introduction
Printmaking offers a rewarding way to create art through various techniques and tools.
For beginners, choosing the right tools can make all the difference.
Using appropriate printmaking tools ensures you achieve quality prints and develop your skills effectively.
Printmaking is a fascinating art form that involves creating images through different methods, such as carving, etching, and inking.
Beginners often face a plethora of tools and techniques, making it crucial to start with the basics.
Essential printmaking tools include brayers, carving tools, and ink trays, each serving a specific function in the printmaking process.
Understanding these tools helps beginners navigate the art form more confidently.
Using the right tools in printmaking is crucial for achieving the desired results.
A high-quality brayer ensures even ink distribution, which is key for a clean print.
Proper carving tools enable precise lines and details in the print block.
Additionally, selecting the right paper and ink affects the final outcome significantly.
The right tools not only enhance the quality of prints but also streamline the creative process.
Beginners can explore several printmaking techniques, each requiring specific tools.
Relief printing involves carving a design into a surface and inking the raised areas.
Intaglio techniques, such as etching, require tools for creating intricate lines and textures on metal plates.
Lithography uses limestone or metal plates to transfer designs onto paper.
Screen printing employs stencils and mesh to apply ink.
Each technique offers unique challenges and creative possibilities, making it exciting for beginners to explore.
In fact, starting with the right printmaking tools and understanding various techniques sets the foundation for a successful printmaking journey.
Essential Tools for Relief Printing
Relief printing requires basic tools such as carving tools, linoleum blocks, and brayers.
Transform Your Career Today
Unlock a personalized career strategy that drives real results. Get tailored advice and a roadmap designed just for you.
Start NowCarving tools come in different shapes and sizes for intricate designs in linoleum blocks.
Linoleum blocks are smooth surfaces for carving designs that will be printed.
Brayers are essential for applying ink evenly onto the linoleum blocks before printing.
Tips on Choosing the Right Tools
Consider the type of design you want to create when choosing carving tools.
Beginners should start with a basic set of carving tools with different blade shapes.
Look for linoleum blocks that are easy to carve yet durable for multiple prints.
Choose a brayer that is the appropriate size for the linoleum block you are using.
Visualizing the Tools
Images of carving tools will help beginners understand the different blade shapes available.
Pictures of linoleum blocks can show beginners the smooth surface for carving designs.
Visual examples of brayers in action can demonstrate how ink is applied evenly.
By understanding the essential tools for relief printing, beginners can start their printmaking journey with confidence.
These tools are the building blocks for creating beautiful prints, and choosing the right ones is key to successful projects.
Experimenting with different tools and techniques will help beginners hone their skills and develop their unique style in relief printing.
Read: Character Design Workshops: Benefits and Opportunities
Recommended Materials for Intaglio Printing
Intaglio printing, an intricate form of printmaking, requires specific tools to achieve precise and detailed results.
Here are the essential materials every beginner should consider.
Tools Needed for Intaglio Printing
To start intaglio printing, you need a few key tools.
First, etching needles are crucial.
These needles help you carve designs into metal plates.
Showcase Your Business Today
Reach thousands of readers actively exploring professional services. Publish your business profile and grow your audience now.
Publish NowChoose various sizes to achieve different line thicknesses.
Second, metal plates‘often copper or zinc‘serve as your canvas.
These plates hold the ink and transfer your design to paper.
Intaglio inks are specially formulated to adhere to the recessed areas of your plate.
They come in various colors and should be thick enough to fill the etched lines.
Different Intaglio Techniques and Tools
Intaglio encompasses several techniques, each requiring specific tools.
For etching, you‘ll use a combination of etching needles and acids to create your design.
Aquatint involves sprinkling resin onto the plate and then etching to achieve tonal variations.
For this, you‘ll need an aquatint box and spray equipment.
Drypoint involves scratching directly onto the plate, so a variety of engraving tools will be necessary.
Each technique relies on a different approach to create textures and effects.
Where to Purchase Affordable Intaglio Tools
Beginners can find affordable intaglio tools through various sources.
Art supply stores often offer starter kits at reasonable prices.
Online retailers like Amazon or specialized art websites provide a range of options.
Consider checking out second-hand art supply shops or local printmaking studios for budget-friendly deals.
Additionally, joining printmaking forums or social media groups can lead to recommendations and second-hand finds.
With these tools and tips, you‘ll be well-equipped to start your intaglio printmaking journey.
Read: Incorporating Cultural Elements in Character Design
Introduction to Screen Printing Supplies
When it comes to starting out in the world of printmaking, one of the most popular and versatile techniques is screen printing.
Screen printing allows beginners to create unique and vibrant designs on various surfaces, making it an excellent choice for those looking to explore their creative side.
To get started with screen printing, you’ll need to have the right supplies on hand.
Below, we’ll outline the essential tools needed for screen printing, including screens, squeegees, and inks.
Essential Screen Printing Supplies
Screens: Screens are the foundation of screen printing.
They come in a variety of mesh counts, which determine the level of detail and opacity in your prints.
Beginners should start with a lower mesh count (around 110-156) for easier printing.
Squeegees are used to push ink through the screen and onto the printing surface.
They come in different shapes and sizes, with the most common being square or round-edged.
For beginners, a medium-sized squeegee is recommended for versatility.
Inks are available in various types, including water-based, discharge, and plastisol.
Water-based inks are beginner-friendly, as they are easy to clean up and do not require special equipment for curing.
They also provide a soft hand feel on textiles.
Different Types of Screens
There are two main types of screens used in screen printing: aluminum screens and wooden screens.
Aluminum screens are durable and long-lasting, making them ideal for high-volume printing.
Wooden screens, on the other hand, are more affordable and suitable for beginners who are just starting out.
Pros and Cons
Aluminum screens are sturdy and provide consistent results, but they can be expensive.
Wooden screens are budget-friendly and easy to work with, but they may warp over time.
Recommendations for Beginner-Friendly Kits
For beginners looking to dive into screen printing, investing in a starter kit is a great option.
These kits typically include all the essential supplies needed to get started, making it easy for beginners to jump right into the process without having to source individual items.
Some recommended beginner-friendly screen printing kits include:
- Speedball Intermediate Screen Printing Kit: This kit includes a screen, squeegee, inks, and emulsion, making it a comprehensive option for beginners looking to experiment with screen printing.
- Jacquard Screen Printing Kit: This kit includes everything you need to create custom prints, including screens, inks, and photo emulsion.
It’s a beginner-friendly option that provides quality results. - DHgate DIY Screen Printing Kit: This budget-friendly kit is perfect for beginners who want to try their hand at screen printing without breaking the bank.
It comes with all the essential supplies to get started.
By investing in the right screen printing supplies and kits, beginners can embark on their printmaking journey with confidence and creativity.
Showcase Your Business Today
Reach thousands of readers actively exploring professional services. Publish your business profile and grow your audience now.
Publish NowWith the right tools in hand, the possibilities are endless for creating unique and personalized prints that reflect your artistic vision.
Read: How to Start a Career in Printmaking
Tools for Lithography
Lithography is a unique printmaking technique that requires specific tools to achieve its distinctive results.
For beginners, understanding and using the right tools is crucial.
Litho Stones
Litho stones are essential for lithography.
These stones, usually made from limestone, provide a surface for drawing.
They are ground and polished to ensure a smooth, even texture.
Litho stones absorb and release grease and water in a way that creates clear prints.
Selecting a high-quality litho stone is important for achieving detailed images.
Litho Pencils
Litho pencils are used to draw directly onto the litho stone.
These pencils contain a special grease-based material that interacts with the stone‘s surface.
Unlike regular pencils, litho pencils are designed to create images that will hold ink.
They are available in various hardness levels, allowing for different drawing effects and textures.
Litho Presses
A litho press is used to transfer the image from the litho stone onto paper.
The press applies consistent pressure, ensuring that the inked image transfers cleanly and evenly.
Litho presses come in various sizes, and selecting one depends on the scale of your printmaking projects.
Properly maintaining the press is crucial for achieving high-quality prints.
Importance of Specialized Tools
Using specialized tools for lithography ensures that your images transfer accurately and with high quality.
Litho stones, pencils, and presses are designed to work together in a way that regular printmaking tools cannot.
They allow for detailed and precise prints, making them indispensable for successful lithography.
Resources for Beginners
To learn more about lithography tools and techniques, several resources are available.
Books on printmaking often include chapters on lithography.
Online tutorials and workshops can provide practical guidance.
oining printmaking communities can also offer support and advice.
Exploring these resources will help beginners master lithography tools and enhance their printmaking skills.
Read: Learning from the Masters: Iconic Character Designers
Specialized Tools for Monoprinting and Monotype
Monoprinting and monotype techniques are distinct in printmaking, requiring specific tools to achieve their unique effects.
Both processes produce one-of-a-kind prints, offering rich opportunities for artistic experimentation.
Here‘s a guide to the essential tools for beginners and notable artists who have embraced these techniques.
Unique Tools for Monoprinting and Monotype
Monoprinting involves creating a single, unique print from a reprintable plate, while monotype printing involves creating a single image on a smooth surface.
For these methods, artists use tools like brayers, brushes, and stencils.
These tools enable artists to apply ink in varied ways, creating textured, intricate, and expressive prints.
Using Brayers, Brushes, and Stencils
A brayer is a small roller used to evenly spread ink on a plate.
For monoprinting, beginners should use a brayer to apply ink thinly and evenly.
This tool helps control the ink‘s texture, allowing for smooth or textured prints depending on the amount of ink used.
Brushes are versatile tools for applying ink in different ways.
By using brushes, beginners can experiment with various textures and effects, from delicate lines to bold strokes.
Brushes allow for greater control and creativity in designing your print.
Stencils add another layer of creativity.
They enable artists to create patterns and shapes by blocking out areas of ink.
Showcase Your Business Today
Reach thousands of readers actively exploring professional services. Publish your business profile and grow your audience now.
Publish NowBeginners can use stencils to experiment with geometric patterns or detailed designs, adding complexity and depth to their prints.
Famous Artists Who Embraced Monoprinting
Notable artists who have made significant contributions to monoprinting include Pablo Picasso and Edgar Degas.
Picasso experimented with monoprinting techniques, often creating unique, expressive prints that showcased his innovative approach.
Degas also used monoprinting, particularly for his studies of dancers, blending fluid motion with static composition.
Monoprinting and monotype techniques offer limitless creative possibilities.
By mastering the use of brayers, brushes, and stencils, beginners can explore this dynamic printmaking process and create stunning, one-of-a-kind artworks.
Safety Precautions for Using Printmaking Tools
Printmaking tools, while essential, come with risks.
Prioritizing safety ensures a productive and injury-free experience.
Emphasize the Importance of Safety
Printmaking tools can be hazardous if not handled properly.
Safety must always be a top priority. Always read the safety instructions for each tool.
Wearing appropriate protective gear, such as gloves and aprons, prevents injuries.
Understand the functions and risks of each tool before use.
Tips for Protecting Yourself from Injuries
Beginner printmakers should be especially cautious.
Use cutting tools with protective guards or handles.
Always cut away from your body to avoid accidental injuries.
When working with sharp tools, such as knives or chisels, ensure your work surface is stable.
Keep your fingers away from the cutting path.
Regularly sharpen your tools to reduce the force needed for cutting.
Proper Cleaning and Storage of Tools
Proper cleaning and storage extend the life of printmaking tools.
After use, clean tools thoroughly to remove ink or residue.
For metal tools, dry them completely to prevent rust.
Store tools in a dry, designated area to avoid damage.
Use protective covers for blades and sharp edges.
Regularly inspect tools for wear and tear, replacing any damaged items promptly.
By following these safety precautions, beginners can enjoy printmaking while minimizing risks.
Always prioritize safety, use tools correctly, and maintain them well.
Uncover the Details: Case Study: Designing for Art Galleries
Budget-Friendly Alternatives for Printmaking Tools
Printmaking can seem expensive, but budget-friendly alternatives make it accessible for beginners.
Here‘s how you can start without a hefty investment.
Affordable Alternatives to Expensive Printmaking Tools
Instead of splurging on costly printmaking tools, consider affordable alternatives.
For instance, use inexpensive brayers and rollers from craft stores instead of high-end printmaking rollers.
Simple acrylic paints can substitute for specialized inks.
For cutting, a basic craft knife or utility blade works well for linoleum blocks.
Many beginners find that household items can effectively replace expensive tools.
DIY Solutions for Creating Tools at Home
Crafting your own tools at home can be both fun and economical.
Create a DIY brayer by repurposing a rolling pin or a small paint roller.
A makeshift baren, used to press the paper onto the inked block, can be made from a small, smooth, round object covered with a soft cloth.
For carving, use a linoleum cutter or even a serrated kitchen knife if you‘re starting with basic linoleum.
Printmaking paper doesn‘t have to be expensive; try using any smooth, heavyweight paper you already have at home.
Encouraging Experimentation with Different Tools and Techniques
Experimentation is key to finding what works best for you.
Showcase Your Business Today
Reach thousands of readers actively exploring professional services. Publish your business profile and grow your audience now.
Publish NowTry various DIY tools and affordable alternatives to discover their effectiveness.
Don‘t hesitate to explore different techniques with these budget-friendly options.
Each tool will offer a unique result, so embrace the trial and error process.
The goal is to understand the principles of printmaking without the need for costly equipment.
With these budget-friendly tips, you can start printmaking without a significant financial outlay.
Experiment, create, and enjoy the process of making art with accessible tools.
Discover More: Typography in Print vs. Digital Media
Conclusion
In this blog post, we explored the essential printmaking tools for beginners. W
We discussed the importance of having a solid foundation for starting your printmaking journey.
Key tools like brayers, carving tools, and printmaking inks play crucial roles in creating quality prints.
We also highlighted the significance of using a suitable press and the benefits of different types of paper.
Trying out various techniques and tools helps you discover what suits your style best.
Experimenting with linocut, woodcut, or monotype methods can open new creative avenues.
Each tool and technique offers unique possibilities for expression, allowing you to refine your artistic voice.
We encourage you to explore and test different printmaking tools.
Embrace the process of learning and experimenting to find what resonates with you.
Your personal style will evolve as you gain experience with each new tool and technique.
Please feel free to share your experiences or ask questions in the comments section.
Engaging with fellow printmakers can provide valuable insights and foster a supportive community.
Your feedback is vital for enhancing our discussions and helping others on their printmaking journey.
Remember, printmaking is both a craft and an art form.
The tools you choose and how you use them shape your creative output.
Enjoy the exploration, and happy printmaking!
[E-Books for Sale]
The Big Book of 500 High-Paying Jobs in America: Unlock Your Earning Potential
$19.99 • 500 High-Paying Jobs • 330 pages
Explore 500 high-paying jobs in America and learn how to boost your career, earn more, and achieve success!
See All 500 High-Paying Jobs of this E-Book
1001 Professions Without a Degree: High-Paying American Jobs You Can Start Now
$19.99 • 1001 Professions Without a Degree • 174 pages
Discover 1001 high-paying jobs without a degree! Unlock career tips, skills, and success strategies for just $19.99!