Introduction
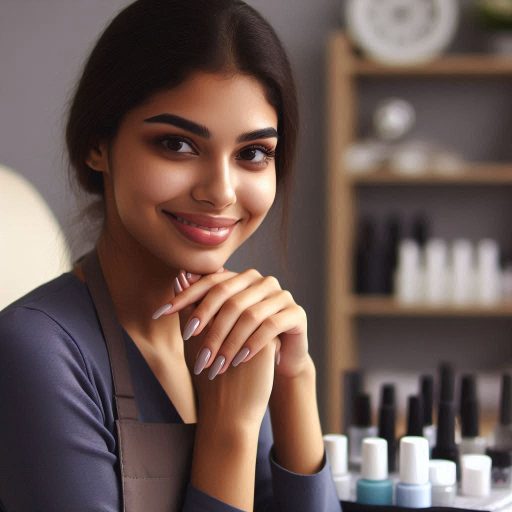
Nail art plays a vital role in the beauty industry, allowing professionals to showcase their creativity and skills.
Various nail art techniques enhance beauty services offered by professionals, attracting a diverse clientele.
In this blog post, we will focus on top nail art techniques that professional technicians can utilize to elevate their services.
Creating intricate designs using fine brushes allows technicians to personalize nail art for clients.
Adding embellishments like crystals and charms provides a unique and eye-catching dimension to nail designs.
Marbling involves blending different nail polish colors to create a mesmerizing and abstract design on nails.
Blending two or more complementary colors seamlessly creates a smooth and gradient effect on nails.
Using nail art stamps helps technicians to achieve intricate patterns and designs with precision and ease.
By using magnets, professionals can create stunning designs with a unique 3D effect on nails.
Mastering these nail art techniques will enable professional technicians to offer diverse and innovative nail art services to their clients, setting them apart in the competitive beauty industry.
Water marbling technique
How to create intricate designs using water marbling
Water marbling is a technique that involves creating intricate designs on nails by floating nail polish on water.
To create designs, you will need a base coat, a cup of room temperature water, toothpicks, and nail polish in various colors.
Start by applying a base coat to protect your nails.
Then, choose your desired nail polish colors and drop them onto the water’s surface.
Use a toothpick to create a design by gently swirling the polish together.
Next, dip your finger into the water, allowing the design to stick to your nail.
Once dry, clean up any excess polish around your cuticles with a cotton swab dipped in nail polish remover.
Finish with a top coat for a glossy finish.
Tips for mastering this technique
- Ensure the water is room temperature to prevent the polish from drying too quickly
- Use high-quality nail polish for better results
- Practice on fake nails or swatch sticks before trying on your own nails
- Experiment with different color combinations to create unique designs
Examples of popular water marbling designs
- Floral patterns
- Geometric shapes
- Marble effects
- Ombre gradients
- Abstract swirls
Read: Nail Technician Career Path: Steps to Success
Stamping Technique
Stamping nail art is a popular technique that allows professional technicians to create intricate designs with ease.
Transform Your Career Today
Unlock a personalized career strategy that drives real results. Get tailored advice and a roadmap designed just for you.
Start NowHere is an overview of the tools and materials needed for successful stamping:
Overview of Stamping Tools and Materials Needed
- Stamping plate
- Stamping polish
- Scraper
- Stamping tool
- Nail polish remover
Now, let’s dive into a step-by-step guide on how to achieve flawless stamped designs:
Step-by-Step Guide on How to Achieve Flawless Stamped Designs
- Start by applying a base coat to your nails and allow it to dry completely.
- Select a design on the stamping plate and apply a generous amount of stamping polish over it.
- Use the scraper to remove the excess polish and quickly pick up the design with the stamping tool.
- Press the stamping tool onto your nail in a rolling motion to transfer the design.
- Clean up any excess polish around your nails using a brush dipped in nail polish remover.
- Finish with a layer of top coat to seal in your design and prolong its wear.
Inspiration for Unique Stamping Designs
Lastly, to spark your creativity, here are some ideas for unique stamping designs you can try:
- Geometric patterns
- Floral motifs
- Abstract designs
- Animal prints
- Holiday themes
- Celestial-inspired patterns
Experiment with different color combinations, textures, and layering techniques to create one-of-a-kind stamped nail art that will impress your clients and elevate your nail technician skills.
Read: How to Offer Exceptional Customer Service in Nail Care
Gradient technique
Creating seamless gradient nail art involves blending colors to create a smooth transition from one shade to another.
How to create seamless gradient nail art
- Start by applying a base coat and letting it dry completely.
- Choose two or more nail polish colors that complement each other.
- Apply the lightest color as the base and let it dry.
- Take a makeup sponge and apply lines of the chosen colors on it.
- Lightly dab the sponge onto your nail in a downward motion.
- Repeat the process to build up the intensity of the colors.
- Finish with a top coat to seal the design and add shine.
Tips for blending colors and creating ombre effects
- Make sure the colors you choose have a similar texture and finish.
- Blend the colors while they are still wet to achieve a seamless look.
- Use a light hand when dabbing the sponge to avoid smudging the colors.
- Practice on a piece of paper or a nail wheel to perfect your technique.
Ideas for incorporating gradients into nail designs
- Create a rainbow gradient using a different color on each nail.
- Add glitter or metallic accents to enhance the gradient effect.
- Try a monochromatic gradient with varying shades of the same color.
- Use a sponge to create a cloud-like effect with pastel colors.
- Combine gradients with other nail art techniques like stamping or freehand designs.
Read: Creating Eye-Catching Nail Art for Special Occasions

3D Nail Art Technique
Creating 3D nail art designs can take your nail technician skills to the next level.
This technique involves adding dimension and depth to your nail art creations, making them stand out from the rest.
Here’s a guide on how to master the art of creating 3D nail designs:
Introduction to 3D Nail Art Supplies and Materials
- Start by gathering your supplies: nail tips, acrylic powders, nail glue, nail drills, sculpting brushes, and a variety of decorations like rhinestones, pearls, and studs.
- Make sure to have a clear acrylic powder and liquid set, as well as colored powders to create intricate designs.
- Invest in a good quality nail drill with different drill bits to help you create detailed 3D designs.
- You can also use pre-made 3D nail art decorations like flowers, bows, and charms to enhance your designs.
Step-by-Step Instructions on How to Create 3D Nail Art Designs
- Start with prepping the natural nails or nail tips by shaping, buffing, and applying a base coat.
- Apply a thin layer of clear acrylic to the nail surface as a base for your 3D design.
- Using a sculpting brush, dip it into the acrylic powder, then the liquid, and sculpt the design on the nail surface.
- You can create various shapes and designs like flowers, bows, hearts, or any other intricate patterns using this technique.
- Allow the acrylic to dry and harden before adding more layers or embellishments to your design.
- Once your 3D design is complete, seal it with a layer of clear acrylic to protect and secure the design.
- Finish off with a top coat to add shine and longevity to your 3D nail art design.
Examples of Intricate 3D Nail Art Creations
Here are some stunning 3D nail art designs that you can use as inspiration for your own creations:
- 3D floral designs: Create beautiful roses, daisies, or orchids using acrylic powders and sculpting techniques.
- 3D embellishments: Add rhinestones, pearls, studs, and other decorations to your 3D designs for a glamorous look.
- 3D character designs: Sculpt cute animals, cartoon characters, or other figures on the nail surface for a playful touch.
- 3D geometric designs: Experiment with shapes and lines to create geometric patterns and abstract designs.
- 3D textured designs: Use different techniques like embossing or layering to add texture to your 3D nail art creations.
With practice and creativity, you can master the art of 3D nail designs and impress your clients with your unique and intricate creations.
Remember to experiment with different techniques and materials to push your boundaries and create one-of-a-kind nail art designs.
Read: Navigating the Busy Season as a Nail Technician
You Might Also Like: Effective Time Management for Busy Loan Officers
Negative Space Technique
Negative space nail art involves leaving parts of the nail unpainted to create a design.
This technique has gained popularity in recent years due to its modern and chic appeal.
Explanation of Negative Space Nail Art
Negative space nail art is a technique where the natural color of the nail is incorporated into the design.
This creates visually striking patterns that stand out on the nail.
Tips for Creating Negative Space Designs
- Use tape or stickers to create clean lines and geometric shapes.
- Experiment with different color combinations to make the design pop.
- Keep the design simple and minimalist to highlight the negative space.
- Practice proper nail prep to ensure the negative space stands out.
- Use a small brush for precision when painting the design.
Examples of Minimalist Negative Space Nail Art Ideas
- Half Moon Design: Leave the half-moon at the base of the nail unpainted for a chic look.
- Striped Negative Space: Paint thin stripes or lines on the nail, leaving negative space in between.
- French Tip with Negative Space: Create a modern twist on the classic French tip design by incorporating negative space.
- Cuticle Negative Space: Leave negative space near the cuticle area for an edgy and unique design.
- Geometric Negative Space: Experiment with geometric shapes like triangles, squares, or diamonds for a modern look.
Overall, negative space nail art is a versatile technique that allows for endless creativity and innovation.
Transform Your Career Today
Unlock a personalized career strategy that drives real results. Get tailored advice and a roadmap designed just for you.
Start NowBy following these tips and trying out different designs, professional nail technicians can elevate their nail art game and impress their clients with stunning negative space creations.
Hand-painted nail art technique
Hand-painted nail art is a versatile and creative technique that allows nail technicians to showcase their artistic skills.
Here is a detailed overview of essential tools, a tutorial on creating designs, and inspiration for artistic motifs.
Overview of essential tools for hand-painted nail art
- Fine detail nail art brushes in various sizes
- Acrylic paints or nail art paints in a wide range of colors
- Nail art palette for mixing and blending colors
- Nail polish remover and cotton pads for corrections
- Top coat or gel top coat for sealing the design
Tutorial on creating hand-painted nail art designs
To create hand-painted nail art designs, start by prepping the nails with a base coat and desired nail polish color.
Follow these steps:
- Choose a design inspiration or create your own sketch
- Use a fine detail nail art brush to paint the design on the nails
- Allow the design to dry completely before adding a top coat
- Clean up any mistakes with nail polish remover and a clean brush
- Finish with a top coat or gel top coat for a long-lasting finish
Inspiration for artistic hand-painted nail art motifs
Looking for inspiration for your hand-painted nail art designs?
Here are some artistic motifs to consider:
- Watercolor florals
- Geometric patterns
- Abstract designs
- Marble effects
- Gradient and ombre techniques
Experiment with different colors, shapes, and styles to create unique hand-painted nail art designs that showcase your creativity and skills as a professional nail technician.
Have fun and let your imagination run wild!
Delve into the Subject: Insurance Agent’s Guide to Client Retention
Conclusion
We have explored various nail art techniques that professional technicians can use to enhance their skills and creativity.
Whether it’s ombre, marbling, or 3D designs, each technique offers a unique way to express artistry on nails.
I encourage all nail technicians to experiment with new techniques, practice consistently, and master their craft.
Remember, the beauty industry is constantly evolving, and there are endless possibilities when it comes to nail art.
By staying inspired, creative, and dedicated, professional nail technicians can continue to push boundaries and delight their clients with stunning nail designs.
[E-Books for Sale]
The Big Book of 500 High-Paying Jobs in America: Unlock Your Earning Potential
$19.99 • 500 High-Paying Jobs • 330 pages
Explore 500 high-paying jobs in America and learn how to boost your career, earn more, and achieve success!
See All 500 High-Paying Jobs of this E-Book
1001 Professions Without a Degree: High-Paying American Jobs You Can Start Now
$19.99 • 1001 Professions Without a Degree • 174 pages
Discover 1001 high-paying jobs without a degree! Unlock career tips, skills, and success strategies for just $19.99!