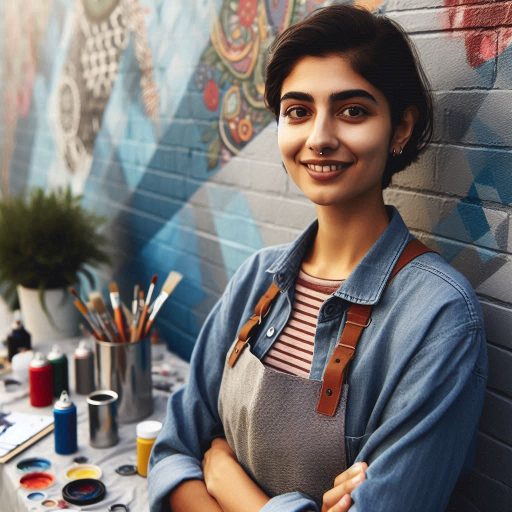
Introduction
Creating stunning glass sculptures captivates artists and enthusiasts alike.
Glass art combines skill, creativity, and science, resulting in breathtaking pieces.
The beauty of glass sculptures lies in their intricate designs and vibrant colors.
Each piece reflects light uniquely, enhancing its visual appeal.
Artists often experiment with different techniques, pushing boundaries and exploring new forms.
The popularity of glass art has surged in recent years.
Galleries and exhibitions showcase talented glass artists, drawing significant attention.
Collectors seek out these unique creations, appreciating their craftsmanship and artistic value.
The versatility of glass allows artists to express their ideas and emotions vividly.
From delicate floral shapes to bold abstract forms, the possibilities are endless.
Glass sculptures can transform spaces, adding elegance and sophistication.
Homeowners often incorporate these pieces into their d‘cor, making striking focal points.
Public installations also feature glass art, inviting admiration from passersby.
As glass art continues to evolve, it inspires new generations of artists to explore its potential.
In this blog, we will delve into the process of creating stunning glass sculptures.
We‘ll explore techniques, tools, and tips that can help aspiring artists bring their visions to life.
Whether you’re a beginner or an experienced artist, this guide will provide valuable insights into the captivating world of glass sculpture creation.
Join us on this creative journey and discover the magic of glass art!
Choosing the Right Type of Glass
When creating stunning glass sculptures, selecting the right type of glass is crucial.
Different types of glass offer unique qualities, influencing your final piece.
Transform Your Career Today
Unlock a personalized career strategy that drives real results. Get tailored advice and a roadmap designed just for you.
Start NowTypes of Glass Used in Sculpture
- Borosilicate Glass: This glass is durable and resistant to thermal shock. Artists often use it for intricate designs.
- Soda-Lime Glass: Commonly used for everyday items, this glass is affordable and easy to work with.
- Lead Glass (Crystal): Known for its brilliance, this glass has a high refractive index, perfect for elegant sculptures.
- Fused Glass: This glass combines multiple pieces through heat, creating vibrant colors and patterns. It’s great for artistic expressions.
- Cast Glass: Artists pour molten glass into molds. This method allows for complex shapes and heavy sculptures.
Characteristics and Qualities
- Borosilicate Glass: High strength, low expansion, and good thermal resistance make it ideal for detailed work.
- Soda-Lime Glass: Easy to shape and affordable, but less durable than other types.
- Lead Glass: Offers exceptional clarity and weight but is more fragile and requires careful handling.
- Fused Glass: Versatile and colorful, perfect for layering techniques and decorative pieces.
- Cast Glass: Allows for substantial forms and textures, but requires longer cooling times.
Recommendations for Sculpting Techniques
- For Detailed Work: Use borosilicate glass for its durability and thermal properties.
- For Budget-Friendly Projects: Choose soda-lime glass, which is cost-effective and accessible.
- For Elegant Designs: Opt for lead glass, as it enhances clarity and brilliance.
- For Colorful Expressions: Fused glass is your best choice, allowing creativity in colors and patterns.
- For Large Sculptures: Consider cast glass, which can create impressive and intricate designs.
By understanding these glass types and their characteristics, you can elevate your glass sculpting to new heights.
Choose wisely to create stunning, memorable pieces.
Read: Careers in Glass Art and Design
Tools and Materials Needed
Essential tools and materials required for creating glass sculptures
Creating stunning glass sculptures requires specific tools and materials to achieve the desired results.
Here is a list of essential items needed for this art form:
Tools
- Glass Cutter: Used to cut and shape the glass into desired forms.
- Heat Source: A kiln or torch to melt and fuse the glass together.
- Pliers: Helps in breaking and shaping the glass with precision.
- Grinder: Used for smoothing out rough edges and surfaces of the glass.
- Clamps: Hold pieces of glass together while they are being fused.
- Protective Gear: Safety goggles, gloves, and apron for personal protection.
Materials
- Glass Sheets: Different colors and textures for creating unique designs.
- Glass Frit: Small granules of colored glass used for decoration.
- Glass Rods: Thin rods of glass for adding intricate details to sculptures.
- Adhesive: Specialized glass glue to attach glass pieces together.
- Release Agents: Prevent glass from sticking to molds or surfaces.
- Polishing Compound: To give the finished sculpture a beautiful shine.
Purpose and function of each tool and material
Each tool and material plays a crucial role in the glass sculpting process.
The glass cutter allows artists to shape the glass precisely, while the heat source is essential for fusing the pieces together.
Pliers provide control and accuracy when breaking and forming glass, and the grinder ensures smooth and polished edges for a professional finish.
Clamps hold the glass securely in place during the fusing process, while protective gear safeguards the artist from potential hazards.
Where to purchase quality tools and materials
When it comes to purchasing quality tools and materials for creating glass sculptures, there are several options available.
Art supply stores, online retailers, and specialty glass shops are great places to find a wide selection of glass sculpting supplies.
It’s essential to invest in high-quality tools and materials to achieve the best results in your glass sculpting projects.
Read: Financial Tips for Aspiring Mural Artists
Safety Precautions
When it comes to creating stunning glass sculptures, safety should always be a top priority.
Working with glass can be dangerous if proper precautions are not taken.
Here are some important safety tips to keep in mind:
Importance of safety
Always make sure to stress the importance of working safely with glass to anyone attempting to create glass sculptures.
It is crucial to follow safety guidelines to avoid accidents and injuries.
Protect yourself from cuts and burns
Glass edges can be extremely sharp and can cause cuts if not handled carefully.
Showcase Your Business Today
Reach thousands of readers actively exploring professional services. Publish your business profile and grow your audience now.
Publish NowAlways wear cut-resistant gloves to protect your hands from getting injured while working with glass.
Additionally, be cautious of molten glass to prevent burns.
Use protective gear
It is highly recommended to wear protective gear such as safety goggles and gloves when working with glass.
Safety goggles will protect your eyes from glass particles or splashes, while gloves will provide a barrier between your skin and sharp glass edges.
By following these safety precautions, you can create stunning glass sculptures while minimizing the risk of accidents or injuries.
Remember, safety should always come first when working with glass to ensure a safe and enjoyable creative process.
Read: How to Price Your Glass Art Pieces
Designing and Planning
The process of designing a glass sculpture
Designing a glass sculpture begins with a clear vision.
Artists must first conceptualize their ideas, considering themes, shapes, and colors.
Take time to brainstorm various concepts.
Allow creativity to flow without limitations during this phase.
Importance of planning and sketching out ideas
Next, planning plays a crucial role in the sculpting process.
A well-thought-out plan helps ensure successful execution.
Create sketches to visualize your ideas.
Draw multiple perspectives to understand how the sculpture will look from different angles.
Consider the materials you‘ll use for your sculpture.
Each type of glass offers unique qualities, such as color and transparency.
Choose materials that align with your design vision.
This choice will significantly affect the final appearance of the piece.
As you sketch, think about the dimensions and proportions of your sculpture.
Use a ruler or measuring tools to maintain accuracy.
This attention to detail ensures that the finished piece matches your original vision.
Tips on how to visualize the final piece before starting the sculpting process
Visualizing the final piece before starting is essential.
Picture the sculpture in your mind, including its colors and textures.
This mental image can guide your decisions during the sculpting process.
Additionally, create a small-scale model or maquette.
This three-dimensional representation helps you assess the design’s feasibility.
It allows for adjustments before committing to the larger piece.
Finally, seek feedback from peers or mentors.
Fresh perspectives can provide valuable insights and improve your design.
Use this input to refine your concept further.
In a nutshell, designing and planning are vital steps in creating stunning glass sculptures.
A clear vision, detailed sketches, and careful consideration of materials will lead to a successful sculpting experience.
Read: Mural Art Education: Best Schools and Programs in USA
Techniques for Shaping Glass
Creating stunning glass sculptures involves mastering various techniques for shaping glass into intricate designs.
Below are five different methods for shaping glass, along with step-by-step instructions for each technique:
Blowing
Blowing glass is a traditional technique that involves inflating molten glass into a bubble using a blowpipe.
Here’s how to achieve this:
- Gather molten glass on the end of a blowpipe.
- Blow gently into the blowpipe to inflate the glass into a bubble.
- Shape the glass using different tools such as jacks and shears.
- Control the temperature of the glass to prevent it from cracking.
Tips for achieving specific shapes with blowing technique
- To create a round shape, rotate the blowpipe evenly while blowing.
- For elongated shapes, stretch the glass gently while shaping it.
- Experiment with different blowing pressures to achieve unique textures.
Casting
Casting glass involves pouring molten glass into a mold to create a specific shape.
Here’s how to cast glass for your sculpture:
Showcase Your Business Today
Reach thousands of readers actively exploring professional services. Publish your business profile and grow your audience now.
Publish Now- Create a mold of the desired shape using materials like clay or plaster.
- Heat the glass until it reaches molten state.
- Pour the molten glass into the mold and let it cool and solidify.
- Remove the glass sculpture from the mold and polish the surface.
Tips for achieving specific textures with casting technique
- Experiment with different molds to create intricate patterns on the surface.
- Add colored glass powders or frits to the molten glass for a unique look.
- Use textured molds to imprint patterns on the glass sculpture.
Fusing
Fusing glass involves melting pieces of glass together to form a single piece.
Here’s how to fuse glass for your sculpture:
- Arrange glass pieces on a kiln shelf in the desired pattern.
- Heat the kiln to a specific temperature to fuse the glass pieces together.
- Cool the glass slowly to prevent thermal shock.
- Shape the fused glass using cold-working techniques like grinding and polishing.
Tips for achieving specific shapes with fusing technique
- Layer different colors of glass to create depth and dimension in your sculpture.
- Experiment with different heating and cooling cycles for unique textures.
- Use pre-cut glass shapes to create intricate designs in your fused glass sculpture.
By mastering these techniques for shaping glass, you can create stunning sculptures that showcase your creativity and craftsmanship.
Experiment with different methods to discover your unique style in glass art.
Uncover the Details: Top Fashion Design Trends for 2024
Explore Further: The Future of Virtual Reality in Game Design
Adding Color and Texture
Different ways to add color and texture to glass sculptures
There are various methods to incorporate color and texture into glass sculptures.
One popular technique is painting the surface of the glass with specialized glass paints.
Another method is etching, where the glass is treated with acid to create a frosted effect.
Layering different colored glass pieces can also add depth and dimension to the sculpture.
Recommendations
Experiment with different types of paints to find the right one for your desired effect.
When etching, use stencils or tape to create intricate designs on the glass surface.
Consider using a variety of textures, such as smooth and frosted glass, to create contrast.
Examples
- A blue glass sculpture with etched waves that give the illusion of movement.
- A layered glass sculpture with vibrant red and yellow pieces that create a fiery look.
- A painted glass sculpture with metallic accents that catch the light and sparkle.
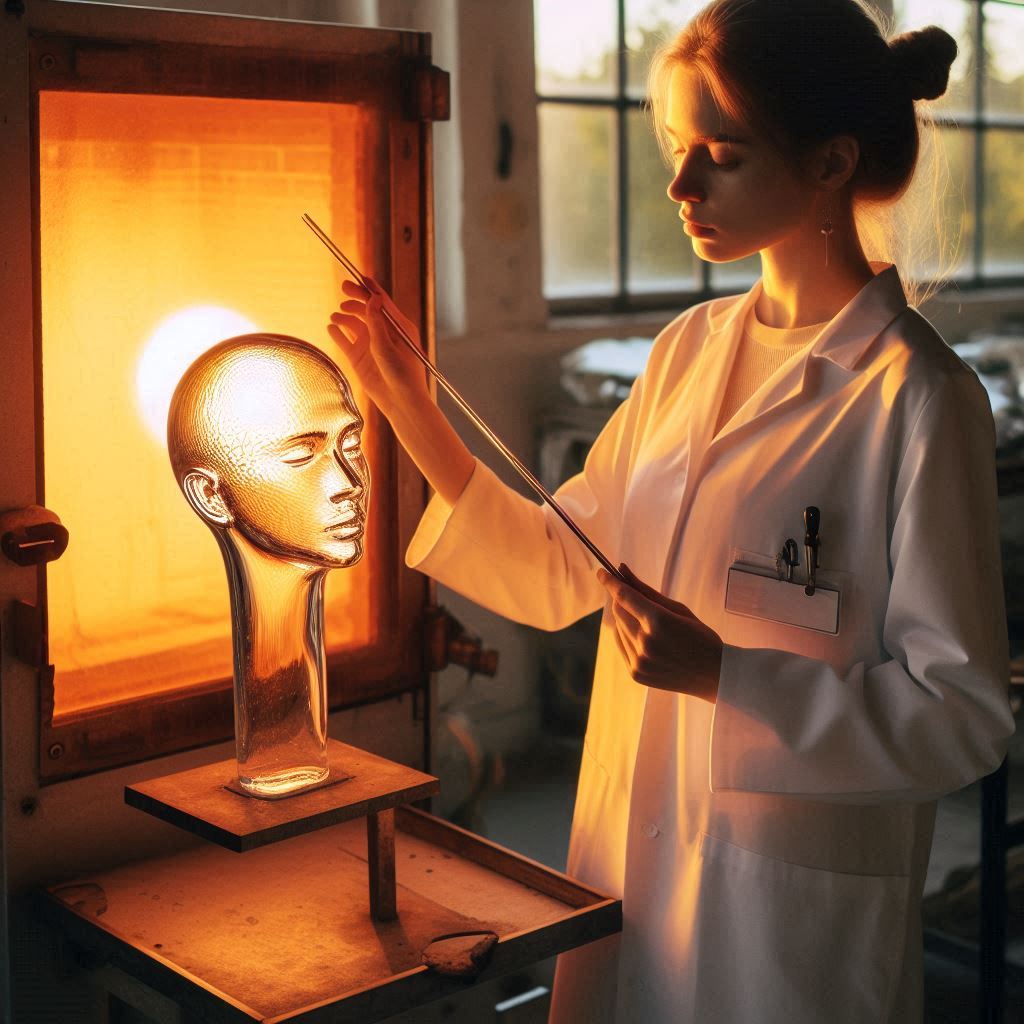
Firing and Finishing
The process of firing the glass sculpture in a kiln
Firing the glass sculpture in a kiln is a crucial step in the creation process.
The kiln helps to heat the glass to its melting point, allowing it to shape and form.
Make sure to follow the manufacturer’s instructions for firing temperatures and times.
Tips on how to achieve the desired level of transparency and shine
- To achieve the desired level of transparency and shine, it’s essential to control the firing process.
- Experiment with different firing schedules to find the perfect combination for your sculpture.
- Keep in mind that over-firing can result in a cloudy or distorted finish.
- Under-firing, on the other hand, may leave your sculpture looking dull or underdeveloped.
Different finishing techniques
When it comes to finishing techniques, there are several options to consider:
- Polishing is a common technique used to smooth out any rough edges on the sculpture.
- Sanding can also be used to achieve a matte finish or to add texture to the surface.
- Consider using a diamond pad for a polished look or a sandblaster for a frosted effect.
- Etching is another technique that involves using acid to create patterns or designs on the glass.
- Be sure to wear protective gear when working with etching chemicals to avoid skin irritation.
- Experiment with different finishing techniques to enhance the overall appearance of your glass sculpture.
Remember that the finishing touches can make all the difference in the final result.
By mastering the firing and finishing processes, you can create stunning glass sculptures that captivate and inspire.
Conclusion
Creating stunning glass sculptures requires patience, precision, and creativity.
Throughout this blog post, we have discussed techniques such as glass blowing, fusing, and casting.
It is important to have a clear vision of your design before you start working with glass.
Remember to always prioritize safety when working with glass, as it can be dangerous.
Creating glass sculptures is a truly unique and rewarding art form that requires dedication.
We encourage all readers to explore their creativity and try their hand at making their own glass art pieces.
With practice and a willingness to learn, you can create stunning glass sculptures that truly reflect your artistic vision.
So, gather your materials, set up your workspace, and let your imagination run wild as you embark on your glass sculpture journey!
[E-Books for Sale]
The Big Book of 500 High-Paying Jobs in America: Unlock Your Earning Potential
$19.99 • 500 High-Paying Jobs • 330 pages
Explore 500 high-paying jobs in America and learn how to boost your career, earn more, and achieve success!
See All 500 High-Paying Jobs of this E-Book
1001 Professions Without a Degree: High-Paying American Jobs You Can Start Now
$19.99 • 1001 Professions Without a Degree • 174 pages
Discover 1001 high-paying jobs without a degree! Unlock career tips, skills, and success strategies for just $19.99!