Introduction
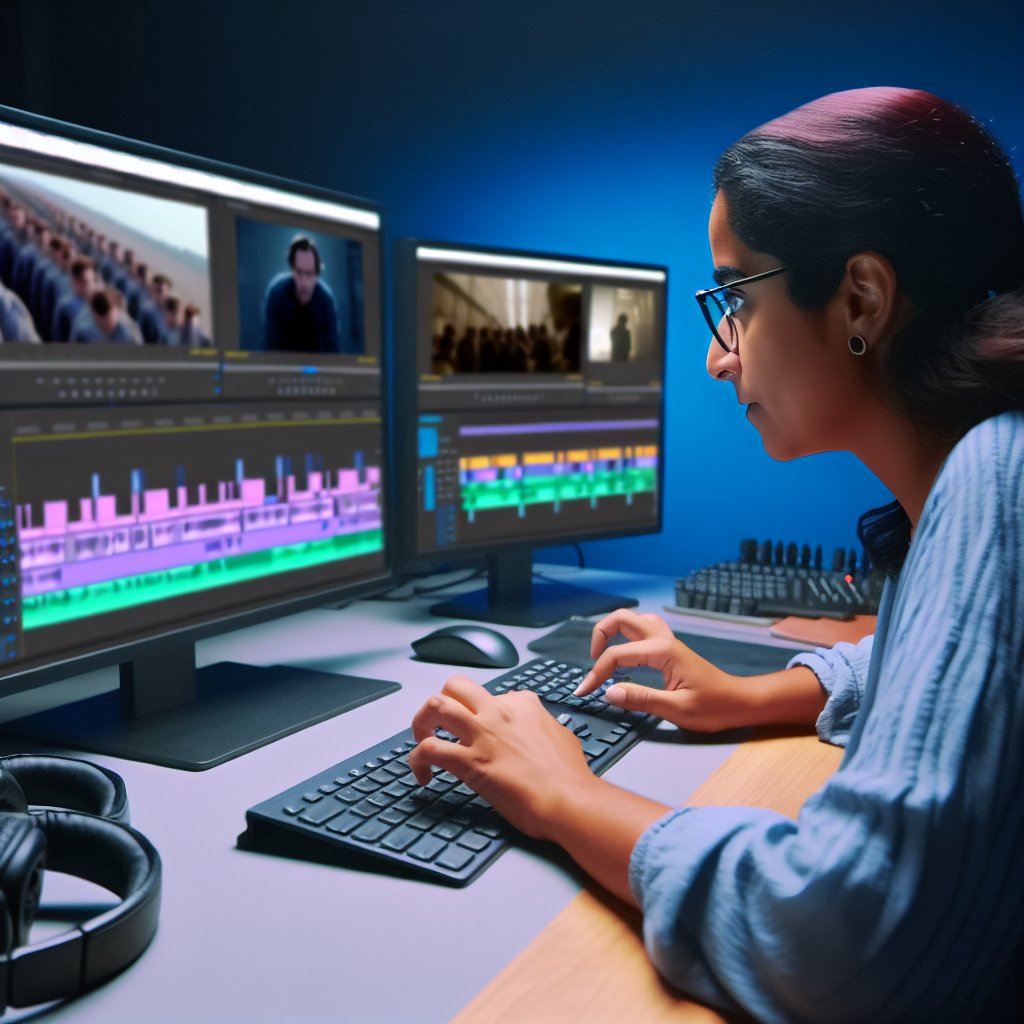
Video editing plays a crucial role in creating professional-quality content.
It transforms raw footage into engaging stories.
Effective editing enhances the visual and auditory appeal of any project.
Viewers often judge a video’s quality based on its editing.
Thus, mastering this skill is essential for any aspiring creator.
Advanced techniques elevate video projects beyond basic cuts and transitions.
Such methods include color grading, motion graphics, and sound design.
Each technique contributes significantly to the overall feel of the final product.
For instance, color grading conveys emotions and sets the mood.
Motion graphics can explain complex concepts clearly and attractively.
Moreover, advanced editing allows for creative storytelling.
A well-edited video captivates audiences and keeps them engaged.
It helps convey messages with clarity and impact.
Viewers connect more deeply with compelling visuals and soundscapes.
Thus, enhancing storytelling through effective video editing is vital.
Using advanced techniques can significantly improve pacing and rhythm.
Proper pacing keeps viewers involved and invested in the narrative.
Techniques such as jump cuts or slow-motion create dynamic scenes.
They reflect different emotional beats and heighten tension when necessary.
Additionally, sound design can significantly enhance the viewing experience.
Transform Your Career Today
Unlock a personalized career strategy that drives real results. Get tailored advice and a roadmap designed just for you.
Start NowLayering sound effects and incorporating background music create a rich audio landscape.
Well-chosen sound elements reinforce visuals and evoke emotion.
The synergy of audio and video elevates the overall impact of a project.
Mastering advanced video editing techniques is essential for producing professional results.
These techniques not only refine visual quality but also enrich storytelling.
As technology evolves, staying current with editing trends can distinguish your work from others.
Invest time in learning these advanced methods to elevate your video projects to new heights.
Understanding the Basics Before Advancing
Before diving into advanced video editing techniques, understanding the basics is crucial.
Mastery of fundamental concepts contributes significantly to your overall editing proficiency.
Let’s explore essential video editing concepts, the importance of mastering these skills, and recommended tools for beginners and intermediates.
Overview of Basic Video Editing Concepts
Successful video editing revolves around a few foundational concepts.
These include:
- Cuts: Cuts are the most basic form of editing. A cut involves moving from one shot to another, enhancing storytelling.
- Transitions: Transitions smoothen the shift between different scenes. Common transitions include fades, wipes, and dissolves.
- Pacing: Pacing refers to the speed at which video sequences unfold. Effective pacing maintains viewer engagement and builds suspense.
- Color Grading: Color grading involves adjusting the colors in a scene. It ensures a consistent tone and enhances the visual appeal.
- Audio Editing: Audio editing includes balancing sound levels, adding effects, and ensuring dialogue clarity. Good audio maintains viewer attention.
These concepts serve as the building blocks for more complex techniques.
Each element interplays with the others, creating a cohesive narrative.
Understanding how to utilize these elements effectively is vital before moving forward.
Importance of Mastering Foundational Skills
Mastering the basics is crucial for various reasons:
- Building Confidence: When you understand the fundamentals, you gain confidence in your abilities. This confidence encourages experimentation with advanced techniques.
- Developing a Unique Style: Basic skills provide a solid framework for developing your unique editing style. You can build upon them to create signature moves.
- Avoiding Frustration: Advanced techniques can be confusing without a solid understanding of the basics. Mastering fundamental concepts reduces frustration.
- Efficient Workflow: An understanding of basic concepts contributes to a more efficient editing workflow. This efficiency allows you to focus on creativity instead of technical issues.
- Enhanced Communication: If you collaborate with other professionals, mastering basics enhances communication. You can discuss ideas clearly and effectively.
When you approach video editing with a strong foundation, your skills will shine.
Those advanced techniques that follow will feel more intuitive and less daunting.
Recommended Software Tools for Beginners and Intermediates
Selecting the right software is essential for learning video editing.
Here’s a list of effective tools suited for beginners and intermediates:
Transform Your Career Today
Unlock a personalized career strategy that drives real results. Get tailored advice and a roadmap designed just for you.
Start Now- Adobe Premiere Pro: A professional-grade editing tool with advanced features. It also offers a user-friendly interface suitable for beginners.
- Final Cut Pro: Ideal for Mac users, Final Cut Pro combines powerful editing capabilities with a customizable workspace.
- DaVinci Resolve: This software offers robust editing features alongside advanced color grading. It has a free version, making it accessible for beginners.
- HitFilm Express: A free option with many features, including visual effects. It’s great for beginners who want to explore various editing styles.
- iMovie: Perfect for Mac and iOS users, iMovie’s simplicity makes it ideal for those just starting. It offers basic editing tools that can help users learn the craft.
- Camtasia: Excellent for screen recording and basic video editing. Camtasia is user-friendly and provides options for beginners.
Choosing the right software impacts your learning experience.
Experimenting with different tools can help you find your ideal editing environment.
Each software comes with its learning curve, but starting with the right tools ensures a smooth transition into more advanced techniques.
As you work through the foundational concepts and become comfortable with the software, your skills will naturally progress.
The tools you choose will aid your understanding of fundamental editing techniques.
When you feel ready, you will be well-prepared to explore advanced video editing methods and discover your creative vision.
Building a solid foundation is essential for success in video editing.
Understanding basic concepts, mastering essential skills, and selecting appropriate tools will set you on the path to becoming a proficient video editor.
This journey opens doors to advanced techniques that can elevate your work.
Embrace the basics, and you will create professional results in no time.
Understanding Color Grading
Color grading involves adjusting the colors and tones in a video.
This process enhances the overall visual aesthetics of a film.
It plays a crucial role in storytelling, evoking various emotions.
Through color grading, editors can set the mood for each scene.
The right colors can invoke feelings of sadness, joy, or suspense.
The Impact of Color on Storytelling
Color has a profound impact on audience perception.
Different colors communicate various emotions and themes:
- Red: Often associated with passion, anger, or danger.
- Blue: Conveys calmness, melancholy, or tranquility.
- Green: Represents nature, growth, or envy.
- Yellow: Evokes cheerfulness, warmth, or caution.
- Purple: Suggests luxury, mystery, or spirituality.
Professionally applied color grading can unify a film’s visual language.
This technique helps in creating a cohesive look across scenes.
For instance, darker tones can emphasize despair or danger.
Transform Your Career Today
Unlock a personalized career strategy that drives real results. Get tailored advice and a roadmap designed just for you.
Start NowBrighter shades can reflect innocence or happiness.
Techniques in Color Grading
Several techniques are essential for effective color grading.
Editors often use Look-Up Tables (LUTs) for quick adjustments.
LUTs are pre-defined color profiles that apply specific color changes.
By selecting a LUT, editors can achieve a distinct look rapidly.
However, fine-tuning is often necessary to match the footage.
Color wheels are another fundamental tool in color grading.
These allow for precise adjustments to shadows, midtones, and highlights.
Using color wheels, editors can shift colors to alter the mood.
This method provides greater control and creative flexibility.
Furthermore, software like Adobe Premiere Pro and DaVinci Resolve offers advanced tools.
They provide layers, masks, and correction features for detailed adjustments.
Such software enables professionals to manage every aspect of color.
For example, isolating a single color for dramatic effect can enhance storytelling.
Examples of Transformative Color Grading
Numerous films have demonstrated the power of color grading.
One striking example is the film “Mad Max: Fury Road.”
Its vivid color palette, primarily oranges and blues, creates a surreal atmosphere.
This contrast stimulates excitement and tension throughout the film.
Another renowned example is “The Matrix.”
The film uses a green tint to signify the digital world.
Transform Your Career Today
Unlock a personalized career strategy that drives real results. Get tailored advice and a roadmap designed just for you.
Start NowThis distinctive grading influences how the audience perceives reality.
“Moonlight” also showcases the emotional weight of color grading.
The warm hues convey intimacy and love, while cooler tones signal isolation.
This dynamic use of color significantly contributes to the narrative journey.
Creating Emotional Resonance Through Color
Effective color grading can evoke strong emotional reactions.
By deliberately choosing color schemes, filmmakers can influence their audience’s feelings.
For instance, using desaturated colors can create a sense of nostalgia.
Conversely, vibrant colors can elicit joy or excitement.
To create emotional depth, consider the following:
- Select a dominant color palette to convey a primary emotion.
- Use contrasting colors to highlight conflicts or tensions.
- Apply color adjustments that align with character development.
- Maintain consistency in color grading throughout the narrative.
By focusing on these strategies, filmmakers can enrich their storytelling.
This practice transforms the audience’s viewing experience.
Enhancing Visual Storytelling with Color Grading
Mastering color grading is essential for professional video editing.
This technique enhances visual storytelling and evokes desired emotions.
Using tools like LUTs and color wheels allows for tailored adjustments.
With the right techniques, color grading can elevate a mere video into a cinematic masterpiece.
Understanding and applying these principles leads to professional results.
See Related Content: Case Studies: Successful Brand Strategies in Action
Introduction to VFX and Their Importance
Visual effects (VFX) play a crucial role in modern video production.
They enhance storytelling by creating immersive experiences.
Audiences expect striking visuals, making VFX indispensable.
Transform Your Career Today
Unlock a personalized career strategy that drives real results. Get tailored advice and a roadmap designed just for you.
Start NowToday’s filmmakers rely on a myriad of tools and technologies.
These help to bring their creative visions to life.
VFX can turn ordinary scenes into extraordinary moments.
They allow for the impossible to be achieved on screen.
By integrating VFX, producers can create visual spectacles that captivate viewers.
With the rise of streaming platforms, high-quality VFX is no longer optional; it’s a necessity.
Different Types of Visual Effects
Understanding the various types of visual effects enriches a filmmaker’s toolkit.
Here are the primary categories of VFX used today:
-
Motion Graphics: Enhance storytelling through animated graphics.
They often include text, symbols, and logos that convey vital information.
-
Computer-Generated Imagery (CGI): Enables the creation of visual elements
entirely from computer graphics. CGI can depict anything from creatures to entire worlds
that do not exist in real life.
-
Compositing: Combines multiple elements into a single image. This
technique overlays various visuals, creating plausible environments and integrates
live-action footage with CGI.
Each VFX type serves different purposes.
Motion graphics often accompany titles and transitions, while CGI builds complex scenes.
Compositing allows filmmakers to merge various elements seamlessly.
How to Use Effects Sparingly for Maximum Impact
More isn’t always better when it comes to visual effects.
Overusing VFX can overwhelm the audience.
Here’s how to apply effects judiciously:
-
Prioritize Storytelling: Always ask how a VFX element serves the narrative.
If it does not enhance the story, consider omitting it.
-
Establish a Consistent Style: Use a uniform approach to VFX across a project.
Inconsistency can distract viewers and break immersion.
-
Limit the Color Palette: When adding effects, stick to a cohesive color scheme.
This choice ensures that effects blend naturally within the scenes.
-
Focus on Emotional Resonance: Choose VFX that elicits emotions.
The most impactful effects enhance audience connection rather than detract from it.
-
Test Your Shots: Preview your scenes with and without effects.
Analyze which approach resonates better with your intended audience.
Using effects gently allows them to breathe.
This careful approach can elevate the quality of the final product significantly.
Viewers appreciate subtlety and clever enhancements that support the narrative.
Key Considerations When Implementing VFX
Implementing VFX effectively requires foresight and planning.
Here are some key considerations for better results:
-
Pre-Visualization: Create storyboards or animatics before shooting.
This step helps solidify how VFX will integrate into scenes.
-
Understanding the Technical Aspects: Familiarize yourself with the software
and techniques required. Knowledge about rendering times and formats can save you headaches later.
-
Proper Lighting: Ensure lighting conditions match the intended VFX.
Consistency in lighting enhances realism.
-
Collaborate with VFX Artists: Work closely with professionals.
They can provide insight into what is feasible and how to achieve it.
These considerations will guide your project to a more polished outcome.
Transform Your Career Today
Unlock a personalized career strategy that drives real results. Get tailored advice and a roadmap designed just for you.
Start NowRemember, successfully incorporating VFX requires collaboration and technical understanding.
Best Practices for VFX Integration
Incorporating visual effects into video production transforms mundane projects into captivating narratives.
By understanding different types of VFX, filmmakers can enhance their storytelling effortlessly.
However, remember to use these effects judiciously.
Focus on how they benefit the story rather than overshadowing it.
Ultimately, successful VFX integration leads to professional results.
Here’s a summary of best practices:
-
Start with a clear vision of your story.
-
Choose the right type of effect for your needs.
-
Use effects as a storytelling tool, not just eye candy.
-
Maintain flexibility, allowing for creative adjustments during post-production.
-
Always seek feedback from peers and audiences.
Incorporate these practices into your workflow, and you’ll transform your video projects.
Effective use of VFX will lead to a more engaging and visually appealing product.
Engage, enthrall, and leave your audience wanting more!
Find Out More: Impact of AI on the Future of Audio Engineering
Importance of Sound in Video Production
Sound plays a crucial role in video production.
It enhances the emotional tone of the visual content.
Dialogue, ambience, and music are key components of sound design.
Each of these elements contributes to the viewer’s overall experience.
Here’s a breakdown of their importance:
-
Dialogue: Clear dialogue ensures audiences can follow the story.
Good dialogue enhances character development.
It adds depth to interactions and engages viewers. -
Ambience: Ambient sounds create a sense of realism.
They fill in the gaps between dialogue.
They establish the environment and set the mood for scenes. -
Music: The right music influences emotions.
It can heighten tension or evoke nostalgia.
Properly chosen music enhances storytelling and connects with the audience.
Techniques for Sound Design
Effective sound design requires advanced techniques.
These techniques help create a rich auditory experience.
Here are some essential sound design techniques:
Layering Sounds
Layering involves combining multiple sound elements.
Transform Your Career Today
Unlock a personalized career strategy that drives real results. Get tailored advice and a roadmap designed just for you.
Start NowIt creates a more immersive soundscape.
Here’s how to layer sounds effectively:
-
Identify key sounds: Determine which sounds will drive the scene.
Focus on elements that enhance the narrative. -
Choose complementary sounds: Select sounds that complement each other.
Ensure they fit the mood and tone of the video. -
Adjust levels: Balance the volume of each layer.
Ensure that no single sound overwhelms the others. -
Add effects: Use audio effects like reverb or delay.
Effects add depth and space to the sound.
Using Foley Effects
Foley effects bring realism to video.
They are created by recording sounds in sync with the visuals.
Here’s how to incorporate Foley effectively:
-
Create custom sounds: Use everyday objects to produce unique sounds.
For example, crumpling paper can mimic footsteps. -
Record in a controlled environment: Isolate sounds to avoid background noise.
Use soundproof spaces for the best results. -
Sync with video: Carefully match the sounds with the action.
Precise synchronization enhances realism. -
Edit with precision: Utilize sound editing software for fine-tuning.
Adjust timing and blending for seamless integration.
Tips for Achieving Professional-Sounding Audio
Professional sound can elevate your video projects.
Here are some tips for achieving high-quality audio:
Mixing
Mixing is crucial for balancing audio elements.
Effective mixing can make or break your project.
Follow these steps for successful mixing:
-
Listen critically: Use high-quality headphones or speakers.
Critical listening helps in identifying issues. -
Use equalization: Adjust frequencies to enhance clarity.
Cutting unnecessary frequencies can reduce muddiness. -
Control dynamics: Use compression to manage volume peaks.
Compression ensures consistency in sound levels. -
Utilize panning: Distribute sounds across the stereo field.
Panning adds depth and separation to audio.
Mastering
Mastering is the final step in audio production.
It prepares audio for distribution.
Here’s how to master effectively:
-
Final adjustments: Make subtle changes to improve overall quality.
Focus on overall cohesion and clarity. -
Apply limiting: Use a limiter to prevent distortion.
This ensures audio plays well on various devices. -
Check loudness levels: Measure loudness according to industry standards.
Consistent loudness enhances the listening experience. -
Export in high quality: Choose the right format for distribution.
High-quality audio provides the best results across platforms.
Enhancing Your Video Projects with Sound Design
Sound design enriches video production significantly.
By understanding its importance, you create a compelling experience.
Utilizing advanced sound design techniques and mastering audio enhances professionalism.
Invest time in mastering these skills for impressive results.
Elevate your projects with stunning soundscapes that captivate your audience.
Learn More: How to Stay Updated with Sound Design Trends
The Art of Advanced Transitions
Transitions play a critical role in video editing.
Transform Your Career Today
Unlock a personalized career strategy that drives real results. Get tailored advice and a roadmap designed just for you.
Start NowThey help convey emotions and maintain the flow of a narrative.
While cuts and fades serve their purpose, advanced transitions elevate your editing skills significantly.
This section explores various creative transition techniques that can enhance your videos.
Exploring Creative Transition Techniques
Innovative transitions go beyond simple cuts and fades.
They create dynamic sequences that can captivate an audience.
Some advanced transition techniques include:
- Whip Pans: These create a quick and fluid motion effect. By panning the camera rapidly from one scene to another, the visuals blend seamlessly.
- Match Cuts: This technique links two scenes based on composition. For example, cutting from a spinning wheel of a car to a spinning reel in a factory offers visual continuity.
- Morph Cuts: This transition blends two shots seamlessly. It’s often used in interviews or dialogues, where the subject’s expressions change.
- J-Cuts and L-Cuts: These involve audio transitions. J-cuts introduce audio from the next scene before transitioning, while L-cuts allow the audio from one scene to linger into the next.
- Fade to Black/White: These transitions signal a change in emotion or an ending. They can be very powerful if used sparingly.
Using Whip Pans
Whip pans are exciting and energetic transitions that can inject life into your video.
They work well in action sequences, travel vlogs, or fast-paced edits.
However, their effectiveness relies on the proper execution and timing.
How to Create Whip Pans:
- Start by panning the camera quickly at the end of the first shot.
- Ensure that the second shot begins with a similar panning motion.
- Match the speed of the pan to maintain consistent flow.
- Add motion blur during post-production for added smoothness.
Implementing Match Cuts
Match cuts require careful planning but can create striking visual connections.
They can bring unexpected humor or profundity to your project.
Always consider the thematic connections between scenes.
Steps to Execute Match Cuts:
- Identify the visual element you want to match.
- Ensure both scenes share a similar visual component or shape.
- Cut on action to create a seamless transition.
- Test the pacing to keep your audience engaged.
Mastering Morph Cuts
Morph cuts can enhance narratives by smoothing over dialogue changes.
This technique is incredibly effective in interviews or storytelling.
Achieving a flawless morph cut requires attention to detail.
Creating Effective Morph Cuts:
- Capture continuous action or expressions for a smoother transition.
- Utilize software like Adobe Premiere Pro or Final Cut Pro with morph cut plugins.
- Adjust the timing and frame to maintain continuity.
- Always preview the cut before finalizing it.
Utilizing J-Cuts and L-Cuts
J-cuts and L-cuts offer valuable tools for transitioning between scenes effectively.
They enrich the narrative flow by allowing audio to linger or lead.
Implementing J-Cuts:
- Start with the audio from the next scene before cutting visually.
- Use this technique to build anticipation or set the mood for an upcoming scene.
Implementing L-Cuts:
- Allow the audio from the current scene to extend into the next scene.
- This technique aids in maintaining emotional connections between scenes.
Power of Fade to Black/White
Fade transitions mark emotional highs and lows in your story.
They provide the audience with a moment to absorb what has just happened.
Use these fades judiciously to maximize their impact.
Transform Your Career Today
Unlock a personalized career strategy that drives real results. Get tailored advice and a roadmap designed just for you.
Start NowWhen to Use Fade Transitions:
- At the end of a significant scene to signal closure.
- To transition between different sections in a narrative.
- When shifting from one intense emotion to another.
Practical Tips for Creative Transitions
Utilizing advanced transitions successfully is an art.
Below are practical tips to enhance your transition execution:
- Plan Ahead: Visualize how the scenes will flow. Pre-visualizing helps set up your shots accordingly.
- Test and Adjust: Don’t hesitate to experiment. Adjust timing, pacing, and effects to suit the narrative needs.
- Maintain Consistency: Ensure that your transitions fit the overall aesthetic and tone of your video.
- Limit Overuse: While exciting, overusing transitions can confuse viewers. Less is often more in video editing.
Mastering advanced transitions can greatly enhance your editing skills.
Experiment with various techniques to find your unique style.
By thoughtfully applying these creative methods, your videos will become more engaging and professionally polished.
Learn More: How to Manage Media Relations for Events
Understanding Timing and Pacing in Video Editing
Timing and pacing play vital roles in video editing.
They shape the viewer’s experience significantly.
A well-paced edit can heighten emotional impact.
Conversely, poor pacing can lead to viewer disengagement.
Therefore, mastering timing and pacing is essential for an impactful video.
Effects of Timing and Pacing on Viewer Engagement
The timing of cuts and transitions influences how the audience perceives your content.
Here are some key ways timing and pacing enhance viewer engagement:
- Emotional Resonance: A well-timed cut can intensify feelings. For example, cutting away just before a dramatic reveal can create suspense.
- Rhythm Creation: The rhythm of your editing can mirror the content’s emotional tone. A fast pace can convey excitement, while a slow pace can evoke contemplation.
- Attention Retention: Fast-paced editing can keep attention. However, too rapid a pace might confuse viewers, leading to frustration.
- Narrative Flow: Consistent pacing supports the story’s flow. Mismatched pacing disrupts narrative continuity, causing viewer disengagement.
Techniques for Controlling Rhythm in Editing
Effective editors utilize various techniques for controlling rhythm and pace.
They focus on specific tools and strategies to enhance viewer engagement:
1. Jump Cuts
Jump cuts can create a punchy, fast-paced feel.
Use them to remove unnecessary content seamlessly.
They maintain viewers’ attention while moving the story forward.
Here’s how jump cuts influence rhythm:
- Energy Boost: By cutting away to highlight key moments, you energize the scene.
- Humor Creation: When used with comedic timing, jump cuts can enhance humor effectively.
- Increased Engagement: Shortened segments keep pacing brisk, which raises audience interest.
2. Pacing with Music
Music plays a crucial role in setting the pace.
Transform Your Career Today
Unlock a personalized career strategy that drives real results. Get tailored advice and a roadmap designed just for you.
Start NowThe right soundtrack can drive the editing rhythm significantly.
Here’s how to incorporate music effectively:
- Beat Matching: Align cuts with musical beats. This synchronization creates a natural flow.
- Dynamic Variation: Utilize music’s tempo changes to enhance emotional shifts. Faster sections can speed up the editing pace.
- Sound Cues: Use sound effects to punctuate important moments. This draws attention to specific content within your edit.
3. Visual Rhythm
The arrangement of visual elements contributes to the overall pacing of a video.
Here are strategies to manage visual rhythm:
- Shot Length Variation: Change shot lengths to maintain interest. Varying length can create unexpected dynamics.
- Cross-Cutting: Alternate between simultaneous actions or locations. This technique can create tension and excitement.
- Cinematic Techniques: Use slow motion or fast motion to emphasize specific moments. This variation can enhance emotional weight.
The Importance of Feedback in Refining Timing
Feedback is essential for refining your edits, especially regarding timing.
It provides a fresh perspective.
Here are some effective ways to gather and apply feedback:
- Peer Reviews: Share your work with other editors or creatives. They can provide valuable insights on pacing and engagement.
- Test Screenings: Host informal screening sessions with audiences. Observe their reactions and gather feedback on pacing elements.
- Adjusting Based on Feedback: Be open to revising your edits based on viewer responses. Take constructive criticism seriously to improve your work.
You may find that certain edits feel different after reflecting on viewer feedback.
A small change in timing can influence the overall impact significantly.
Strategies for Revisiting and Refining Edits
Revisiting your edits allows for better decision-making about timing and pacing.
Here are strategies for refining your edits:
- Take Breaks: Stepping away provides clarity. Fresh eyes allow you to spot pacing issues you previously overlooked.
- Re-evaluate Key Cuts: Assess potential rearrangements. Sometimes, a cut may need adjustment to enhance pacing.
- Watch Without Sound: Observing the visual flow without audio reveals pacing issues. You can identify chaotic or slow areas more easily.
Mastering Timing for Impactful Editing
Mastering timing and pacing is essential for professional video editing.
It significantly affects viewer engagement and emotional impact.
Utilizing techniques like jump cuts and music pacing enhances rhythm, keeping your audience captivated.
Furthermore, seeking feedback allows for continuous refinement.
Ultimately, careful attention to timing will elevate your editing skills and your projects overall.
Exporting for Optimal Quality
Exporting your video is fundamental to achieving high-quality results.
The process involves choosing the best file formats, resolutions, and codecs.
Understanding these elements can significantly enhance your final video output.
Let’s dive into the details of each aspect for optimal quality.
Transform Your Career Today
Unlock a personalized career strategy that drives real results. Get tailored advice and a roadmap designed just for you.
Start NowFile Formats
Choosing the right file format is crucial for maintaining video quality.
Here are some common file formats you should consider:
-
MP4: This is the most widely used format. It offers a balance between quality and file size. Most platforms support this format.
-
AVI: AVI files provide high quality but result in larger file sizes. They are suitable for high-definition applications.
-
MOV: Developed by Apple, MOV files are excellent for Mac users. They maintain high quality but can be large.
-
WMV: These files are suitable for Windows users. They offer good quality at smaller file sizes.
-
MKV: MKV supports multiple audio and subtitle tracks. It is ideal for high-definition videos and allows for a range of codecs.
Selecting the right file format depends on your intended platform and audience.
Each format has distinct advantages and limitations.
Resolutions
Resolution refers to the video’s pixel dimensions.
Higher resolutions typically yield better visual quality.
Consider these common resolutions:
-
480p: This is standard-definition (SD) quality. It is suitable for older devices and low bandwidth.
-
720p: This is the minimum for HD (High Definition). It provides decent quality for most viewers.
-
1080p: Also known as Full HD, this resolution offers a superior viewing experience. It’s ideal for most online content.
-
4K UHD: This ultra-high definition offers incredible detail. It is best for high-end projects and specialized platforms.
Choosing resolution is essential depending on the platform and intended audience.
Ensure your choice enhances viewer experience.
Codecs
Codecs are algorithms for compressing and decompressing digital video.
They affect both file size and video quality.
Here are some commonly used codecs:
-
H.264: This codec offers a good balance between quality and compression. It is the most widely supported codec.
-
H.265: Also known as HEVC (High Efficiency Video Coding), it provides better compression than H.264. This allows for smaller file sizes.
-
ProRes: This codec is favored by professionals for its high quality during editing. It results in larger files but maintains excellent detail.
-
Avid DNxHD: Similar to ProRes, it is designed for high-quality video editing. It provides flexibility during the editing process.
Choose a codec based on your project’s needs.
Balancing quality and file size is key to achieving the best results.
Exporting for Specific Platforms
Different platforms have unique requirements for video uploads.
Tailoring your exports can enhance your video’s effectiveness in various environments.
Here’s how to export for popular platforms:
-
YouTube: Use MP4 format with H.264 codec and 1080p resolution. This ensures fast uploads and high-quality playback.
-
Vimeo: Similar to YouTube, Vimeo supports MP4 with H.264 codec. However, it favors higher resolutions, like 4K UHD.
-
Facebook: Export in MP4 format with H.264 codec at 720p resolution. This ensures compatibility and quick loading times.
-
Instagram: Use vertical or square formats for posts. MP4 is ideal at 1080p resolution, though IGTV can handle up to 4K.
Check each platform’s specific guidelines before exporting.
This ensures your content looks its best across platforms.
Preserving Quality While Optimizing File Size
One significant challenge is keeping high-quality video while reducing file size for web use.
Transform Your Career Today
Unlock a personalized career strategy that drives real results. Get tailored advice and a roadmap designed just for you.
Start NowEmploy these tips for effective balance:
-
Choose the right resolution: Avoid using unnecessarily high resolutions. 1080p is often sufficient for most platforms.
-
Utilize efficient codecs: Select H.264 or H.265 to compress videos effectively without sacrificing quality.
-
Trim unnecessary footage: Carefully edit out any scenes that do not contribute to your video’s narrative. This reduces the overall size.
-
Adjust bit rates: Lowering the bit rate can help reduce file size. Test various rates to find a balance that maintains quality.
-
Utilize variable bit rate (VBR): This technique optimizes file size by adjusting bit rate based on video complexity.
By implementing these techniques, you can create high-quality videos that are suitable for web distribution.
Prioritize quality while addressing file size for an optimal online experience.
Advanced Techniques for Video Editing
In this blog post, we explored various advanced techniques that elevate your video editing skills.
We discussed color grading, motion graphics, and sound design.
Each technique plays a vital role in creating impactful videos.
Mastering color grading enhances mood and visual storytelling.
It allows editors to convey emotions effectively.
Motion graphics help in engaging the audience and adding flair.
Sound design, meanwhile, brings scenes to life and reinforces themes.
Practicing these techniques regularly strengthens your editing prowess.
Experimenting with different styles helps you discover your unique voice.
Don’t hesitate to try new approaches and tools.
Each project presents an opportunity to refine your skills.
The more you edit, the more you learn about storytelling through visuals.
Stay curious and keep up with industry trends.
Video editing continually evolves with technology and design principles.
New software releases and techniques emerge frequently.
Engaging with online communities and forums can further enhance your knowledge.
Networking with fellow editors can inspire fresh ideas and collaborations.
Transform Your Career Today
Unlock a personalized career strategy that drives real results. Get tailored advice and a roadmap designed just for you.
Start NowAdvanced video editing techniques significantly improve your work.
They contribute to the professional quality that clients and audiences expect.
Embrace continuous learning and adapt to changes in the field.
Your passion for video editing will lead you to mastery and innovation.
Keep pushing boundaries and exploring new horizons in your creative journey.
Additional Resources
If I like to do video editing, what college degrees would you …