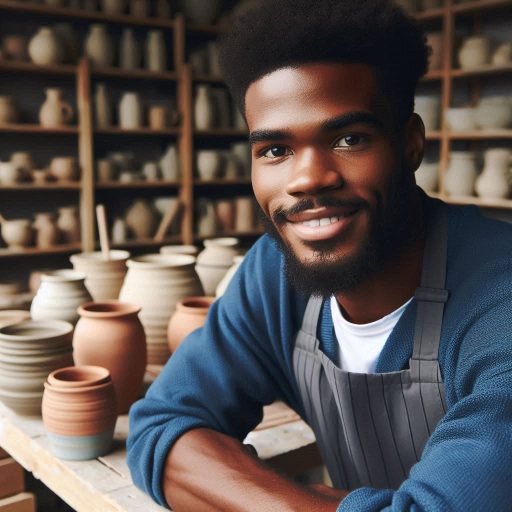
Introduction
Ceramic art involves creating objects from clay that are fired to high temperatures.
It is a versatile and rewarding form of art.
For beginners, learning ceramic art can be a great way to unleash creativity and develop new skills.
Whether you’re interested in pottery, sculpture, or tile-making, ceramics offer endless possibilities.
In this blog post, we will cover the basics of ceramic art for beginners.
From choosing the right clay to understanding different firing techniques, we’ll help you get started on your ceramic art journey.
Understanding the Basics of Ceramic Art
When starting your journey into ceramic art, it’s essential to grasp the fundamentals before diving into the creative process.
This section will cover the definition of ceramic art, the different types of clay used in ceramic art, and the tools and materials needed to get started.
Definition of Ceramic Art
Ceramic art is a form of art that involves creating objects from clay and then firing them in a kiln to harden.
This art form has been practiced for centuries and encompasses a wide range of styles and techniques.
From functional pottery to decorative sculptures, ceramic art offers artists a versatile medium for self-expression.
Different types of clay used in ceramic art
There are several types of clay used in ceramic art, each with its unique properties and characteristics.
Some common types of clay include earthenware, stoneware, and porcelain, each suited for different purposes.
Earthenware clay is known for its low firing temperature and is ideal for beginners due to its malleable nature.
Stoneware clay is more durable and commonly used for functional pottery, while porcelain clay is prized for its translucency and fine details.
Tools and materials needed for ceramic art
Before starting your ceramic art projects, it’s essential to gather the necessary tools and materials.
Some essential tools for ceramic art include a pottery wheel, kiln, clay cutting tools, and various modeling tools.
You will also need glazes, brushes, sponges, and other supplies to decorate and finish your ceramic pieces.
Investing in quality tools and materials will help you create beautiful and long-lasting ceramic artworks.
By understanding the basics of ceramic art, including the definition of ceramic art, the different types of clay used, and the tools and materials needed, you can embark on your creative journey with confidence and enthusiasm.
Stay tuned for more tips and techniques to help you explore the world of ceramic art!
Read: Finding Inspiration for Your Ceramic Art
Techniques for Handbuilding
Pinching, coiling, and slab building techniques
Handbuilding is a versatile and accessible technique in ceramic art that allows beginners to explore their creativity without the need for a pottery wheel.
Here are some common techniques for handbuilding:
- Pinching: This involves shaping clay by pinching it between your fingers to create small vessels or sculptures.
- Coiling: Coiling is done by rolling out long, snake-like coils of clay and stacking them on top of each other to build up walls.
- Slab building: Slab building involves rolling out flat sheets of clay and cutting them into shapes to construct forms like boxes or tiles.
Step-by-step guide on how to create basic shapes using handbuilding techniques
- Pinching: Start by taking a small ball of clay and gently pinching it between your fingers to create a small vessel.
- Coiling: Roll out several long coils of clay and stack them on top of each other, smoothing the joins to create walls for a pot.
- Slab building: Roll out a flat sheet of clay and use a template or cutting tool to cut out shapes like squares or circles.
Tips for beginners to improve their handbuilding skills
- Practice regularly: The more you practice handbuilding techniques, the more comfortable and skilled you will become.
- Experiment with different clay types: Try working with various clay bodies to see which one suits your style and projects best.
- Take a class or workshop: Learning from experienced ceramic artists can provide valuable insight and guidance to improve your skills.
- Don’t be afraid to make mistakes: Embrace imperfections as part of the learning process and use them as opportunities to grow.
By honing your handbuilding skills through practice and experimentation, you’ll be able to create intricate and unique ceramic pieces that showcase your artistic talent and vision.
Read: Printmaking for Interior Design and Decor
Introduction to Wheel Throwing
Wheel throwing is a pottery technique that involves using a pottery wheel to create ceramic pieces.
It allows for the creation of symmetrical and evenly shaped pieces such as bowls, cups, and vases.
Learning how to wheel throw can be an exciting journey for beginners in the world of ceramic art.
Explanation of the Wheel Throwing Process
The wheel throwing process begins with wedging the clay to remove air pockets and ensure uniform consistency.
Next, the clay is centered on the wheel, creating a stable base for shaping.
Once centered, the potter uses their hands to shape the clay into the desired form.
The rotation of the wheel allows for even shaping and smooth finishes.
After shaping, the piece is left to dry to a leather-hard stage, where it’s easier to handle and trim.
Trimming involves using tools to refine the shape and foot of the piece.
Finally, the piece is bisque fired before glazing and final firing.
The wheel throwing process requires practice and patience to master the techniques and create beautiful ceramic pieces.
Step-by-Step Guide on How to Center Clay on the Wheel
- Prepare your clay by wedging it to remove air bubbles and ensure even consistency.
- Place the clay on the center of the pottery wheel bat and secure it by applying pressure.
- Center the clay by gently pressing it downward while the wheel is spinning at a slow speed.
- Use your hands to constrict the clay towards the center, forming a cone shape.
- Continue to center the clay by applying equal pressure and adjusting any off-centered areas.
- Once the clay is centered, begin the shaping process by opening the center of the clay mound.
- Gradually widen and lift the walls to create the desired form, maintaining even thickness.
- Smooth the surface using your hands or a rib tool to refine the shape and remove imperfections.
- Repeat the process until you achieve the desired shape and height for your ceramic piece.
- Remember to practice regularly to improve your wheel throwing skills and create more intricate designs.
Common Mistakes to Avoid When Wheel Throwing
- Avoid using too much water, as it can weaken the structure of the clay and cause deformities.
- Do not rush the centering process, as this is crucial for creating symmetrical and balanced pieces.
- Avoid applying excessive pressure, as it can lead to unintentional warping or collapsing of the clay.
- Ensure proper clay consistency, as clay that is too dry or too wet can affect the wheel throwing process.
- Practice proper posture and hand positioning to prevent strain or injuries while wheel throwing.
- Pay attention to the speed of the wheel, as spinning too fast or too slow can impact shaping and stability.
- Be mindful of your tools and their usage, as incorrect tool handling can result in damages to your ceramic piece.
- Seek guidance from experienced potters or take classes to improve your wheel throwing skills and avoid common mistakes.
By familiarizing yourself with the wheel throwing process, practicing centering techniques, and avoiding common mistakes, you can enhance your skills as a beginner in ceramic art.
Keep practicing wheel throwing to improve your skill. Don’t let initial challenges discourage you.
Embrace the learning process and enjoy the journey of creating unique ceramic pieces through wheel throwing.
Transform Your Career Today
Unlock a personalized career strategy that drives real results. Get tailored advice and a roadmap designed just for you.
Start NowRead: How to Get Your Ceramic Art into Galleries

Glazing and Firing
Glazing is a crucial step in ceramic art as it adds color, texture, and protection to the piece.
It seals the porous surface of the clay, making it water-resistant and enhancing its visual appeal.
Importance of glazing in ceramic art
- Enhances the aesthetic appeal of the ceramic piece
- Provides a protective layer for the clay
- Brings out the texture and details of the piece
- Allows for experimentation and creativity in color application
There are various types of glazes available, each with its unique characteristics and firing requirements.
It’s essential to understand the different types of glazes to achieve the desired results.
Different types of glazes and firing techniques
- Underglazes: Applied before the final glaze, used for detail work
- Majolica: Brightly colored glazes that are applied over unfired clay
- Raku: Quick firing process resulting in dramatic and unpredictable effects
- Crystalline: Produces crystal-like formations on the surface
As a beginner, achieving the desired glaze effects can be challenging.
Here are some tips to help you navigate the glazing process:
Tips for beginners on how to achieve desired glaze effects
- Test your glazes on small sample tiles before applying them to your art piece
- Take note of the firing temperature and duration required for the glazes you’re using
- Experiment with layering different glazes to create unique and textured effects
- Use tools like brushes, sponges, or airbrushes to achieve different application techniques
- Allow your glazed piece to dry thoroughly before firing to prevent any bubbles or imperfections
Remember, practice makes perfect when it comes to glazing and firing your ceramic art.
Don’t be afraid to experiment and try new techniques to discover what works best for you.
With time and patience, you’ll develop your own signature style and create stunning ceramic pieces that showcase your creativity and passion for the art form.
Read: Innovative Materials in Printmaking Today
Inspiration and Ideas for Projects
Sources of Inspiration for Ceramic Art Projects
One of the great things about ceramic art is that inspiration can come from a variety of sources.
Here are some ideas to help spark your creativity:
- Nature: Take a walk in the park or spend some time in your garden.
The shapes, colors, and textures of plants and flowers can provide endless inspiration for your ceramic projects. - Art museums: Visit art museums to see how artists have used ceramics in their work throughout history.
You might discover new techniques or styles that you want to try for yourself. - Travel: If you have the opportunity to travel, take advantage of it!
Different cultures have unique pottery traditions that can inspire your own creations. - Books and magazines: Look for books and magazines that feature ceramic art.
You might find a new technique or design that you want to incorporate into your own work. - Social media: Follow ceramic artists on platforms like Instagram or Pinterest.
Seeing their work might inspire you to try new things or experiment with different styles.
Easy Project Ideas for Beginners to Try
It’s important to start with simple projects when you’re just beginning with ceramic art.
Here are some easy ideas to get you started:
- Pinch pots: This is a classic beginner project that involves using your fingers to pinch and shape a small pot.
It’s a great way to practice basic techniques like coiling and smoothing. - Coiled bowls: Coiling is another basic technique that beginners can master quickly.
Try making a small bowl by coiling long ropes of clay and then smoothing the coils together. - Slab coasters: Cutting shapes from flat slabs of clay is another simple project that can help you get comfortable working with clay.
You can experiment with textures and patterns on the surface of the coasters. - Simple sculptures: Start with small, abstract sculptures to practice shaping clay in different ways.
You can create animals, people, or abstract shapes using basic sculpting tools. - Painted tiles: Use underglazes or glazes to paint designs on ceramic tiles.
This is a great way to experiment with color and patterns without having to worry about shaping the clay.
Encouragement to Experiment and Explore Creativity
As a beginner in ceramic art, it’s important to give yourself permission to experiment and make mistakes.
Here are some tips to help you explore your creativity:
- Don’t be afraid to try new techniques: The only way to improve your skills is by trying new things.
Don’t be afraid to experiment with different tools, textures, and firing techniques. - Practice regularly: Like any art form, ceramic art takes practice.
Set aside time each week to work on your projects and practice your skills. - Seek feedback: Don’t be afraid to show your work to other artists or instructors and ask for feedback.
Constructive criticism can help you grow as an artist. - Be patient with yourself: Remember that learning a new art form takes time.
Don’t get discouraged if your first few projects don’t turn out exactly as you had hoped. - Have fun: Above all, remember to have fun with your ceramic art projects.
Let your creativity flow and don’t be afraid to let your imagination run wild!
Resources for Learning and Community Engagement
For beginners in ceramic art, having access to resources for learning and community engagement is essential for growth and improvement in this craft.
Here are some valuable resources that can help you on your ceramic art journey:
Online tutorials and courses for beginners
Online tutorials offer step-by-step guidance on basic ceramic techniques.
Courses designed for beginners provide a comprehensive foundation in ceramic art.
Platforms like YouTube, Skillshare, and Udemy offer a wide range of tutorials and courses.
Learning online allows flexibility in schedule and the ability to learn at your own pace.
Local ceramic art classes and workshops
Attending local classes and workshops provides hands-on experience and guidance from instructors.
Working in a studio environment with other artists fosters creativity and community.
Local classes often offer access to specialized tools and equipment not available at home.
Feedback from instructors and fellow students helps in identifying areas for improvement.
Importance of joining ceramic art communities for support and feedback
Joining ceramic art communities connects you with like-minded individuals who share your passion.
Communities provide a platform for sharing your work, receiving feedback, and learning from others.
Networking with experienced artists can offer mentorship opportunities and valuable insights.
Being part of a community nurtures a sense of belonging and encourages growth in your craft.
By taking advantage of these resources for learning and community engagement, beginners in ceramic art can enhance their skills, build confidence, and develop a supportive network of fellow artists.
Conclusion
Getting Started, let’s recap some key points we covered.
It’s important for beginners to remember that ceramic art is a versatile and rewarding creative outlet.
So, don’t be afraid to dive in and start your ceramic art journey.
The key is to practice, experiment, and most importantly, have fun with it.
Remember, there are endless possibilities when it comes to ceramic art, so embrace the process and enjoy the journey!