Introduction
Lighting serves as the foundation of photography.
It dramatically influences the mood and clarity of your images.
Photographers understand that great lighting can elevate an ordinary shot to extraordinary heights.
Mastering it opens doors to creative possibilities, making your work stand out.
The Importance of Lighting in Photography
Proper lighting provides contrast, depth, and texture.
It enhances colors and defines shapes.
Without good lighting, even the most composed photographs can fall flat.
Great lighting captures attention and elicits emotion in viewers.
Thus, it becomes a photographer’s most powerful tool.
Overview of How Mastering Lighting Can Transform Photographs
When you master lighting, your photography improves exponentially.
You can manipulate it for various artistic effects.
Consider how light can create a dramatic portrait or a soft landscape.
Mastering lighting enables bold images that grab viewers’ attention.
It allows you to tell a story through your photographs.
This transformation will set your work apart in a crowded field.
Different Types of Lighting Techniques to Be Covered
This blog will explore several lighting techniques.
First, we’ll discuss the significance of natural light.
Learning to harness its power can yield stunning results.
Next, we will cover artificial lighting, including flash and continuous lights.
Understanding how to use these sources expands your creative options.
We’ll also touch on soft and hard lighting, each creating unique effects.
Mastering each technique will enhance your photography skills dramatically.
Understanding lighting is essential for any photographer.
Whether you are a beginner or a professional, mastering lighting elevates your work.
As you explore these techniques, you’ll discover endless possibilities to transform your images.
Get ready to ignite your creativity through the mastery of lighting!
Understanding Natural Light for Photography
Understanding natural light is essential for any photographer.
Natural light can create stunning images when used correctly.
Let’s delve deeper into its characteristics and techniques for utilizing it effectively.
Characteristics of Natural Light
Golden Hour Versus Harsh Midday Sun
The golden hour refers to the first hour after sunrise and the last hour before sunset.
During this time, the light is soft and warm.
Photographers adore this period for its flattering tones.
- Soft shadows: Light during golden hour produces long, soft shadows, enhancing your images.
- Warm colors: The light takes on a golden hue, creating inviting and warm photographs.
- Less contrast: More diffused light means less contrast, which is easier to work with.
In contrast, harsh midday sun can create challenges.
The sun is directly overhead, producing strong shadows and highlights.
This type of lighting often leads to overexposed areas and stark shadows.
- Deep shadows: Harsh sunlight creates deep, dark shadows that can distort features.
- Bleached-out highlights: Bright light may wash out colors and details, making images look flat.
- Color temperature: Midday sun has a cooler color temperature, requiring adjustments in white balance.
Influence of Weather Conditions
Weather plays a significant role in how natural light behaves.
Different conditions can dramatically change your photography outcome.
- Cloudy days: Overcast skies act as a natural diffuser. They produce soft, even illumination, making it easier to photograph subjects.
- Rain: Rainy weather can create a moody atmosphere. Wet surfaces enhance reflections and can make colors pop.
- Fog: Fog creates a dreamy, ethereal quality in photos. It softens the light and adds depth to images.
Techniques for Utilizing Natural Light Effectively
Finding the Right Location
Your location can significantly impact how you utilize natural light.
Observe your surroundings to find ideal spots.
- Understand the sun’s path: Knowing where the sun rises and sets allows you to plan your shots.
- Seek shade: When shooting during midday, look for shaded areas. Shade reduces harsh shadows and helps maintain color saturation.
- Embrace reflective surfaces: Walls, water, and other reflectors can bounce light onto your subject. Experiment with these surfaces to create stunning highlights.
Using Reflectors and Diffusers
Reflectors and diffusers are valuable tools for manipulating natural light.
Transform Your Career Today
Unlock a personalized career strategy that drives real results. Get tailored advice and a roadmap designed just for you.
Start NowThey help to control lighting conditions and achieve desired effects.
- Reflectors: These bounce light to fill shadows. Use white reflectors for soft effects and silver reflectors for stronger highlights.
- Diffusers: A diffuser softens harsh sunlight. Place it between the sun and your subject to create a more even lighting pattern.
- DIY options: Use materials around you, like white boards or cloth, as makeshift reflectors and diffusers.
Incorporating natural light techniques into your photography can elevate your work significantly.
Understanding the characteristics of different light conditions helps you make informed decisions.
With practice, you can master natural lighting to create stunning images.
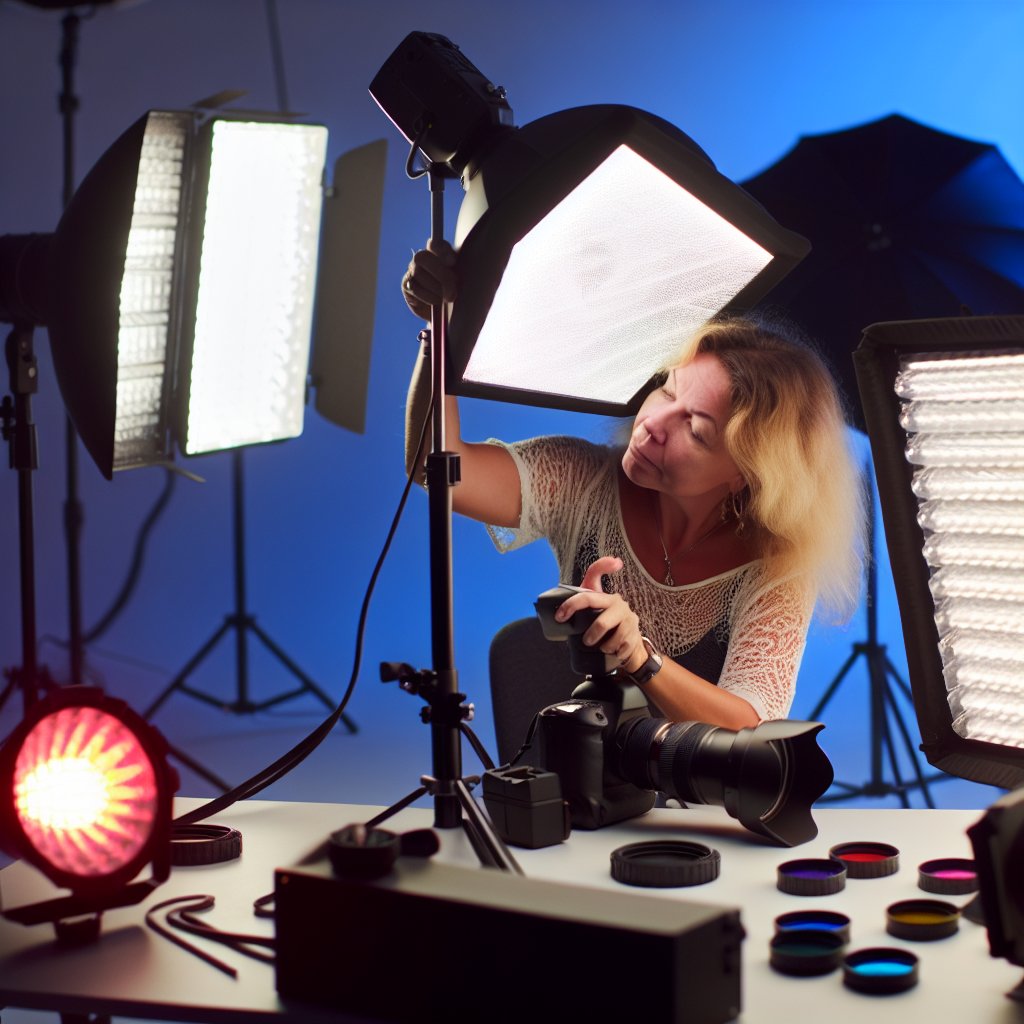
Artificial Lighting Essentials
Types of Artificial Light Sources
Understanding the various types of artificial light sources is vital for mastering photography lighting.
Each type offers unique characteristics that can enhance your photographic work.
- Flash:
- Flashes provide brief bursts of light.
- You typically use them to freeze motion and balance exposure.
- They come in various forms, such as speedlights and studio strobes.
- Flashes provide brief bursts of light.
- Continuous Lights:
- Continuous lights emit a steady light source.
- They are great for both video and photography.
- You can easily see how the light falls on your subject.
- Continuous lights emit a steady light source.
- Studio Lights:
- Studio lights offer versatility in studio environments.
- They typically include softboxes, umbrellas, and reflectors.
- These tools help modify the light for a softer, more pleasing result.
- Studio lights offer versatility in studio environments.
Understanding Color Temperature and Its Effects on Photos
Color temperature is crucial in photography, impacting the overall mood and feel of your images.
Understanding this concept enables you to create desired effects in various environments.
- Color Temperature Defined:
- Measured in Kelvin (K), it describes the color of light.
- Lower temperatures (2000K-3000K) produce warm tones.
- Higher temperatures (5000K-7000K) yield cooler tones.
- Measured in Kelvin (K), it describes the color of light.
- Effects on Photography:
- Lighting influences the emotional tone of a photograph.
- Warm light can create a cozy, inviting atmosphere.
- Cool light often conveys a more clinical, distant feel.
- Lighting influences the emotional tone of a photograph.
- Balancing Color Temperature:
- Use a gray card to set the correct white balance in-camera.
- Post-processing software can help adjust the color tones.
- Layering different light sources demands careful balancing.
- Use a gray card to set the correct white balance in-camera.
How to Control Shadows and Highlights with Artificial Light
Artificial lighting offers photographers the ability to manipulate shadows and highlights effectively.
Mastering this skill allows for dynamic and dramatic images.
- Controlling Shadows:
- Position your light source strategically to create desired shadow effects.
- Using multiple light sources can help soften harsh shadows.
- Modifiers like softboxes can diffuse the light, leading to softer shadows.
- Position your light source strategically to create desired shadow effects.
- Managing Highlights:
- Adjust light intensity to prevent blown highlights.
- Move your light further away for a softer highlight effect.
- Use reflectors to bounce light and fill in areas lacking highlights.
- Adjust light intensity to prevent blown highlights.
- Balancing Shadows and Highlights:
- Consider the direction of your light and the subject’s positioning.
- Observe how shadows fall; adjust light placement if needed.
- Take test shots to evaluate the balance of shadows and highlights.
- Consider the direction of your light and the subject’s positioning.
Mastering artificial lighting in photography involves understanding the various light sources available.
Recognizing the significance of color temperature and skillfully controlling shadows and highlights is essential.
Experiment with different equipment, settings, and modifications to achieve the desired mood and effect in your images.
The key is to practice consistently.
Each click of the shutter opens new opportunities for creativity and expression through lighting.
Uncover the Details: How to Collaborate Effectively with Speakers
IV. The Role of Light Modifiers
A. Explanation of Common Light Modifiers
Light modifiers serve an essential function in photography.
They alter the quality, intensity, and direction of light.
Understanding these modifiers empowers you to create stunning images.
Below are some common types of light modifiers:
- Softboxes: These enclosures diffuse light and soften shadows. They come in various shapes and sizes. Softboxes produce a large, even light source.
- Umbrellas: Umbrellas work as diffusers and reflectors. You can position them in two ways: reflective or shoot-through. Reflective umbrellas bounce light back onto your subject.
- Grids: Grids narrow and direct light. They create tighter beams and reduce spill. You can use grids to control the light’s spread effectively.
B. How to Choose the Right Modifier for Specific Photography Styles
Choosing the appropriate light modifier hinges on your photographic style.
Each type of light modifier suits specific situations.
Understanding your needs helps streamline your decision-making process.
1. Portrait Photography
For portrait photography, soft, flattering light is crucial.
Consider the following modifiers:
- Softbox: Use a large softbox to create soft shadows. This light quality enhances skin texture.
- Umbrella: A white shoot-through umbrella offers a natural look. It envelops your subject in gentle light.
2. Product Photography
In product photography, highlight details and avoid harsh shadows.
Your choices should include:
- Softbox: A softbox produces even lighting, showcasing products effectively.
- Umbrella: Use a reflective umbrella to bounce light on shiny surfaces. This technique highlights glossiness.
3. Fashion Photography
Fashion photography benefits from dynamic lighting effects.
Explore these options:
- Grids: Grids help you focus light on specific areas. This effect adds drama to the images.
- Softboxes: Combine softboxes with grids for a controlled look. This blend creates soft shadows while directing light precisely.
4. Event Photography
For event photography, flexibility matters.
Choose versatile modifiers:
- Umbrellas: Carrying both reflective and shoot-through umbrellas gives options.
- Softboxes: Portable softboxes help maintain consistent lighting throughout an event.
C. Techniques for Using Modifiers to Shape and Diffuse Light
Understanding techniques for using light modifiers enhances your photography.
You can apply several strategies to achieve desirable effects.
1. Positioning Modifiers
The placement of your light modifier significantly impacts light quality.
Experiment with various distances and angles:
- Closer Positions: Placing the modifier closer to the subject softens the light.
- Farther Positions: Moving the modifier farther creates harsher, more dramatic shadows.
2. Controlling Light Spill
Controlling light spill helps maintain focus on your subject.
Use grids or flags to manage this:
- Grids: Grids narrow the beam of the light source, preventing unwanted spill onto the background.
- Flags: Use flags to block excess light, creating contrast and depth in your images.
3. Diffusing Light
Diffusing light changes its properties significantly.
Use these methods to achieve softer light:
- Softboxes: The inner lining of softboxes distributes light evenly, resulting in a diffused effect.
- Umbrellas: Shoot-through umbrellas create a broader light source, softening shadows.
4. Combining Modifiers
Combining different modifiers can yield unique lighting effects.
Transform Your Career Today
Unlock a personalized career strategy that drives real results. Get tailored advice and a roadmap designed just for you.
Start NowExperiment with various combinations:
- Softbox and Reflector: Use a softbox for your main light and a reflector for fill light.
- Grid and Softbox: Add a grid to your softbox for focused yet soft illumination.
Discover More: Effective Metadata Management for Web Content Managers
Creative Lighting Techniques
Backlighting for Dramatic Effects
Backlighting can transform an ordinary photograph into a piece of art.
This technique involves placing the light source behind your subject.
This creates a striking effect, allowing your subject to glow.
Follow these tips to master backlighting:
- Choose the Right Time: Shoot during the golden hour. The sun’s angle creates softer light, providing warmth.
- Expose for the Highlights: Adjust your camera settings to prevent your subject from washing out.
- Use a Lens Hood: Reduce lens flare by using a hood. This ensures sharper, clearer images.
- Experiment with Positioning: Move your subject and camera until you achieve the desired light effect.
- Utilize a Reflector: Position a reflector in front of your subject to bounce light back. This adds detail and dimension.
Backlighting can also help create mood and atmosphere in your photos.
When framing your shot, think about how the light interacts with your subject.
This technique works beautifully in portraits, landscapes, and still life.
Remember, the golden hour enhances this effect, so plan your shoots accordingly.
The challenge lies in balancing highlights and shadows, but the outcome is worth it.
Using Silhouettes and Shadows to Add Depth
Silhouette photography showcases the outline of your subject against a brighter backdrop.
This technique creates bold and captivating images.
To effectively use silhouettes in your photography, follow these pointers:
- Find a Strong Subject: Choose subjects with interesting shapes. Trees, people, and architecture work well.
- Control Your Lighting: Position your subject against a bright background. Sunrise or sunset is ideal.
- Adjust Your Camera Settings: Lower your exposure to darken the subject while keeping the background bright.
- Incorporate Leading Lines: Use lines in the composition to draw the viewer’s eye to the silhouette.
- Experiment with Perspective: Change the angle from which you photograph the silhouette. A different viewpoint can create unique shapes.
Shadows can dramatically transform any scene and enhance depth.
Use shadows to create contrast and intrigue in your images.
Pay attention to the direction of the light as shadows reveal textures and shapes.
Try these techniques with architectural shots or even macro photography.
Shadows can isolate your subject from a busy background.
Make sure to capture shadows at different times of day.
Each hour produces a different texture and intensity.
Incorporating Mixed Lighting for Unique Results
Mixed lighting involves using multiple light sources with different qualities and colors in a single image.
This technique can create astonishing effects.
Here’s how to effectively use mixed lighting in your photos:
- Understand Your Light Sources: Learn the characteristics of each light type. Natural daylight, tungsten, and fluorescent lights differ significantly.
- Use White Balance Settings: Adjust the white balance according to your light sources. This helps maintain color accuracy.
- Add Artificial Light: Use flash or continuous lights to complement natural light. This can highlight specific areas.
- Experiment with Color Temperature: Mix warm and cool lights. This contrast can create a stunning visual effect.
- Layer Your Lighting: Use several light sources at different intensities to add complexity and depth to your images.
When photographing indoors, you often encounter mixed lighting conditions.
Different light from windows and artificial sources can clash.
Understanding how to balance these can yield fantastic results.
An image may gain a warm glow from incandescent bulbs while benefiting from cool daylight color.
Capture a scene where shadows from a window blend with soft artificial lighting for dramatic visual interest.
Using mixed lighting invites creativity.
Always be open to unexpected results; you might discover something stunning.
Keep your camera handy to capture spontaneous moments.
Test various settings and positions for the best outcome.
Each shoot provides a new learning opportunity and enhances your skills.
As you experiment with these creative lighting techniques, always remember to have fun.
Photography is not just about technical skill; it’s about capturing moments and creativity.
Your unique vision will shine through as you practice.
Cultivate a habit of assessing your light sources and their impacts.
The more you understand lighting, the better your photos will become.
Mastering creative lighting techniques enhances your photography significantly.
Transform Your Career Today
Unlock a personalized career strategy that drives real results. Get tailored advice and a roadmap designed just for you.
Start NowBe adventurous; try new methods and get inspired by the world around you.
Each click of the shutter is an opportunity to explore and express your artistic vision.
Uncover the Details: Building Brand Loyalty: Strategies and Techniques
Composition and Lighting
A. The Relationship Between Composition and Light
Good photography depends heavily on both composition and light.
These two elements work together to create stunning images.
When you understand how they interact, your photos will improve significantly.
Here are some key points about their relationship:
- Light Shapes Composition: The direction and quality of light dictate how we perceive forms and details in photographs.
- Guiding the Eye: Good lighting can guide the viewer’s attention to specific areas in a photo.
- Creating Mood: Different lighting techniques can convey various emotions in your photographs.
- Enhancing Texture: Light can reveal textures and patterns, adding depth to the composition.
- Balancing Elements: You can balance your composition by positioning light sources effectively.
Understanding these key relationships allows photographers to make better creative choices.
Exploring how light interacts with your composition will elevate your work.
B. How to Position Subjects for Optimal Lighting
Positioning your subjects correctly is crucial for achieving great lighting.
Here are some techniques to help you find the best light for your photos:
- Utilize Natural Light: Whenever possible, use natural light. Position your subject facing the light source for a soft, flattering look.
- Observe the Golden Hour: Shoot during the golden hours of sunrise and sunset. The soft, warm light enhances features beautifully.
- Find Open Shade: Test open shade for a softer shadow and diffused light. Avoid harsh midday sunlight that creates strong shadows.
- Experiment with Backlighting: Position your subject in front of the light source. This creates dramatic silhouettes and glowing edges.
- Use Reflectors: Employ reflectors to bounce light onto your subject. This technique softens shadows and adds brightness.
- Angle Your Subject: Adjust your subject’s position relative to the light source. A slight turn can drastically change the lighting effect.
Mastering subject positioning takes practice.
Make it a routine to analyze your lighting conditions and experiment with these techniques.
C. Using Foreground and Background Lighting for Layered Photographs
Incorporating foreground and background lighting creates depth in your photographs.
Layering adds interest and complexity to your images.
Here’s how to implement it effectively:
- Identify Layers: Define your foreground, middle ground, and background. Plan how each layer will interact with lighting.
- Light the Foreground: Use key elements in your foreground to draw attention. Even subtle lighting can create impactful layers.
- Control Background Lighting: Use separate light sources to illuminate the background. This technique separates the background from the subject.
- Maintain Depth of Field: Utilize a shallow depth of field to blur backgrounds. This keeps focus on the subject while enhancing the layered effect.
- Experiment with Color: Use colored gels on backlighting to create mood and texture in the background.
- Consider Silhouettes and Shadows: Foreground shadows can create interesting shapes, adding to the overall layers in your images.
Incorporating these elements takes thoughtful experimentation.
Layering your lighting will translate into richer photographs.
By mastering the relationship between composition and light, positioning subjects effectively, and utilizing layered lighting techniques, you’ll develop a keen eye for photography.
Always keep experimenting and learning.
Engaging with these components will only enhance your skills.
Ultimately, the goal is to merge composition and lighting for a cohesive visual experience.
The right combination will not only draw viewers in but also communicate the story behind your images.
The brighter your understanding, the deeper your photographs will resonate with emotion and beauty.
Gain More Insights: SEO Basics Every Digital Marketer Should Know
Mastering lighting in photography involves more than just capturing the perfect shot.
Post-processing plays a crucial role in enhancing your images.
It enables you to adjust lighting conditions that may not have been ideal during the capture.
This section explores various editing software options and techniques for adjusting brightness, contrast, and color balance.
A. Overview of Editing Software Options
Choosing the right software can significantly impact your workflow and the final output.
Various tools exist, each with unique features.
Here are some popular options:
- Adobe Lightroom: Ideal for batch editing and quick adjustments. It offers intuitive sliders for exposure, contrast, and highlights.
- Adobe Photoshop: Versatile program for advanced edits. It provides powerful tools for layers and selective adjustments.
- Capture One: Preferred by professionals for RAW processing. It excels at color grading and tethering for studio setups.
- Affinity Photo: A cost-effective alternative to Photoshop. It offers layer support and comprehensive editing tools.
- GIMP: A free alternative with extensive features. It supports layers and plugins for added functionality.
- Canva: Great for beginners looking to enhance images easily. Simple interface suitable for quick fixes and graphics.
Each software option suits different needs and skill levels.
Beginners may favor Lightroom or Canva for ease of use.
Professionals might prefer Photoshop or Capture One for their advanced capabilities.
B. Techniques for Adjusting Brightness and Contrast
Brightness and contrast adjustments can greatly improve your images.
They can enhance details and create focal points.
Here are effective techniques to consider:
1. Adjusting Brightness
Brightness affects the overall exposure of your image.
An increase brightens shadows and highlights, while a decrease darkens them.
Transform Your Career Today
Unlock a personalized career strategy that drives real results. Get tailored advice and a roadmap designed just for you.
Start NowHere’s how to adjust brightness:
- Use the Brightness Slider: Most editing software includes a simple brightness slider. Move it left or right to see real-time changes.
- Adjust Individual Channels: If available, use separate sliders for red, green, and blue channels to fine-tune brightness.
- Check for Clipping: Monitor the histogram to avoid clipping in highlights and shadows. Clipping reduces detail quality.
2. Adjusting Contrast
Contrast controls the difference between light and dark areas.
High contrast makes images pop, while low contrast results in a softer appearance.
Here’s how to enhance contrast:
- Use the Contrast Slider: Like brightness, contrast adjustments are made using a slider. Experiment for desired results.
- Apply Curves: Use curves adjustments for precise control. This allows you to adjust specific tonality levels in shadows and highlights.
- Use the Levels Tool: Adjust the black and white points to boost contrast. This can give your image more depth and vibrance.
Both brightness and contrast adjustments should be done subtly.
Overdoing these changes can lead to unnatural results.
Always keep the image’s integrity in mind while editing.
C. Fine-Tuning Color Balance and Enhancing Light Effects
Color balance and light effects contribute to the mood of your photograph.
Proper adjustments can drastically change the viewer’s perception.
Here are techniques for fine-tuning:
1. Adjusting Color Balance
Color balance considers the overall tone and hues in your image.
Each photograph may need adjustments to ensure accuracy.
Follow these steps:
- White Balance Adjustment: Use temperature and tint sliders to correct color casts. Aim for neutral white and grey tones.
- Use Color Channels: Adjust the red, green, and blue channels separately. This can help correct specific color imbalances.
- Experiment with Split Toning: Add colors to highlights and shadows for artistic effects. This can enhance the mood of your image.
2. Enhancing Light Effects
Light effects add dimension and atmosphere to photos.
Enhancements can create a more engaging visual narrative.
Here are ways to enhance light:
- Add Vignetting: Create a vignette effect around the edges to draw focus to the center. Adjust its intensity for subtlety.
- Utilize Dodge and Burn Tools: Brighten (dodge) or darken (burn) specific areas to create depth. This technique enhances textures and details.
- Apply Gradients: Use gradient filters to control exposure across specific areas. This can mimic natural light falloff.
Keep in mind balance when applying these enhancements.
Too much manipulation can detract from the subject.
Always compare edits to the original image to ensure improvement.
Overall, mastering post-processing lighting adjustments requires practice.
Utilize the right tools and techniques to develop your style.
Continually experiment with brightness, contrast, and color balance.
With dedication, you will enhance your photography significantly.
Experimentation and Practice
A. Encouragement to Experiment with Different Lighting Styles
Photography thrives on creativity.
Lighting plays a crucial role in shaping your images.
Exploring various lighting styles helps you discover your unique artistic voice.
Here are some ways to encourage experimentation:
- Try Natural Light: Utilize sunlight during different times of the day.
Morning and evening provide soft, warm light that flatters subjects. - Experiment with Flash: Use on-camera flash to add light or off-camera flash for dramatic effects.
Change the direction and intensity for unique results. - Use Reflectors: Bounce light onto your subjects with reflectors.
You can create soft shadows or enhance highlights. - Explore Backlighting: Position your subject in front of a light source.
This creates silhouettes and enhances texture. - Play with Color Gels: Adding color gels to your lights can change the mood of your photographs dramatically.
- Work with Shadows: Use shadows creatively to add depth and interest.
Chiaroscuro lighting can be striking.
B. How to Set Up a Lighting Practice Routine
Establishing a routine helps build consistency and skill in your photography.
Here’s how to create an effective lighting practice routine:
- Designate Practice Days: Set aside specific days for lighting practice.
Consistency breeds improvement. - Select a Controlled Environment: Use a room with minimal distractions.
This allows you to focus on lighting without interference. - Gather Equipment: Collect all your lighting tools.
This includes flashes, reflectors, diffusers, and tripods. - Create a Shot List: Write down specific lighting scenarios you want to try.
This gives your practice structure and purpose. - Incorporate Different Subjects: Use various subjects to see how they react to different lighting.
Experiment with people, objects, and landscapes. - Vary Your Camera Settings: Adjust ISO, aperture, and shutter speed.
Understand how they interact with lighting. - Test and Review: After shooting, take time to analyze your results.
Determine what worked and what didn’t. - Join a Community: Engage with fellow photographers.
Sharing experiences can provide new insights and inspiration.
C. Importance of Reviewing and Learning from Past Photographs
Reflection is a vital part of mastering photography.
Reviewing your work lets you identify strengths and weaknesses.
Here’s how to effectively analyze your past photographs:
- Document Each Photo: Keep a journal or digital record.
Note the lighting conditions, settings, and emotions you wanted to convey. - Identify Patterns: Look for recurring themes in your work.
This will reveal your style and help enhance it. - Seek Feedback: Share your work with others.
Constructive criticism can provide valuable perspectives. - Study Successful Shots: Identify images that resonate with you.
Analyze the lighting techniques and settings used. - Use Editing Software: Edit your images to enhance lighting.
Understanding post-processing can refine your original shots. - Keep Track of Progress: Compare older photos with newer ones.
Celebrate improvements and recognize areas needing focus. - Stay Open to Change: Evolve your style as you learn.
Incorporate new techniques and leave behind what doesn’t serve you.
Mastering lighting requires patience and dedication.
Practice opens up new avenues for creativity.
So, don’t shy away from experimentation.
Embrace every opportunity to learn and grow as a photographer.
By scrutinizing past work and adapting your methods, you will become a more proficient and confident photographer.
Key Insights on Photography Lighting Techniques
Throughout this guide, we explored several essential lighting techniques in photography.
We discussed the significance of natural light and how to leverage it effectively.
Soft diffused light can create stunning portraits, while harsh light can add drama to your scenes.
Transform Your Career Today
Unlock a personalized career strategy that drives real results. Get tailored advice and a roadmap designed just for you.
Start NowUnderstanding the color temperature of light is also crucial.
It influences the mood of your images.
Additionally, we covered the use of reflectors and diffusers to manipulate light.
These tools enhance highlights and soften shadows.
Mastering flash photography expands your capabilities.
It allows for creativity in low-light situations.
The Importance of Ongoing Learning and Adapting to New Lighting Techniques
The world of photography continuously evolves with new techniques and technologies.
Staying updated with these changes helps you expand your skillset.
Engaging with photography communities and attending workshops can improve your understanding.
Experimenting with various lighting setups will also refine your skills.
Remember, consistent practice is key to mastering any technique.
Analyze your results and learn from both successes and mistakes.
Each photo is an opportunity to develop your artistry and technical proficiency.
Encouragement to Apply Acquired Knowledge in Future Photography Endeavors
Now that you have valuable insights into lighting, embrace them in your future projects.
Apply what you have learned to explore new styles and genres.
Don’t hesitate to challenge yourself with different lighting conditions.
Experimentation leads to growth as an artist.
Use available resources, such as books and online courses, to enhance your knowledge.
Capture every moment with confidence, knowing you can manipulate light to your advantage.
Your creativity will flourish as you continue to learn and adapt.
Additional Resources
Six ways the media influence elections | School of Journalism and …